Common RV Battery Problems and Troubleshooting (My Guidelines)
An RV battery failure can turn a fun road trip into a complete nightmare. With the lights out and appliances off, enjoyment comes to a screeching halt. But many common RV battery issues can be prevented or fixed with some basic maintenance and troubleshooting knowledge.
This article discusses why RV batteries fail in the first place. From old age to improper use, I am going to cover the most common problems. You’ll also learn how to recognize symptoms of battery problems in your RV or trailer. I’ll describe what to look for, from dimming lights to slow cranking. Finally, you’ll get actionable tips to get your camper’s electrical system up and running again. From checking connections to charging and replacement, I’ll provide hands-on fixes.
Follow along to diagnose battery problems, get DIY troubleshooting advice, and ensure your RV’s electrical system works well trip after trip. With some preventative care and troubleshooting tricks, you can stay powered up for adventure on the open road.
What Makes RV Batteries Prone to Issues?
Unlike car batteries, RV batteries often sit unused for long periods between trips. They also tend to endure more irregular charging and extreme temperatures. These factors make them vulnerable to early failure. I’ll explore common causes from corrosion to old age that result in RV battery problems.
Infrequent Use and Irregular Charging: RV batteries discharge over time while in storage between trips. This renders them ineffective unless properly recharged before use.
Exposure to Extreme Temperatures: Heat and cold degrade lead-acid batteries faster. Since RVs sit unused often, batteries endure temperature swings.
Corrosion and Loose Connections: Vibrations from travel loosen cables and terminals. This can cause discharge issues. Dampness also corrodes connections.
Old Age and Sulfate Buildup: As batteries wear out, sulfate crystals accumulate on the lead plates inside, reducing charge capacity over years of use.
Signs of RV Battery Failure
It’s important to recognize the symptoms of dying or damaged RV batteries early. Gradual signs like dimming lights indicate deterioration, while the inability to start your motorhome points to urgent issues. I’ll walk through noticeable red flags, from wonky electronics to short lifespans. Spotting these markers of battery failure allows you to address problems promptly.
Dim lights or slow electronics: As batteries weaken, they struggle to power lights, appliances, and other electronics at full capacity. Dimness or slowing electronics indicate fading charge.
Inability to start the engine: Dead batteries lack enough power to start the engine. The starter motor cranks slowly or not at all with bad or damaged batteries.
Reduced battery lifespan: RV batteries dying significantly earlier than their typical 3-6 year lifespan points to issues with the electrical system, charging problems, or battery flaws.
Common RV Battery Problems and Solutions
RV batteries fail due to a range of issues like natural aging, improper charging, electrical shorts, and more. We outline common battery problems RVers face and actionable solutions to restore power and prevent future failures.
Dead Battery: Appliances Only Work When Connected to Shore Power
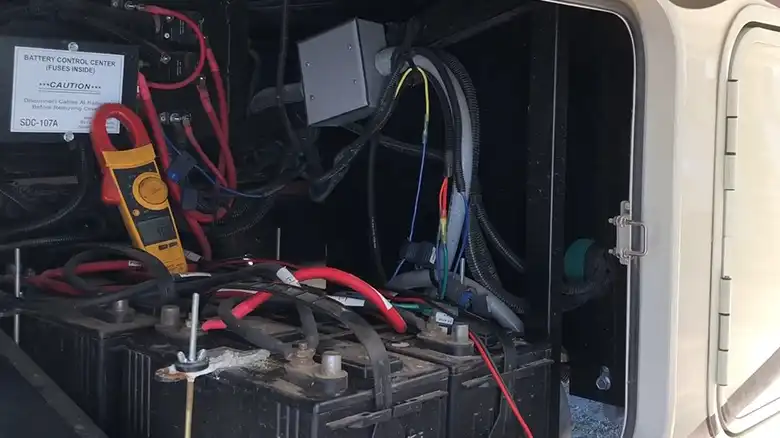
1. Test voltage and charge if needed: An RV battery should have a voltage of 12-13 volts when fully charged. Using a voltmeter, check the charge level. If it measures below 12 volts, the battery needs to be recharged or may need replacing if it no longer holds a full charge.
2. Inspect terminals, clean corrosion, tighten: Corrosion and loose cable connections can prevent an RV battery from charging properly or create high resistance that hinders starting the vehicle. Clean any buildup on terminals, re-tighten connections, and inspect cables for damage that could cause issues.
Parasitic Drain: Automatic Depletion
1. Disconnect to Test for Draw When Off: A small, unwanted drain on the battery even when the RV is shut off can prematurely run it down. Disconnect the battery cables and use an ammeter to check for any current draw happening without loads on.
2. Inspect Fuses, Lighting, Appliances: Damaged wiring, lighting components stuck in the on position, or appliances drawing standby power could explain parasites draining the battery. Inspect circuits for shorts and check components.
Sulfation: Crystal Buildup
1. Test Cells, Consider Replacement: As batteries age, lead sulfate crystals accumulate on the lead plates inside, negatively impacting charge capacity. Use a hydrometer to test if individual cells have become heavily sulfated and may need replacing.
2. Use Desulfation Methods to Recover: Applying an epsom salt electrolyte solution or a pulsing high-voltage current can help dissolve damaging lead sulfate deposits and extend battery life, provided the sulfation isn’t too extreme.
Undercharging and Overcharging
1. Replace or Repair Charging System: The alternator and converter/inverter are responsible for charging an RV battery while driving and when plugged into shore power. Issues with either can lead to under or overcharging, shortening lifespan.
2. Only Use Compatible Chargers: Using an incompatible standalone battery charger at improper voltages for an extended time can boil away battery fluid or corrode plates. Only use a charger designed for the particular battery type.
How to Prolong Your RV Battery Life
Extend the working life of your RV batteries with proper maintenance. We provide tips from ideal storage procedures to routine terminal cleaning that keeps batteries charging at peak efficiency longer.
A. Store batteries properly when not in use – Allowing RV batteries to sit unused for extended periods results in gradual self discharge as the lead plates chemically interact with the sulfuric acid. Fully charging them first and keeping them in cool, dry storage between trips minimizes natural depletion of charge so they are ready to go each season.
B. Maintain water levels (for wet batteries) – Wet cell lead acid batteries have fluid that keeps the lead plates immersed. As charging forms hydrogen and oxygen gas bubbles, fluid evaporates over time. Routinely checking and topping off battery water to the proper level prevents exposing plates to air which can permanently damage their ability to hold a charge.
C. Clean terminals regularly – Frequent vibrations and temperature fluctuations can result in oxidation and buildup of mineral deposits on the metallic terminals and cables connecting RV batteries. Cleaning corrosion and ensuring tight, clean connections prevents voltage drop and charging issues that could leave you without power when remote camping.
D. Get an annual battery test – As RV batteries age with heavier usage their internal resistance rises, and charge capacity begins fading years before complete failure. Performing load tests annually gives a clear picture of charge ability so deteriorating wet cell or AGM batteries can be replaced before leaving you stranded on your next adventure.
When It’s Time for A New RV Battery
Knowing when to replace worn batteries prevents being stranded without power while out on adventures. Learn when it’s time to swap in new batteries based on age, usage needs, and RV house electrical loads.
A. Match the battery to your usage needs – The battery type best suited for an RV depends on camping style and electrical demands. Those who stay at full hookup sites can use standard batteries, while dry camping needs the deep cycling abilities of true deep cycle batteries to withstand repeated heavy power drain. Lithium batteries are the best choice for their ultra long lifespans and huge charge capacities to boondock off-grid for extended periods.
B. Look for date codes to determine age – All batteries have a coded date stamped into the outer case indicating manufacture date. Once 5 years old, the average wet cell or AGM battery used only for RV house loads will have lost around 30% of its peak charge capacity, making it a prime candidate for replacement before expected failures leave you powerless in the wilderness.
C. Size appropriately for RV house loads – House battery banks must be adequate to meet a RV’s overall electrical needs including lighting, water pumps, furnaces, refrigerators, entertainment systems and more. Add up the amp draw of components and size your battery capacity using amp-hour ratings to prevent constant discharge/recharge cycles that strain systems. Undersizing leads to rapid failure, while oversizing wastes money.
Frequently Asked Questions (FAQs)
Q1: Why does my RV battery lose power even when not in use?
A1: RV batteries can self-discharge over time. Disconnect appliances, check for parasitic draws, and consider a battery disconnect switch to prevent power drain when parked.
Q2: Can extreme temperatures affect my RV battery?
A2: Yes, temperature matters. Cold weather slows chemical reactions, reducing battery efficiency. In heat, water loss increases. Keep batteries charged, and store in moderate temperatures.
Q3: How often should I check water levels in my RV battery?
A3: Regularly inspect water levels every 2-4 weeks. Add distilled water if needed to maintain proper levels, ensuring optimal battery performance and longevity.
Q4: Are there alternatives to traditional lead-acid RV batteries?
A4: Yes, explore AGM or lithium-ion batteries. AGM is maintenance-free and charges faster. Lithium-ion is lightweight, lasts longer, and offers consistent power, but it’s pricier.