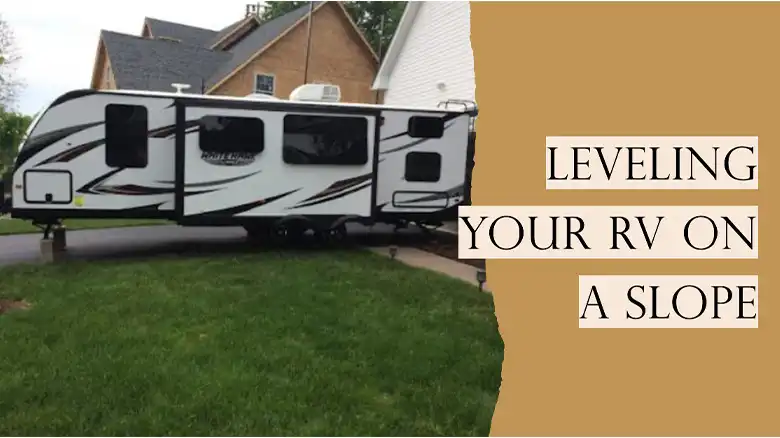
How to Level an RV on a Slope | Easy Tips
As any seasoned RVer knows, proper leveling is essential for a comfortable and safe experience on the road. But what do you do when faced with the challenge of leveling your RV on a slope?
Don’t worry. Because, in this article, we’ll provide you with a detailed step-by-step guide to help you with leveling your RV on a slope with ease. Let’s begin.
Why Leveling is Important
Before diving in, let’s understand why a level RV is crucial. A tilted RV can lead to a cascade of inconveniences, from uneven sleeping surfaces (think rolling off the bed!) to malfunctioning appliances like refrigerators that struggle to maintain proper temperatures. More importantly, a significantly unlevel RV can put a strain on its chassis and jacks, potentially causing damage in the long run.
Essential Precautions to Take Before Leveling Your RV
Safety is paramount when setting up your RV. Here are some non-negotiables:
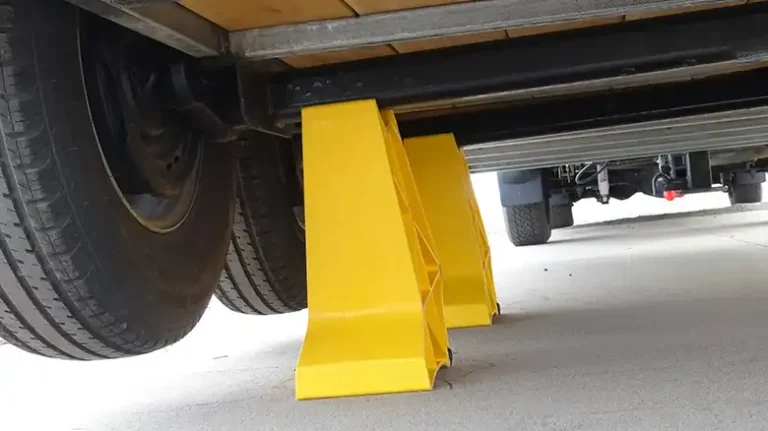
Wheel Chocks: These wedges are your best friends on a slope. Place them securely behind both wheels on the downhill side (tires facing downhill) to prevent any unintended rolling. Consider using high-quality, X-shaped chocks with good gripping surfaces.
Stable Ground: Avoid soft earth or areas with a significant drop-off. Look for a firm, level-ish base where your jacks and stabilizers can find solid footing.
Double-Check Jacks and Stabilizers: Ensure all jacks and stabilizers are fully extended and firmly planted on the ground. Check for any loose bolts or connections before relying on them to support your RV.
Gathering Tools and Equipment

Now, let’s get equipped! Here’s a list of essentials to have on hand:
- Level: A reliable bubble level is your primary tool for checking side-to-side and front-to-back tilt. Consider a digital level for added accuracy, especially on steeper slopes.
- Leveling Blocks: These sturdy plastic blocks are lifesavers for raising specific tires. Choose blocks with a high weight capacity and interlocking features for stability.
- Wheel Chocks: As mentioned earlier, dependable wheel chocks are crucial for safety.
Here are some optional but helpful items:
- Ramps: If you need to raise a tire significantly, ramps can provide a gradual incline compared to stacking blocks. Choose ramps with a weight capacity exceeding your RV’s weight.
- Leveling Wedges: These angled blocks can be handy for fine-tuning adjustments, especially on uneven surfaces.
- Jack Extension: For situations where the standard jack doesn’t reach the ground on a steep slope, a jack extension can be a lifesaver. Make sure it’s compatible with your specific RV jack.
Different Leveling Techniques to Level Your RV on a Slope
Now comes the fun part: leveling your RV! Here’s a breakdown of the key techniques:
Side-to-Side Leveling
- Engage the Parking Brake: Put your RV in neutral and engage the parking brake for safety.
- Check the Level: Use your level to measure the side-to-side tilt. Ideally, the bubble should be centered on the level.
- Adjust the Jacks: Extend or retract the jacks on the lower side until the bubble reaches the center of the level. Lower slowly and check the level frequently to avoid over-adjusting.
Front-to-Back Leveling on a Slope (Uphill)
- Raise the Tongue Jack: With the RV still in neutral and the parking brake on, raise the tongue jack until it starts to take the weight off the front wheels.
- Position Leveling Blocks: Place leveling blocks under the tires on the downhill side. Start with one block and gradually add more as needed until the bubble in the level (placed inside the RV) moves toward the center.
- Fine-tune Leveling: Once the bubble is close to the center, use the jacks for minor adjustments. Re-check the level frequently and ensure the blocks are stable and secure.
Front-to-Back Leveling on a Slope (Downhill)
- Lower the Tongue Jack: Slowly lower the tongue jack until the front wheels lift slightly off the ground.
- Position Leveling Blocks: Place leveling blocks in front of the uphill tires, angled slightly so the RV can roll forward onto them.
- Roll Forward and Adjust: Carefully release the parking brake and slowly roll the RV forward onto the blocks. Re-engage the parking brake and check the level. Use the tongue jack and blocks for further adjustments until the RV is level.
Advanced Techniques for Slope Leveling
For even more challenging situations, here are some additional tips:
Uneven Ground
If your campsite has a significant slope that changes direction, you might encounter a situation where one side and one end of your RV need raising simultaneously. Here, a combination of leveling blocks and digging shallow trenches on the high side can be helpful. Start by raising the low side with blocks as usual. Then, carefully dig a trench (a few inches deep) on the high side opposite the raised wheels. This allows the chassis to settle slightly, further aiding in achieving a level position. Remember, take your time and remove small amounts of earth at a time to avoid creating an unstable base.
Ramps for Significant Height Adjustments
For situations where leveling blocks alone won’t provide enough height, ramps can be a solution. However, prioritize safety:
- Choose the Right Ramps: Select ramps with a weight capacity exceeding your RV’s weight and a textured surface for better grip. Double ramps are ideal for stability.
- Secure the Ramps: Place the ramps on a firm, level surface. Use heavy-duty straps or tie-downs to secure the ramps to the ground to prevent them from shifting under the RV’s weight.
- Drive Slowly and Cautiously: Drive slowly and carefully onto the ramps, ensuring the entire tire makes contact with the ramp surface. It’s best to have a spotter guide you to avoid any mishaps.
Leveling with Slide-Outs Deployed
Deploying slides can sometimes affect the level of your RV. Here’s how to adjust:
- Consider Jack Extension: If the slide deployment causes a significant tilt, you might need a jack extension to reach the ground and provide additional support.
- Adjust Jacks and Blocks: Re-evaluate the level with the slides out. Fine-tune the jacks and leveling blocks on the opposite side of the deployed slide to compensate for the weight shift.
Troubleshooting Tips
Even with the best planning, things might not always go perfectly. Here are some common challenges and solutions:
- Level Won’t Budge? Check for loose jacks or uneven block placement. Tighten any loose bolts on the jacks and ensure all blocks are making full contact with the ground. You might need to add or remove blocks depending on the situation.
- RV Leaning Too Much on One Side? This indicates a significant weight imbalance. Try repositioning heavier items inside the RV to distribute the weight more evenly. If that doesn’t work, you might need to use additional leveling blocks on the lower side.
- Uneven Leveling After Deploying Slides? This is quite common. Simply adjust the jacks or blocks on the opposite side of the deployed slide to compensate for the weight shift.
Sum Up
Conquering a slope might seem daunting at first, but with these techniques and a little practice, you’ll be leveling your RV like a pro! Remember, safety is paramount: use sturdy equipment, prioritize stable ground, and double-check your jacks and stabilizers. Don’t hesitate to practice on flat ground before tackling a challenging campsite. Finally, enjoy the peace of mind and comfort a level RV provides, allowing you to truly relax and embrace your outdoor adventure!
Bonus Tip: Invest in a leveling system app for your smartphone. These apps can offer real-time guidance on jack and block placement based on your RV’s specific measurements and the slope you’re facing.
Happy RVing!