Having a well-sealed and properly adhered rubber roof on your RV is crucial for preventing leaks and extending the lifespan of your vehicle. Over time, the rubber membrane can start to lift, crack, or develop bubbles, indicating that it needs to be re-adhered. Gluing down the rubber roof can be a cost-effective and DIY-friendly solution, but it’s essential to follow the correct procedures to ensure a successful and long-lasting result.
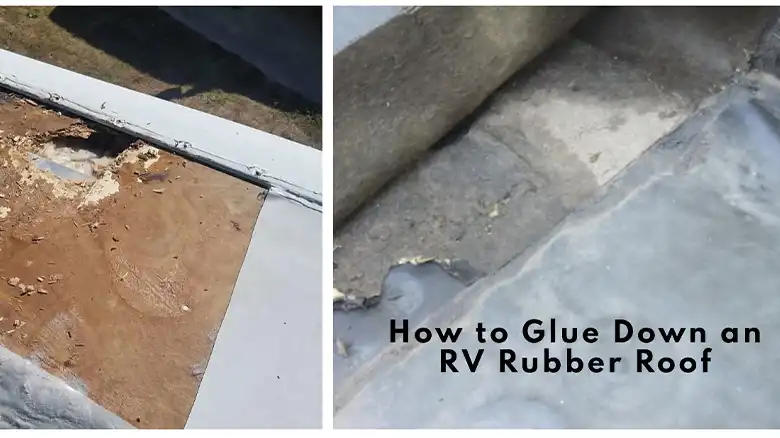
Signs that your RV roof needs re-adhering include lifting edges, cracks, bubbles, or visible gaps between the rubber membrane and the roof surface. Gluing down the rubber roof can not only fix these issues but also provide a watertight seal and extend the life of your RV’s roof.
Below is a step-by-step guide on how to do that with additional maintenance tips for future maintenance of your RV rubber roof as well.
Safety Tips for Working on RV Roof Repairs
Before beginning any roofing project, it’s crucial to prioritize safety. Ensure you have the following safety gear:
- Gloves (preferably chemical-resistant)
- Safety glasses or goggles
- Respirator or face mask
- Non-slip shoes
Additionally, it’s essential to work in suitable weather conditions. Avoid extreme temperatures, rain, or high winds, as these can affect the adhesive’s performance and cure time. Proper ventilation is also crucial when working with adhesives and solvents, so ensure adequate airflow or work outdoors.
When working on a roof, exercise caution to prevent falls. Use sturdy ladders or scaffolding, have a spotter, and avoid overreaching or losing your balance.
Tools and Materials Required for RV Rubber Roof Adhesion
To glue down an RV rubber roof successfully, you’ll need the following tools and materials:
Tools:
- Brushes (for applying adhesive)
- Rollers (for smoothing the membrane)
- Utility knife
- Putty knife
- Scissors
- Caulking gun
Materials:
- Adhesive suitable for RV rubber roofs (EPDM or TPO-specific, solvent or water-based)
- Lap sealant (compatible with the adhesive and rubber membrane)
- Primer or cleaner (as recommended by the manufacturer)
- Rags
- Mineral spirits (for cleaning)
- Plastic sheeting (to protect surrounding areas)
It’s crucial to use compatible products from the same manufacturer. The adhesive, sealant, and rubber membrane should be designed to work together for optimal results.
Preparing the RV Roof for Adhesion
Proper surface preparation is essential for ensuring a strong and lasting bond between the adhesive and the rubber membrane. Follow these steps:
- Remove any old sealant, debris, or loose pieces of the rubber membrane using a putty knife or utility knife.
- Clean the roof surface thoroughly using a power washer or scrub brush and an appropriate cleaner. Remove any dirt, grease, or contaminants that could interfere with adhesion.
- Inspect the rubber membrane for any cracks, holes, or damaged areas and repair them according to the manufacturer’s instructions.
- Clean the underside of the rubber membrane using a suitable cleaner or primer, as recommended by the manufacturer. This helps ensure proper adhesion.
- Allow all surfaces to dry completely before proceeding with adhesive application.
Applying Adhesive to the Roof and Membrane
Proper adhesive application is crucial for achieving a strong and long-lasting bond. Follow these steps:
- Prepare the adhesive according to the manufacturer’s instructions. This may involve mixing or stirring the components and observing the pot life (working time) of the adhesive.
- Choose the appropriate application method: rolling or troweling. Rolling is generally preferred for larger areas, while troweling can provide better control and coverage in tight spaces.
- Apply the adhesive in small sections to avoid premature drying. Follow the manufacturer’s recommendations for coverage and thickness.
- Use a brush or roller to evenly spread the adhesive over the prepared roof surface and the underside of the rubber membrane.
- Pay special attention to challenging areas like corners, vents, and AC units. Use a brush or trowel to ensure proper adhesive coverage in these spots.
Installing and Securing the Rubber Membrane
Once the adhesive is applied, it’s time to lay down the rubber membrane. Follow these steps:
- Position the rubber membrane correctly on the roof, starting from the center or one side.
- Work in small sections, smoothing out any air bubbles with a roller or brush as you go.
- Handle seams and overlaps according to the manufacturer’s instructions, using lap sealant to create a watertight seal.
- Address vent openings, roof hatches, and other protrusions by cutting the membrane carefully and sealing the edges with lap sealant.
- Apply even pressure and avoid wrinkles or stretching the membrane during installation.
Ensuring Proper Edge Sealing
After laying the rubber membrane, it’s essential to secure the edges properly to prevent water infiltration. Follow these steps:
- Use lap sealant or the recommended adhesive to seal the edges of the rubber membrane, following the manufacturer’s instructions.
- Reattach any trim pieces, metal strips, or moldings that were removed during the preparation process.
- Ensure a watertight seal around the edges, seams, and any protrusions by applying sealant and smoothing it with a putty knife or brush.
Adhesive Curing Time and Final Inspection
Proper curing is crucial for the adhesive to achieve its full strength and durability. Follow these steps:
- Consult the manufacturer’s instructions for the recommended cure time, which can vary depending on the adhesive type and environmental conditions.
- Avoid foot traffic or placing objects on the roof during the curing process to prevent disrupting the bond.
- After the specified cure time, conduct a final inspection to ensure proper adhesion and identify any missed spots or bubbles.
- Address any issues promptly by reapplying adhesive, smoothing out bubbles, or resealing any problem areas.
Pro Tips for Maintaining Your RV Rubber Roof
To ensure the longevity of your newly adhered RV rubber roof, follow these maintenance tips:
- Inspect the roof regularly (at least once a year) for any signs of lifting, cracking, or deterioration.
- Clean the roof using suitable cleaning products and methods recommended by the manufacturer. Avoid harsh chemicals or abrasive cleaning tools that could damage the rubber membrane.
- Address any issues promptly, such as repairing cracks or re-adhering lifted areas, to prevent further damage and leaks.
- Consider professional assistance for extensive repairs or a complete roof replacement if the damage is severe or widespread.
Conclusion
Gluing down an RV rubber roof can be a rewarding DIY project that extends the life of your vehicle and protects it from water damage. By following the correct procedures, using compatible materials, and adhering to safety precautions, you can achieve a watertight and long-lasting seal.
Remember, it’s essential to follow the manufacturer’s instructions carefully and work methodically to ensure a successful outcome. If you encounter any significant challenges or feel uncomfortable tackling this project, don’t hesitate to consult a professional for assistance.
With proper preparation, attention to detail, and regular maintenance, your newly adhered RV rubber roof will provide reliable protection for years to come.