
RVing across this beautiful country offers adventure and new experiences around every corner. As the miles roll by, however, that freshwater system that provides drinking water and feeds sinks and showers gets pretty gross. I mean, would you drink from a bottle that’s been sitting in your car for months? Probably not without giving it a good wash first.
Cleaning out the RV’s water system might not be the most glamorous task on the road less traveled, but it protects your health and prevents costly damages down the line. From draining tanks to scrubbing hoses, this guide breaks down the when, why, and how – plus handy tips to make the process as painless as possible. So unhook your hoses and let’s get to work!
When to Clean Your RV’s Freshwater System
Beyond routine maintenance, certain circumstances demand immediate cleaning:
Water Quality is Compromised
Yellow or brown water, floating particles, and foul sulfur smells indicate unhealthy contamination. This likely means biofilm buildup or organisms like bacteria or mold. Don’t drink another drop until the system gets a deep clean!
Water Source Seems Unsafe
It’s always a gamble filling up from some campground spigots of dubious cleanliness. Similarly, water from a lake or stream for boondocking might carry Giardia lamblia or other risks. When utilizing questionable sources, always sanitize the system afterward.
After Repairs or Part Replacements
Anytime the system’s integrity becomes compromised – whether by leaks, floods, opening fittings, replacing corroded pipes or tanks, etc. – flush and sanitize everything once repairs are complete. This clears any introduced contaminants.
Before Lending or Selling Your RV
It’s thoughtful to present a freshwater system sparkling clean to friends borrowing the rig or a new owner after a sale. This removes any of your hair, dirt, or bacteria residue inside!
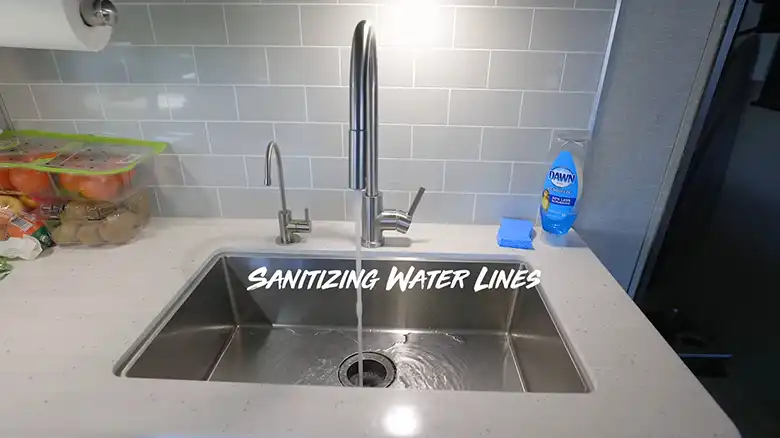
Step-by-Step Process for Cleaning and Sanitizing
Thoroughly cleaning and disinfecting the freshwater system involves draining, flushing, and scrubbing all water storage tanks, pipes, pumps, and fixtures. This removes contaminants and biofilm buildup. Then filling the system with a sanitizing bleach solution kills any remaining bacteria.
Follow this complete process:
Drain Water Heater and Freshwater Tank
First, locate the water heater in your RV and switch it off to ensure no bleach solution will enter while sanitizing.
Next, find the low-point drain valves for both the freshwater tank and hot water heater tank, as well as the tank drain spouts. Place a container under the drain outlets. Open all water tank valves and spouts to allow complete draining.
Let the tanks fully empty, typically around 15-30 minutes for a 40-60 gallon tank. Some residual water may drip out after the main flow stops. Once completely drained, close the freshwater and hot water tank valves/spouts.
If you choose not to sanitize your hot water heater tank, ensure the bypass valve is switched to prevent water from entering that component during the process.
Note – Turning off the water heater is necessary as we are using bleach and water solution for cleaning and sanitizing purposes. If the heater isn’t turned off, then the bleach can get into the RV water heater and there you will have unwanted issues!
Prepare and Add Bleach Solution
Using very cautious handling, mix a bleach-sanitizing solution. According to the rule of thumb, for 50 gallons of water, you will need to add one cup of bleach. So, do the math according to your need, and then prepare the bleach water solution.
Circulate Solution Through Plumbing
Retrieve your bleach solution jug. Locate the external inlet where you fill the freshwater tank (looks like a small gas tank nozzle). Place a funnel into the inlet. Slowly pour all the sanitizing bleach solution from the jug through the funnel into the empty tank.
Next, use a regular known clean water source to top off and fill the freshwater tank. This dilutes the bleach further for appropriate sanitizing concentration.
Flush and Refill with Fresh Water
Inside the RV, turn ON the water pump switch. One by one, carefully open each faucet (hot & cold handles), including the showerhead sprayer if equipped. Allow water to flow completely until smelling a bleach odor discharge.
This ensures recirculation through the entire plumbing system to contact all hidden pipes and fixtures. Close each component once the bleach is smelled. Allow the bleach water solution to sit overnight.
Drain and Flush with Fresh Water
After adequate sanitizing time, connect your garden hose with clean incoming water to the inlet. Switch tank valves back to the drain setting. As you drain the tanks, open all faucets again so clean water also flushes the interior plumbing.
Once you smell no more bleach, the RV system is sanitized! Close valves & faucets. Check for leaks and refill tanks one final time to the desired level for use or storage.
Cleaning Your RV Water Heater
Shut Off Power and Drain the Tank
Turn off the RV’s water shut-off valve and gas valve for the water heater. Additionally, switch off the breaker at the electrical panel corresponding to the water heater.
Drain the water heater.
Locate the drain plug or anode rod, typically at the bottom or side of the water heater. Place a bucket underneath to catch the draining water. Remove the drain plug or anode rod using a socket wrench or water heater wrench.
Flush and Clean with Vinegar
Attach a water heater rinser to the drain opening. Turn on the city water supply and let the water flush out any loose debris in the water heater. Alternatively, turn on the RV’s water pump and let the water run through the water heater until it runs clear.
Clean the water heater with vinegar.
Pour 3 to 5 gallons of white vinegar into the water heater, depending on its capacity. Fill the remaining space with water. Turn on the water heater’s electric element to heat the vinegar solution. Let the vinegar solution sit in the water heater for at least 8 hours. Turn off the water heater and let the vinegar solution sit overnight.
Drain and flush the water heater again.
In the morning, drain the vinegar solution from the water heater. Flush the water heater out again using the water heater rinser or by allowing city water to rush into the tank. Reinstall the drain plug or anode rod.
Flush the faucets.
Remove the aerators from the faucets inside the RV. Turn on each faucet, both hot and cold, and let the water run until the vinegar smell is gone. Reinstall the aerators.
How Often Should You Clean Your Freshwater System?
Keeping the freshwater plumbing clean should be an ongoing effort. At a minimum, the tanks, pipes, and fixtures need deep sanitizing two to three times per year. However, the system requires more frequent attention with heavier use.
Routine Flushing Every Six Months
As a general rule of thumb, aim to sanitize your RV’s freshwater system at least twice a year, ideally every 6 months. This helps maintain the system’s cleanliness and prevent the buildup of bacteria or contaminants. Simply draining tanks or running taps for a few minutes does not provide adequate cleansing. Proper flushing involves:
- Draining both freshwater and hot water heater tanks completely
- Refilling with clean water source and adding RV detoxifier
- Running water through all fixtures for 5+ minutes
- Draining tanks again until water runs clear
Performing this full flush periodically prevents major cleanup jobs down the road.
Deep Cleaning for Seasonal Use or Repairs
In addition to routine flushes, the RV freshwater system requires deep cleaning and sanitizing at least 1-2 times per year. This means actively washing all tanks, lines, and components before disinfecting.
Aim to deep clean:
- In early spring before using the RV after storage
- After boondocking trips when water source cleanliness is uncertain
- After transporting or housing livestock
- Every 5,000 miles of driving
- Before lending your RV to friends or family
- Before winterizing the system
Catching contaminant buildup early on with thorough flushes and periodic deep cleaning prevents unhealthy bacteria and expensive repairs. Keeping your freshwater flow clean makes travel life much more enjoyable!
FAQs Time: Your Questions, Our Answers
- What is the Best RV Tank Cleaner?
Camco Heavy Duty Cleaner, Happy Campers Holding Tank Treatment, and Unique RV Digest are all highly effective and environmentally friendly options.
- How do I Sanitize my RV Water Tank without Bleach?
Using lemon juice or vinegar allows chemical-free disinfecting. Be sure to follow package instructions for concentration and contact time.
- Should RV Water Tanks be Cleaned Annually?
Yes, deep cleaning and sanitizing the freshwater system at least once a year removes harmful residue and protects component integrity.
- Can an RV’s Plumbing System be Sanitized too Much?
Over-sanitizing strips healthy minerals and biofilm, so clean only when necessary. However, most RV antifreeze and cleaning agents cause no harm with reasonable use.
- Is Vinegar as Effective as Bleach for Sanitizing?
White vinegar kills many germs and viruses with adequate exposure time. However, bleach solution better penetrates biofilm layers. Alternating both interchangeably works well.
Final Thoughts
Nothing spoils adventure faster than contaminated water or malfunctioning plumbing. Luckily a bit of periodic planning and elbow grease keeps freshwater systems – and the good times – flowing smoothly all season!
Implementing a regular cleaning and sanitization routine protects tanks, pipes, and parts from hazardous buildup. Performing deep cleaning after risky water sources or repairs also eliminates organism introductions.
Knowing when and how to wash the system properly keeps your drinking water refreshed and safe wherever you roam without much hassle. Now, get on out and make some memories in that squeaky clean RV!

