Have you ever hooked up your trailer, only to find that the lights aren’t working? A faulty 7-pin trailer connector could be the reason behind this. This crucial component transmits electrical signals between your tow vehicle and trailer, allowing the taillights, brake lights, and turn signals to function properly.
A malfunctioning 7-pin connector not only compromises your visibility on the road but also poses a severe safety risk due to potential brake system failure. Ensuring your 7-pin trailer plug is in prime condition is really important for safe towing. Therefore, in this article, we’ll explain how to do it in a proper manner and how to analyze the testing results to find out where the issue is. Let’s go.
What is the 7-Pin Trailer Plug? Functions and Wire Color Guide
The 7-pin trailer plug is a critical component that hosts seven different electrical connections, each serving a specific function.
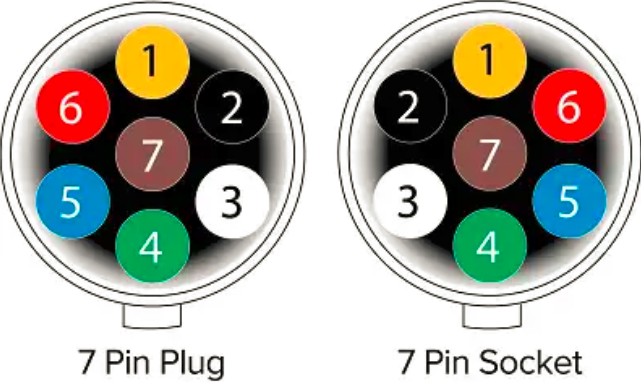
Here’s a breakdown of the typical pin configuration:
| Pin Number | Function | Wire Color |
| 1 | Left Turn Signal / Brake Light | Green |
| 2 | Backup/Reverse Lights | Yellow or Black |
| 3 | Ground | White |
| 4 | Right Turn Signal / Brake Light | Green/Brown or Green/Red |
| 5 | Electric Brake Controller | Blue |
| 6 | 12V Constant Power (for trailers with additional electrical components) | Red |
| 7 | Auxiliary/Charging Wire | Brown or Black |
It’s important to note that while the pin functions are standardized, the wire colors can vary slightly depending on the manufacturer or the specific trailer wiring harness. Therefore, it’s always a good idea to double-check the wire color coding against the documentation provided with your trailer or towing vehicle.
Step-by-Step Guide to Testing Your 7-Pin Trailer Plug with a Multimeter
Before we dive into the testing process, let’s prioritize safety. Working with electrical systems can be hazardous if proper precautions aren’t taken. First and foremost, equip yourself with essential safety gear, including insulated gloves, safety glasses, and proper footwear. Now let’s begin the testing process.
Step 1: Setting Up Your Multimeter for Accurate Testing
- Set your multimeter to the voltage (V) mode, capable of testing for volts.
- Insert the black probe into the “COM” (common) port.
- Insert the red probe into the voltage port.
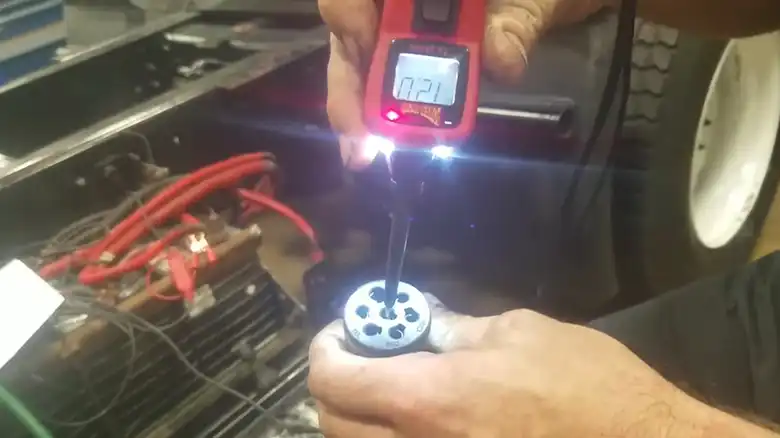
Step 2: Performing the Initial Voltage Check
- Insert the black probe into the ground pin (pin 3) of the 7-pin plug.
- Insert the red probe into the 12V constant power pin (pin 6).
- If you’re getting a reading near 12 volts, it means electricity is flowing in and out of the plug normally. If not, there may be an issue with the grounding or power input.
Step 3: Testing Each Pin for Proper Functionality
- Leave the black probe in the ground pin (pin 3).
- Move the red probe to the first light slot you want to test (e.g., pin 4 for the right turn signal/brake light).
- Ask your assistant to activate the corresponding function (e.g., press the brake pedal or turn signal lever).
- If the pin wiring is working correctly, you should see around 12 volts appear on the multimeter screen. If not, there may be a wiring issue for that specific light.
- Repeat this process for each pin, testing all the lights, brake lights, turn signals, and reverse lights.
Step 4: Analyzing Multimeter Results for Fault Diagnosis
To help you diagnose potential issues, here’s a table summarizing common multimeter readings, their interpretations, and possible causes:
| Reading | Interpretation | Possible Cause |
| No voltage | No power reaching the pin | Blown fuse, loose connection, damaged wire on trailer or tow vehicle |
| Fluctuating voltage | Unstable connection | Loose connection, corrosion on pins |
| Incorrect voltage (lower than expected) | Weak battery in tow vehicle | Charge or replace battery |
As a reference here’s what the voltage should look like for each function:
| Function | Expected Voltage |
| Running Lights | ~12V |
| Brake Lights | Increasing voltage when brakes are applied |
| Turn Signals | Fluctuating voltage as the signal blinks |
| Reverse Lights | ~12V when reverse gear is engaged |
Alternative Methods for Testing Your 7-Pin Trailer Plug
If you don’t have access to a multimeter, a test light can serve as an alternative for testing trailer lights. However, it’s important to note that test lights have limitations compared to multimeters. They can only indicate the presence of voltage, not measure its precise value.
To use a test light, connect one end to a ground point and touch the other end to each pin on the 7-pin connector. If the light illuminates, it indicates that voltage is present at that pin. While this method can identify basic wiring issues, a multimeter offers more comprehensive troubleshooting capabilities.
Troubleshooting Common 7-Pin Trailer Plug Issues
After you’ve identified the issue with your 7-pin trailer plug, here’s how you can go about troubleshooting it:
- Clean the connector plug using an electrical contact cleaner and a brush to remove dirt, dust, and corrosion, which can cause disconnects.
- Check the ground wire to ensure it’s tightly connected to the metal frame of the vehicle. A loose or disconnected ground can break the circuit.
- Replace burnt-out bulbs, as a faulty bulb is often the most common issue.
- Sand away corrosion from the sockets using sandpaper wrapped around a metal rod.
If these steps don’t resolve the issue, it’s time to seek professional assistance from an automotive electrician or trailer repair service.
When to Consult a Professional for Trailer Electrical Issues
While testing and basic troubleshooting can be done at home, some electrical issues may require professional assistance. If you encounter any of the following signs, it’s advisable to seek help from a qualified electrician or trailer repair professional:
- Persistent electrical problems despite your troubleshooting efforts
- Damaged or exposed wiring that needs replacement
- Complex issues beyond your skill level or comfort zone
Remember, electrical work can be hazardous if not performed correctly. Prioritizing safety and seeking expert guidance when needed is crucial.
Conclusion
A properly functioning 7-pin trailer plug is essential for safe towing. By regularly testing and maintaining your connector, you can identify potential issues before they become a hazard on the road. Remember, prioritize safety throughout the testing process, and don’t hesitate to seek professional assistance if you encounter complex electrical problems beyond your expertise.
FAQs
What voltage should I expect when testing the 7-pin trailer plug?
For a standard 12V trailer system, you should expect to see around 12 volts on the multimeter when testing the pins for running lights, turn signals, and brake lights. However, the voltage reading may fluctuate slightly when testing turn signals due to their blinking nature.
What if I get no voltage reading on a particular pin?
If you get no voltage reading on a specific pin, it could indicate a problem with the wiring, a blown fuse, or a loose connection. Double-check the connections and inspect the wiring for any visible damage or corrosion.
Can I test the 7-pin trailer plug without having the trailer connected?
Yes, you can test the 7-pin trailer plug without the trailer connected. As long as your tow vehicle is running and you can activate the corresponding functions (headlights, turn signals, brakes), you can test the individual pins on the 7-pin connector.
How do I ground the multimeter properly during testing?
To ground the multimeter properly, connect the black (negative) probe to the ground pin on the 7-pin connector or to an exposed metal ground point on the tow vehicle’s frame.