Solar Power Installation for RVs | What Steps I Followed
RVs, despite being the epitome of freedom, come with a challenge – power dependence. Traditional power sources tie you down and let’s not even talk about the noise of generators. As RVers, we crave energy independence to roam freely, exploring the highways and byways without worrying about plug-ins.
Installing solar power on your RV can provide numerous benefits like cost savings, energy independence, and an eco-friendly way to power your motorhome, travel trailer, camper van, or other RV.
Fear not, fellow wanderers, as we are also going to unravel the benefits, steps, and tips for successfully harnessing the power of the sun on your RV.
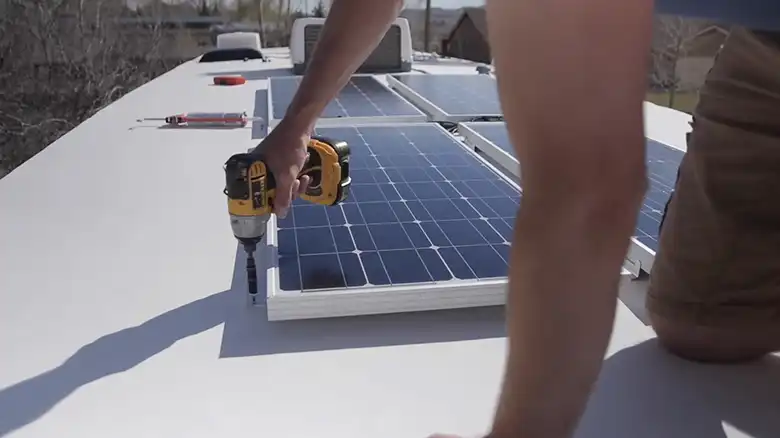
Converting your RV into a solar-powered machine provides energy independence when off-the-grid. Follow this comprehensive, DIY installation guide for harnessing renewable solar electricity.
Step 1: Determine Optimal Mounting Location
Choosing the right mounting spot is crucial for solar panel effectiveness.
- The most practical placement is on the RV roof since it allows for full, unobstructed sun exposure as light travels overhead throughout the day. Check with your RV manufacturer to ensure the roof construction can handle the additional weight load.
- Inspect the roof surface for sufficient area to mount the full solar panel system. Ideally, select a flat or gently curved space at least 120-180 square feet in size.
- Ensure the mounting location does not interfere with existing roof vent pipes, air conditioners, antenna, or other protruding fixtures which may cast shadows and reduce light exposure.
- Thoroughly clean the precise mounting area so panels and frames adhere properly. Remove any loose debris or flaking roof materials using a wire brush and gentle cleaner.
Step 2: Calculate Electrical Power Requirements
Determining expected electrical loads guides appropriate component selection so your solar system generates sufficient sustainable energy.
- Create an inventory of ALL devices and appliances that draw power during RV living like lights, fridges, TVs, computers, battery chargers, etc.
- Check appliance tags to record operational wattages or research specifications if unavailable on device labels.
- Estimate typical daily use times for each item. A fridge may run 24/7 while a coffee maker gets used briefly.
- Factor in future power needs too like adding an induction cooktop or electric space heater.
- Calculate total daily power requirements by multiplying device wattage by usage hours, then adding all loads together.
Once you’ve identified your wattage requirements, you can proceed to calculate the necessary number of RV solar panels and specifically determine the total solar wattage needed.
Contrary to common belief that a 100-watt solar panel yields 800-1000 watts of daily power (within 8-10 hours of daylight), such assumptions can lead to disappointment. To set realistic expectations, a prudent rule of thumb is to anticipate approximately 350 watts per day per 100-watt solar panel, factoring in variables like weather conditions, optimal sun angle/exposure, and panel efficiencies.
For instance, consider the following energy usage scenario: charging a 5-watt phone for an hour, operating a 360-watt rice cooker for 30 minutes, and using a 1500-watt blow dryer for 6 minutes.
Calculations:
- Phone: 5 watts x 1 hour = 5 watts
- Rice Cooker: 360 watts x 0.5 hours = 180 watts
- Blow Dryer: 1500 watts x 0.1 hours = 150 watts
GRAND TOTAL:
5 watts + 180 watts + 150 watts = 335 watts/day
In this example, a 100-watt solar panel would be sufficient to generate the required power for charging your battery and operating your devices each day. Always consult with the professionals installing your panels to determine the optimal panel quantity for your specific needs.
Step 3: Purchase Solar Equipment
Shop for appropriately sized gear to meet your RV’s electrical needs both now and for intended future additions.
- Hand Tools: A versatile set of screwdrivers, a wrench, and a drill are your trusty companions. These tools will help you secure the panels and handle any surprises along the way.
- Safety Gear: Channel your inner construction worker with safety glasses and a sturdy ladder. You’re the director of this solar show, and safety is your top priority.
- Solar Panels – Determine the total wattage output required based on loads. Purchase enough panels sized accordingly, verifying technical specs like efficiency, dimensions, weight, etc. Most RVs use 300-500 watts of panels.
Here are different types of solar panels accord to your need:
- Monocrystalline panels have the highest efficiency rating, usually 20% or more. Space constraints make these lightweight, resilient panels ideal for RVs.
- Polycrystalline panels are bulkier and less efficient at 15-18%, but typically cheaper.
- Flexible thin-film panels are the least efficient at 10%, but useful for irregular RV roof surfaces.
Too few panels leave you electricity deficient, while too many wastefully overproduce. Install panels specifically made for RVs to handle vibration, moisture, and temperature fluctuations experienced on the road.
- Batteries – Choose deep cycle batteries with sufficient amp-hour capacity to store required power needs for operating hours when sunlight is unavailable. These batteries are designed for continual recharging and are rated by amp-hours for determining RV house load electrical capacity needs. Two common options include:
- Flooded Lead-Acid Batteries – Inexpensive but high-maintenance requiring distilled water refills. Heavier in weight.
- Absorbed Glass Mat (AGM) Batteries – Lightweight, non-hazardous, completely sealed for RV safe movement and orientation during travel. More expensive initially but lasts longer in the long run.
Plan for 200-400 amp-hour capacity when estimating your full battery bank size. Group 24 or Group 27 marine batteries are typical for RV solar systems since they withstand vibrations well.
Consider lithium batteries for a high-performing but very pricey choice that lasts over twice as long. Install a battery monitor to track usage and charge levels. Choose batteries specifically designed for solar-powered RVs.
- Wiring – Obtain wiring gauges capable of handling expected electrical loads, along with disconnects and overcurrent protection devices.
- Controller – Solar charge controllers regulate distribution of electricity from solar panels to your battery bank preventing overcharging. RVs require MPPT charge controllers to maximize solar input by tracking the optimum voltage for battery charging.
Choose controllers 25-30% higher than your solar array wattage rating. A 100-amp MPPT solar charge controller properly handles 400 watts of panels typically installed on RVs. Advanced digital versions have informative meters, helpful for monitoring system performance.
- Inverter – Inverters convert DC electricity stored in batteries into 120V AC power used for appliances and entertainment devices. Choose pure sine wave inverters for powering sensitive electronics.
Estimate your peak power needs when sizing inverters, then multiply by two for headroom. For an RV with a normal coffee maker and TV, a 1000-watt inverter should suffice with enough overhead for temporary surge loads.
Select a pure sine wave inverter able to produce the necessary 120V AC power from stored DC batteries.
Step 4: Mount Solar Panels
Securely fastening solar panels to withstand travel vibration and weathering is vital for durability.
- Panel mounting frames typically bolt directly into roof rafters or use heavy-duty adhesive. Mark properly spaced drill holes or adhesive strips per manufacturer specifications.
- Carefully seal external wire holes with waterproof sealant to prevent moisture damage and leaks into the RV interior.
- Avoid piercing roof membranes whenever possible. Thoroughly seal any necessary penetrations like bolt holes.
- Secure wiring is neatly hidden from UV rays, animals, and foliage looking to chew on tasty cordage!
Step 5: Connect System Wiring
Link all equipment for harvesting, governing, storing, and inverting solar electricity.
- Securely connect solar panels wired through the charge controller en route to the battery bank.
- Link batteries to inverter for converting stored DC power into 120V AC current.
- Ensure wiring gauges properly handle expected loads.
- Incorporate fuses and circuit breaker disconnects for overcurrent system protection and isolation capability when necessary.
- Label all wiring connections clearly.
Wiring RV Solar Panels: Series vs Parallel
Determining whether to wire your RV solar panels in series or parallel depends greatly on the voltage and current capabilities of your system’s charge controller and batteries.
Series Wiring
Connecting solar panels in series increases the voltage while maintaining the same amount of current flow.
- Series configurations are recommended when you need to BOOST the overall system voltage to an appropriate level for charging the batteries and powering appliances.
- For example, wiring two 12V solar panels in series produces 24V which can better charge a typical 24V RV house battery bank and adequately power some RV appliances.
- Adding more panels in a series further steps up the system voltage as needed (e.g. four 12V panels in a series generate 48V).
- However, the current does not get increased in a series setup compared to the individual solar panel currents.
Parallel Wiring
Connecting solar panels in parallel increases the overall current flow while maintaining the same system voltage.
- Parallel configurations are recommended when you need to BOOST the total current available to sufficiently charge the batteries within an acceptable timeframe.
- For example, wiring two 12V 100W solar panels in parallel still provides 12V, but the currents from both panels combine for 200W of total power.
- Adding more panels in parallel will continue to add to the total current flow capability.
- Just be careful not to exceed the maximum current rating of your charge controller, which is why controller sizing is so important!
Use SERIES wiring when you need to increase voltage, and PARALLEL wiring when you need more current and power. Properly planned solar schemes utilize series and/or parallel combinations to optimize electrical output!
Step 6: Test and Utilize the Solar System
Verify full system functionality before heading off-grid.
- Check all equipment connections for tightness and reliability. Snug loose component links.
- Carefully activate the system by flipping breakers and disconnecting switches.
- Plug in and test appliances using inverter outlets to confirm proper powering.
- Monitor energy production via solar controller displays.
- Adjust panel angles over time to maximize sun exposure as season and location change.
Done! You now have a complete solar system to sustainably power your RV without relying solely on shore power hookups!
How Much Does It Cost for RV Solar Panel Installation?
The cost of RV solar panel installation varies depending on the size of your RV, the number of panels, the type of components, and the complexity of the installation. For a DIY installation, you can expect to spend between $500 and $1,500. Hiring a professional installer can range from $1,000 to $3,000 or more.
How To Get The Maximum Out Of Your Newly Installed Rv Solar System
Once up and running, follow tips like charging devices when solar generation peaks midday, using efficient lights and appliances, adding wind power, orienting your RV to maximize sunlight on panels, and cleaning panels monthly. Follow your charge controller to see if solar input meets your usage or if more panels are needed.
To maximize the efficiency of your solar system, follow these tips:
- Regularly clean the solar panels to remove dirt and debris.
- Orient the panels towards the sun for optimal performance.
- Monitor your energy consumption and adjust your usage accordingly.
When to Hire a Certified Professional for Solar System Installation
HANDY and technically skilled RVers can install their own systems with diligent research – but be extremely careful working with electrical, roof access and directly modifying your RV. Faulty DIY solar can jeopardize your safety, void warranties or severely damage your RV.
While DIY installation is feasible for those with electrical expertise and DIY experience, hiring a certified professional offers several benefits:
- Expert guidance and recommendations tailored to your RV’s needs.
- Proper installation ensures safety and optimal performance.
- Peace of mind knowing your system is in the hands of experienced professionals.
Benefits of Solar Power for RVs
Solar power offers a multitude of advantages for RVers, transforming the way you experience the outdoors:
- Cost Savings: Solar panels can significantly reduce or even eliminate your reliance on campground electricity, lowering your overall travel expenses.
- Energy Independence: Solar power allows you to enjoy the conveniences of RV living without worrying about finding a power source or the constraints of campground hookups.
- Eco-friendliness: By harnessing the power of the sun, you’re minimizing your carbon footprint and contributing to a more sustainable future.
FAQs: Frequently Asked Questions
How Many Solar Panels Do I Need to Fully Power My RV?
Answer: The number of panels depends on your RV’s energy consumption. A general rule is 100 watts per 100 amp-hours of battery capacity. Calculate based on your RV’s needs for an accurate estimate.
What Type of Solar Panel Is Best for an RV?
Answer: Monocrystalline panels are popular for RVs due to their efficiency and space-saving design. They perform well in various conditions, making them ideal for nomadic adventures.
How Many Watts Does an RV Use?
Answer: RV wattage usage varies, but a rough estimate is around 1200 watts per day for an average RV. This can fluctuate based on appliances, climate, and personal usage.
Is 3000 Watts Enough for an RV?
Answer: A 3000-watt system is robust and should cover the needs of most RVs. However, it’s essential to match the system size to your specific energy requirements.
How Long Do RV Solar Panels Last?
Answer: Quality solar panels can last 25 years or more. Regular maintenance and monitoring can extend their lifespan, providing a long-term, sustainable power solution for your RV.

