
Greystone RV ovens are an essential part of the RV lifestyle, providing the convenience of home-cooked meals on the road. However, lighting these ovens can be a bit tricky, especially for new RV owners. In this article, we’ll provide detailed instructions on lighting your Greystone RV oven, ensuring a safe and hassle-free experience.
It’s important to note that Greystone RV ovens come in various models, each with slight variations in features and lighting procedures. While this guide covers the most common methods, it’s always a good idea to consult your specific oven’s manual for model-specific safety instructions.
Essential Safety Precautions Before Lighting Your RV Oven
Before attempting to light your Greystone RV oven, it’s crucial to prioritize safety. These ovens run on propane, a highly combustible gas, so proper precautions must be taken to prevent accidents.
First, ensure adequate ventilation in your RV by opening windows or turning on exhaust fans. This will prevent the buildup of potentially harmful gases. Next, check for any gas leaks by applying a soapy water solution around the gas connections. If you notice bubbles forming, there’s a leak that needs to be addressed by a professional.
It’s also essential to confirm that the gas is turned off at the propane tank before attempting to light the oven. If you ever smell gas, immediately turn off the propane supply, open all windows and vents, evacuate the RV, and avoid using any open flames or sparks until the issue is resolved.
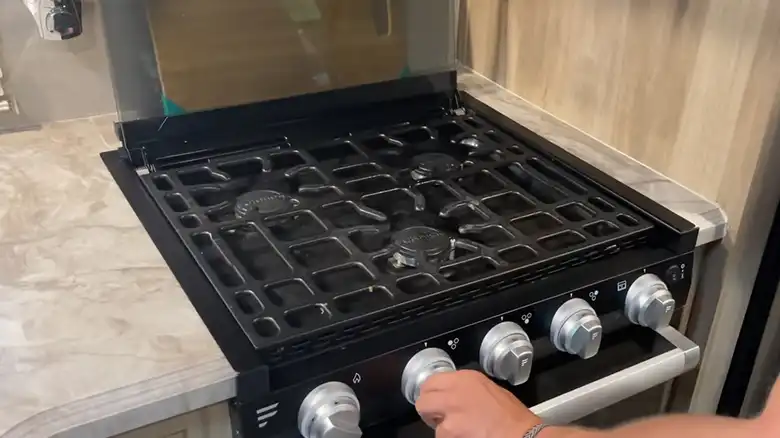
Step-by-Step Guide to Lighting Your Greystone RV Oven with Electronic Ignition
Many modern Greystone RV ovens feature electronic ignition, making the lighting process relatively straightforward. Here are the typical steps:
- Open the oven door to allow proper ventilation.
- Locate the oven control knob and turn it to the appropriate setting, usually marked “Broil” or “Light.”
- Press and hold the control knob. You should hear a clicking sound, indicating the electronic ignition system is working.
- Continue holding the knob until the burner ignites, then release it.
Keep in mind that some electronic ignition systems require a power source, such as a battery or an electrical connection, to function properly. If you don’t hear the clicking sound or the burner doesn’t ignite, check the power source and consult your oven’s manual for troubleshooting steps.
If the burner ignites but goes out shortly after, it could indicate an issue with gas flow or a faulty igniter. In such cases, it’s best to seek professional assistance to avoid potential safety hazards.
Manual Lighting Instructions for Greystone RV Ovens with Pilot Light
Some Greystone RV oven models feature a pilot light system for manual lighting. The pilot light is typically located near the burner, and the lighting process involves the following steps:
- Open the oven door for ventilation.
- Locate the pilot light knob and turn it to the “Pilot” position.
- Have a long match or lighter ready, but never use open flames near the propane supply.
- Press and hold the pilot light knob while simultaneously lighting the pilot with the match or lighter.
- Keep the knob pressed for 30-60 seconds to allow the pilot light to heat up and establish a proper flame.
- Release the knob and turn it to the “Broil” or “Light” setting to ignite the main burner.
If the pilot light won’t stay lit, it could be due to a clogged orifice or debris in the system. Carefully clean the area with compressed air, avoiding the use of water, which could cause further issues.
If the main burner doesn’t ignite after lighting the pilot, check for proper gas flow or a faulty burner. In such cases, it’s advisable to seek professional assistance.
How to Set and Adjust the Temperature on Your RV Oven
Once your Greystone RV oven is successfully lit, you can set the desired temperature using the oven thermostat knob. Consult your oven manual or the temperature markings on the knob to select the appropriate setting.
Keep in mind that preheating the oven is essential for optimal cooking results. The preheating time may vary depending on the dish you’re preparing, but generally, allowing at least 10-15 minutes for preheating is recommended.
Helpful Tips for Maintaining Your Greystone RV Oven
To ensure efficient and safe operation of your Greystone RV oven, consider the following additional tips:
- Keep the oven clean: Regular cleaning helps prevent buildup of grease or food residue, which can affect the oven’s performance and potentially cause safety hazards. Refer to your oven manual for proper cleaning procedures.
- Use appropriate cookware: RV ovens have size limitations and may have different heat distribution patterns than household ovens. Choose cookware designed specifically for RV use or adjust your cooking techniques accordingly.
- Turn off the oven when not in use: This will help conserve propane and prevent accidental gas leaks or fires.
- Troubleshoot common baking issues: If you experience uneven cooking or temperature fluctuations, it could be due to factors like improper cookware placement, blocked ventilation, or issues with the thermostat or control board.
- Keep backup ignition sources: It’s always a good idea to have a backup lighter or matches on hand in case the electronic ignition system fails or you need to manually light the pilot light.
Troubleshooting Common RV Oven Problems
Beyond ignition problems, there are a few other common issues you might encounter with your Greystone RV oven:
- Oven not heating at all: Check the thermostat, pilot light (if applicable), and ensure proper gas flow to the oven.
- Oven not maintaining temperature: This could be caused by a faulty temperature sensor or a malfunctioning control board. Seeking professional assistance is recommended in such cases.
- Oven overheating: Investigate potential causes like a faulty thermostat or blocked ventilation, which could be causing the oven to overheat.
- Expired or low-quality propane: Using old or low-quality propane tanks can contribute to issues with heat output, temperature maintenance, or ignition.
Frequently Asked Questions (FAQs)
Can I use my Greystone RV oven while driving?
No, it’s not recommended to operate any propane-powered appliance, including your RV oven, while the vehicle is in motion. This poses a significant safety risk and should be avoided.
How do I know if my Greystone RV oven needs professional servicing?
If you notice persistent issues with ignition, temperature regulation, or any unusual noises or odors coming from the oven, it’s best to have it inspected by a professional. Additionally, if the oven has sustained physical damage or hasn’t been serviced in a long time, it’s advisable to seek expert assistance.
Can I use my Greystone RV oven for outdoor cooking?
No, Greystone RV ovens are designed for indoor use only. Using them outdoors or in poorly ventilated areas can be extremely dangerous due to the risk of carbon monoxide poisoning and fire hazards.
How often should I clean my Greystone RV oven?
The frequency of cleaning depends on how often you use the oven, but it’s generally recommended to give it a thorough cleaning at least once a month or after every few uses. Consult your oven’s manual for specific cleaning instructions and recommended products.
Can I use my Greystone RV oven to heat the RV during cold weather?
While the oven can provide some additional heat, it’s not designed or recommended to be used as a primary heat source for your RV. Doing so could lead to safety issues, such as carbon monoxide buildup or fire hazards. Instead, rely on your RV’s dedicated heating system.

