
If you’re a proud owner of a camper, you know how important it is to keep things running smoothly. One crucial aspect of camper maintenance is knowing how to change a propane tank. Not only will this knowledge save you from inconveniences during your adventures, but it’s also a matter of safety.
For easier understanding, suppose you’re in the middle of a serene campsite, surrounded by nature’s beauty, and you’re all set to whip up your favorite meal on your camper’s stove. Suddenly, you realize the propane tank is empty. Now, you have two options – sit there with a grumbling stomach or know how to change the tank and continue your culinary adventure. We recommend the latter!
This is why I am here to guide you on the process, step by step (including safety precautions and required tools), ensuring you can handle this task with confidence. So, without delaying any more, let’s get started!
How to Change Your Camper’s Propane Tank Safely
First, Determine Your Propane System
To successfully change your camper’s propane tank, you first need to understand your propane system. Your camper’s propane system consists of several key components, including the propane tank itself, the propane lines, a regulator, and various appliances that rely on propane for operation. These appliances could include your stove, oven, water heater, and even your refrigerator. Knowing the layout and function of these elements will help you navigate the tank replacement process more efficiently.
Safety Precautions
Safety should be your top priority when dealing with propane tanks. Understanding how to switch out a propane tank safely ensures that you, your loved ones, and fellow campers can enjoy the great outdoors without any worry. Changing a propane tank can be a straightforward process, but it should never be taken lightly. Safety should be your primary concern. Make sure you’re well-informed about the process and that you follow safety guidelines diligently.
Before getting into the process straightforwardly, here’s a list of the tools and safety gear you’ll need for this task –
- Safety Gloves: Protect your hands from cold, frostbite, and contact with the propane.
- Safety Goggles: Shield your eyes from any potential propane leakage.
- Adjustable Wrench (If needed): You’ll use this to disconnect the old tank and connect the new one.
- Leak Detection Solution: A mixture of soapy water will help you identify any gas leaks.
- Rag or Paper Towel: For cleaning and drying connections.
- A New Propane Tank: Ensure it’s the correct size and type for your camper.
By having these items ready, you’ll be well-prepared to change your propane tank without any hitches. And once they’re ready, start following the below-mentioned steps as instructed –
Step 1: Turn Off All Propane Appliances
Before you start, turn off all propane-powered appliances within your camper. This includes the stove, oven, water heater, and anything else that uses propane. Ensuring everything is switched off minimizes the risk of a gas leak.
Step 2: Locate the Propane Storage Compartment
Next, you’ll need to find the propane compartment on your camper. This can vary depending on the make and model of your vehicle. It’s often located on the exterior of the camper for easy access.
Step 3: Relieve Pressure in the Propane System
To safely change the tank, you must release any remaining pressure in the system. Do this by gently opening one of the propane appliance valves and letting it burn until the flame goes out. This ensures there’s no residual pressure left in the lines.
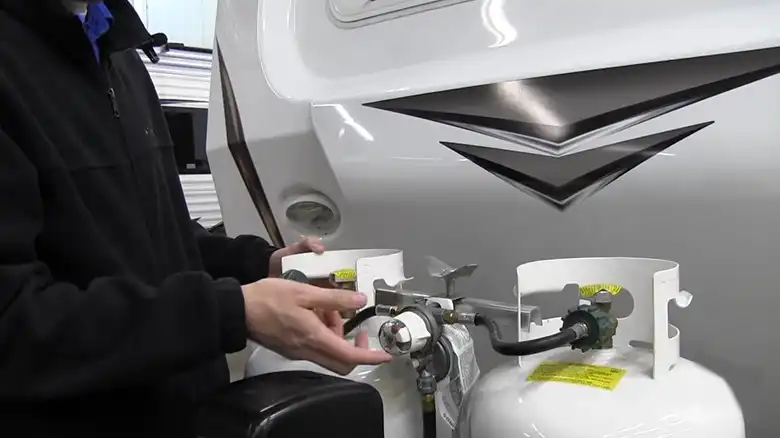
Step 4: Detach the Used Tank Safely
Using an adjustable wrench, carefully disconnect the old propane tank from the regulator and hose. Loosen the connection slowly to avoid any abrupt movements that might damage the lines or connections.
Step 5: Inspect for Wear on Connections
Take a moment to inspect the old tank and connections. Look for signs of wear, damage, or corrosion. If you notice any issues, it’s a good idea to replace damaged parts before connecting the new tank.
Step 6: Attach and Secure the New Propane Tank
Now, it’s time to connect the new propane tank. Attach it to the regulator and hose, and use your adjustable wrench to ensure a secure connection. Be careful not to overtighten, as this could damage the threads.
Step 7: Ensure Connections Are Tight but Not Overdone
Double-check that all connections are snug but not overly tight. You want a good seal, but you don’t want to strip the threads or cause damage.
Step 8: Check All Connections for Leaks
Before you fire up your propane appliances again, it’s crucial to test for leaks. Create a mixture of soapy water and apply it to all the connections. If you see bubbles forming, that indicates a leak. In this case, turn off the tank and recheck your connections.
Step 9: Restart and Test Your Propane Appliances
Assuming there are no leaks, it’s time to turn your propane appliances back on. Test each one to ensure they are functioning correctly. If everything is in working order, you’re all set to continue your camping adventure with a full tank of propane.
Bonus Tips Troubleshooting Common Propane Tank Issues
As with any task, sometimes things don’t go as smoothly as planned. Here are some bonus tips for troubleshooting common issues:
Propane Smell
If you detect a propane smell, do not proceed. Immediately turn off the tank, extinguish all open flames, and ventilate the area by opening windows and doors. Do not use any electrical switches or devices, as they could create sparks. Contact a professional to assess and fix the issue.
Difficulty Disconnecting
If you’re having trouble disconnecting the old tank, don’t force it. Applying excessive force could damage the connections or create a dangerous situation. Instead, seek the help of a professional who can safely resolve the issue.
Know When to Call a Professional for Propane Safety
While changing a propane tank is a manageable task for many, there are situations where it’s best to consult a professional. These are some signs that you should reach out to an expert –
Persistent Leaks: If you’re experiencing persistent gas leaks, even after multiple attempts to fix the issue, it’s time to call in a professional.
Complex Repairs: If you discover that more extensive repairs are needed in your propane system beyond a simple tank change, a professional technician will have the expertise to address these issues.
Uncertainty: If you’re unsure about any part of the process or feel uncomfortable with the task, it’s always better to err on the side of caution and involve a professional. Safety should never be compromised.
Conclusion
In the world of camping, a smooth and safe journey is the ultimate goal. Knowing how to change a propane tank on your camper is a valuable skill that ensures you can enjoy the comforts of home while you’re out in the wild. Remember, safety comes first, and with the right tools and knowledge, you can handle this task with ease. So, go ahead, change that tank, and let your adventurous spirit roam free! Happy camping!

