RV and camper walls have a layered construction, consisting of a rigid, load-bearing exterior layer, insulation in the middle, and interior wall panels made from materials such as vinyl, plywood, or fiberboard. Over time, factors like water intrusion, moisture exposure, and normal wear and tear can cause damage to RV walls.
Properly repairing this damage is important to prevent further deterioration of the wall structure and framing, improve interior aesthetics, and address any discomfort or inconvenience caused by wall issues. This article will cover identifying and fixing different types of RV wall damage.
First, Identify the Extent of Damage
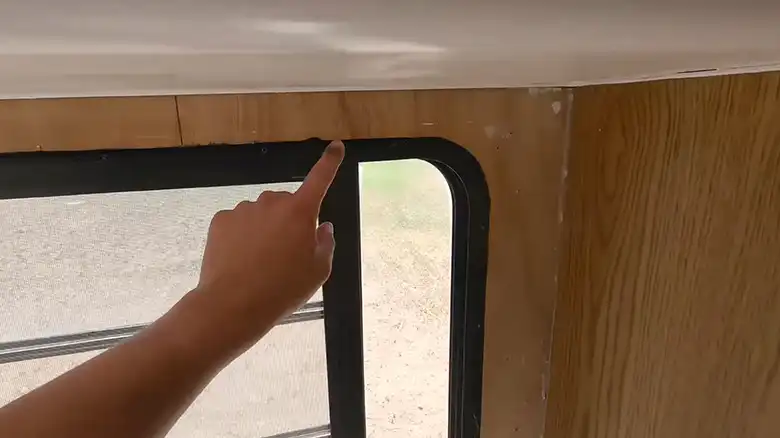
There are several visible signs that can indicate RV wall damage. Soft spots, buckling, or discolored wall panels often occur when water seeps behind the interior finish. A damp, musty smell may also be present if moisture is trapped within wall cavities. Finding the exact source of leaks or moisture buildup is crucial before attempting repairs.
Carefully inspect the roof, windows, and exterior sealants for any cracks that could allow water intrusion. Check plumbing pipes and connections for corrosion leaks. You can also test for unseen wall leaks by using a hose to simulate rain on the exterior while a partner monitors the interior for water coming through.
Peeling back interior wall panels is often necessary to uncover hidden damaged areas and assess the severity. Determine whether spot repairs or full wall replacement will be required based on the level of deterioration of structural framing members and insulation.
Preparing for Camper Wall Repair
Prior to beginning wall repairs, gather the necessary supplies like pry bars, a stapler, a caulk gun, saws for cutting panels or framing, replacement wall panels and insulation, construction adhesives, and self-adhesive wall patches and sealants. For safety, disconnect electricity running to damaged wall areas and drain any plumbing lines that could be impacted.
Remove any interior furniture, stored items, or decorative fixtures on walls to allow full access. Carefully detach wall trim pieces using a flat pry bar or by removing finish nails. Pry off any damaged interior wall panels by breaking the seal of paneling nails or stapes so framing and insulation are exposed.
Fixing Small Holes in Camper Walls
For small holes up to a few inches in diameter, sand down the ragged edges and clear out any loose debris or insulation material from the hole interior. Fill the hole fully with spackling paste or putty, tooling it flush and smooth. Allow sufficient drying time according to the product specifications.
Cut an adhesive wall patch sized slightly larger than the hole and position it over the repaired area, pressing it firmly in place. Carefully trim any overhanging edges with a sharp utility knife and feather them into the surrounding wall surface. Once the patch adhesive has cured, blend it further by coating the patch and immediate area with paint primer or adhesive wallpaper.
Replacing Damaged Camper Wall Panels
If water damage or deterioration is extensive, full wall panels may need replacement. First detach any fixtures like light switches, electrical outlets, or plumbing fixtures from the damaged wall panel using proper tools to avoid damage. Carefully pry the entire damaged panel off the wall while trying to minimize further destruction. Scrape away old adhesive or staples still clinging to framing studs.
Assess insulation and framing members for any mold, rot or pest damage and replace components as required. Custom cut new wall panels to size from stock materials using a circular saw or sharp utility knife and straightedge. Attach the new panels with paneling nails and adhesives designed for RV wall installation. Reconnect any mechanicals like switches or fixtures previously detached by removing damaged panels.
Rebuilding Camper Walls from Scratch
For complete RV wall rebuilds, photograph or sketch the wall framing configuration prior to tear-out so it can be accurately replicated. Remove all damaged framework, insulation, or plumbing components so only the bare structural cavity remains. Salvage any undamaged sections of original framing if possible. Construct an entire new wall frame using the dimensions of the original as a sizing template.
Use pressure-treated lumber and galvanized framing hardware to resist future moisture damage. Install replacement insulation between all framing members, using the proper type for RV walls. Affix precut panels of suitable interior wall finishing material such as hardboard over insulation using adhesives and nails specifically designed for RV application. Before sealing up the rebuilt wall, temporarily position it while checking for proper alignment with door and window openings or any surrounding cabinets or fixtures. Adjust as needed to ensure a flush fit.
Addressing Structural Damage in Your Camper Walls
The first step in repairing structural damage is to remove all affected materials. This might involve carefully cutting away damaged panels, framing members, and any rotted wood. Wear appropriate safety gear like gloves and a respirator mask when performing this task, and dispose of the removed materials responsibly.
Once the damaged materials are removed, you need to replace any compromised framing members. Use treated lumber for optimal durability and resistance to moisture and rot. Secure the new framing securely to ensure the structural integrity of the repaired area.
In some cases, additional reinforcement might be necessary to strengthen the weakened structure. This can involve adding support beams, bracing panels, or other structural elements. Consult with a professional if you are unsure about the required level of reinforcement.
After addressing the framing, it’s time to install new panels. Choose panels that match the existing ones in size and material for a seamless appearance. Once the panels are installed, seal all seams and joints with a high-quality sealant to prevent water infiltration and further damage.
Repairing Delaminated Camper Walls
To repair delamination, you need to inject a specialized adhesive into the affected area. This will re-bond the separated layers of the wall and restore its strength. Use a syringe or other appropriate tool for precise application of the adhesive.
After injecting the adhesive, it’s essential to clamp the area firmly to apply pressure and ensure proper adhesion. Leave the clamps in place for the recommended curing time specified by the adhesive manufacturer.
For additional pressure and improved adhesion, you can consider using a vacuum bag or similar equipment. This method can be particularly helpful for larger delaminated areas.
Finishing Touches After Wall Repairs
Once the repairs are complete, it’s time to give your camper walls a beautiful and finished look. Here’s what you can do:
Apply a fresh coat of paint or stain to the repaired area, choosing a color and finish that matches the existing walls for a cohesive aesthetic.
If the repaired area has a different texture than the surrounding walls, take steps to achieve a seamless blend. This might involve sanding, applying a textured coating, or using other techniques to create a uniform appearance.
Finally, don’t forget to seal all exposed edges of plywood, paneling, and framing with a high-quality sealant. This will prevent moisture penetration and ensure the longevity of your repairs.
Preventing Future Camper Wall Damage
It’s pointless to repair RV wall damage without addressing what caused it originally. Reseal any leaky windows, roofing materials, or exterior joints using high-quality RV sealants. Improve ventilation as much as possible wherever walls frequently get exposed to moisture. Use specially fitted canvas covers or breathable tarps when the RV sits in storage to protect from sun, precipitation, and windstorm debris that could batter exterior walls.
Stay vigilant with routine 6-month inspections for any reopened gaps, new cracks, or material deterioration that could lead to leaks. Fix any such issues immediately to reduce the chances of widespread damage recurring. Consider preventive wall reinforcements in chronically leaky areas.
When to Seek Professional Help for Wall Repairs?
While many RV wall repairs are reasonably within the DIY realm, extensive water saturation, mold contamination or major framing repairs may require contractor expertise. Any signs of structural instability warrant professional assessment and potential reinforcement or rebuilding to assure travel safety. For major mechanical systems like water lines or power conduits running within damaged walls, hire qualified RV service technicians to handle replacement parts. Extensive mold remediation also calls for expert containment protocols. In these scenarios, the extra cost for contractor repairs is well worth it.