How to Add More Solar Panels to Existing RV Systems? Know This and That
Adding more solar panels to an RV’s existing system is the process of supplementing the current solar array with additional panels. This expands the system’s capability to harvest and convert sunlight into usable electricity to power a motorhome or camper van. Supplementing solar capacity enables increased energy independence, reduces reliance on generators, and powers additional appliances.
Expanding an RV’s solar system enhances energy independence, enabling off-grid camping with increased electricity production and reducing the need for frequent generator use. This upgrade also supports the operation of additional appliances and devices, contributing to a more convenient travel experience. Furthermore, the fuller solar charges extend the overall life of the battery bank, making it a practical and efficient choice for RV enthusiasts.
To add solar panels to your RV, assess roof integrity, use flexible panels for curves, secure with appropriate mounts, and optimize sun exposure. Upgrade the charge controller, test the system, monitor output, and make necessary adjustments for peak performance during regular inspections. Now, keep reading to go for the details.
How to Know If Your Existing RV System Requires More Solar Panels?
Check if your batteries are getting enough charge or haven’t lost capacity
Frequently undercharged batteries indicate insufficient solar recharging. Monitor charge levels and compare them to energy use. If batteries routinely fall below 50% capacity despite supposed adequate recharging, expanding solar input may be beneficial.
Calculate existing electrical loads
Tally the watt-hours consumed by existing lighting, refrigeration, entertainment, and other appliances. This quantifies energy needs. Compare against solar array output to identify deficiencies.
Estimate additional loads to be added
Factor in any new battery-powered appliances, devices, or upgrades you wish to install. This determines total electrical requirements. Compare solar system production to right-size additions.
Is Your Existing System Capable of More Solar Panels?
Before expanding solar capacity, confirm your RV’s charge controller, inverter, and wiring can handle increased wattage without overload or overheating. Check specification plates for ratings. Undersized gear can throttle additional energy production.
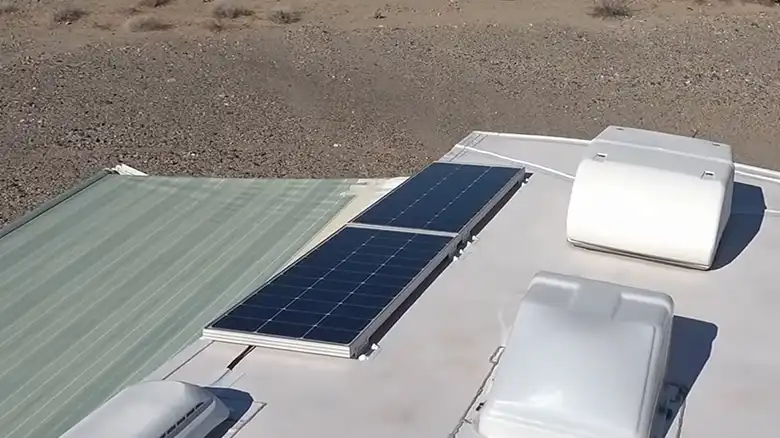
Assess open areas on the roof, hood, or chassis with appropriate sun exposure and structural integrity for panel mounting. This determines how many can be added. Carefully consider panel angles and potential shading. Flexible panels can work on curved surfaces.
Verify wiring gauge capacity between existing solar panels and battery bank. Undersized cables can lead to excessive voltage drop and resistance. Factor in extended wire runs for new panel placement.
Fuses between panels and batteries provide overload protection. When increasing solar input, ensure fuse ratings remain properly sized for total amperage capacity. Add additional fuses if necessary.
Before upgrading solar panels, test existing batteries to evaluate their health. Old, worn-out batteries with diminished capacity may be unable to store additional energy, limiting benefits. Replace batteries if needed prior to expanding the solar array.
How to Install the Additional Solar Panels?
Here’s the step-by-step procedure –
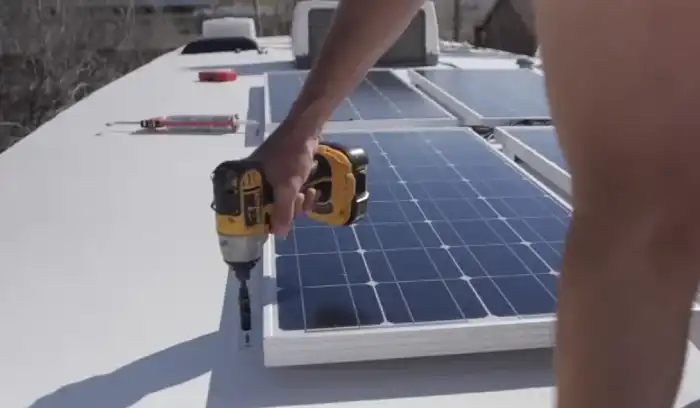
Step 1. Expanding Mounting System
1: Inspect roof structure and seals to ensure it can handle extra panels without compromise. Calculate the total new system weight and compare it to RV specs. Distribute load appropriately through mounting hardware.
2: For rounded roof sections or other irregular surfaces, use adaptable flexible panels which can contour to shape without visually apparent warping. Ensure the backing structure is solid.
3: Carefully consider panel positioning to receive maximum unobstructed sunlight at appropriate angles throughout the day in all seasons. Account for potential shade sources like vents, AC units, or antennas.
4: Securely fasten using RV roof-specific mounting rails and brackets. Follow manufacturer guidance. Can also apply durable adhesive on high-quality backing.
Step 2. Electrical Connections and Wiring
1: Double check cables between the charge controller and new panels are properly sized for the increased amperage and extended distances. Upgrade if needed to prevent voltage drop.
2: Wire additional panels together with an existing array in series to increase voltage or in parallel to add amperage. Follow charge controller requirements. Parallel adds output flexibility.
3: Use specialized solar connectors and terminals to cleanly integrate new panels with suitable strain relief. Ensure watertight seals and proper polarity through diodes.
4: Verify that your RV solar charge controller banks can handle the wattage increase without overload issues or system damage. Upgrade if needed.
Step 3. Adjusting System Components
1: If the existing MPPT or PWM solar charge controller lacks sufficient capacity for the expanded panels, replace it with an appropriately sized model able to convert higher energy throughput.
2: Fuses provide vital protection against shorts and surges. Add supplemental fuses for integrated panels as necessary based on total amperage. Use quality fuse blocks.
3: Upon installation, thoroughly test the new solar system under load to identify any problems. Confirm expected voltage/amperage output and battery charge levels reach target thresholds.
Step 4. Energy Monitoring and Maintenance
1: Install solar system monitors to view real-time data like solar input, battery status, and load draw to optimize system performance. This allows appropriate sizing of the array.
2: Check all components, connections, wiring, and mounts periodically to ensure integrity. Trim shading obstructions, clean panels, and confirm waterproofing. Proactively address issues.
3: Based on energy monitoring, tweak panel angles or locations as needed seasonally to maximize solar gain as conditions and shade patterns change. Identify underperforming aspects for correction.
What Are the Proper Locations for Additional Solar Panels?
The most effective locations for supplementary RV solar panels are areas with excellent sun exposure throughout seasons without shading or obstructions. The roof typically offers ideal placement, positioned thoughtfully around existing roof components. For large solar capacity increases, the hood or chassis can provide additional mounting real estate. Carefully consider optimal panel angles and easy access for cleaning.
What Are the Pros and Cons of Adding More Solar Panels?
Obviously adding more solar panels comes with a bunch of advantages, but you can’t deny the drawbacks too! Here are the notable pros and cons of doing so –
Pros
- Increased solar electricity production enables greater energy independence and off-grid camping capacity
- Less frequent need to run the generator to charge batteries saves fuel and operating hours
- Can power additional appliances, devices, and upgrades to improve quality of life
- Helps extend the overall battery bank lifespan by enabling fuller solar charges
- Upgrades the RV’s overall electrical system performance
Cons
- Added solar panels represent an upfront cost investment
- Extra weight and wind resistance from mounted panels
- Potential roof integrity or leak risks if mounting is improper
- Ongoing maintenance is required, like cleaning and component checks
- Expanding systems can increase complexity if not done methodically
- Charge controller, wiring, and other hardware may need to be upgraded
Overall, the benefits typically outweigh the drawbacks, especially for RVs used heavily off-grid. Carefully weighing the pros and cons allows determining if added solar panels make sense.
What’s the maximum number of panels that I can add in a parallel connection?
With panels wired in parallel, system voltage remains consistent while amperage stacks. So available surface area and cable ampacity ultimately limit how many additional panels can be added rather than electrical factors. Size parallel wiring for predicted max watts.
How do I calculate solar panels for my RV?
Estimate average daily consumption of all appliances and devices in watt-hours, then inflate 20-30% to offset system inefficiencies. This gives the solar array output needed for self-sufficiency. Determine panel number and size accordingly, scaled to available space.
How long do RV solar panels last?
Quality solar panels can remain productive for over 20 years. Key factors impacting lifespan are product quality, mounting integrity preventing vibration/shock damage, electrical maintenance, and degree of environmental exposure. Regular inspection and care preserve longevity.
Conclusion
Adding solar capacity to an existing RV system makes sense for many RVers seeking energy independence and reduced generator reliance. Carefully weighing electrical loads, mounting options, hardware limitations, and installation factors determines if expansion is advisable. When analysis shows the benefits outweigh the complexity, supplemental panels can responsibly enrich on-the-go lifestyles. Strategic solar upgrades empower RVs to realize their full off-grid adventuring potential through sustainable sunlight harvesting. With robust solar power generation, you can enjoy enhanced off-grid adventure.