How to Remove Logos From Trailers?
As I eagerly set out on my first road trip in my brand-new RV, I had visions of adventure on the open road. However, those visions were obstructed by the gigantic “TravelQuest” logos plastered down both sides, like flashing neon signs announcing the manufacturer. I understood why they did it – free advertising for their company! But as an avid outdoorsman not tied to any brand, I wanted to personalize my rig and black out those logos that screamed corporate sponsorship.
Thus began my quest to remove the obtrusive decals and paint from my trailer, so I could cruise in the anonymity and freedom of the open road. After consulting some fellow RVers and acquiring an arsenal of tools, I went for Operation: Logo Removal. To start the logo removal process, I thoroughly examined the graphics to determine if they were painted directly on the surface or applied as adhesive vinyl decals. This close inspection enabled me to select the most effective removal techniques based on the specific material used for each logo.
What ensued was a tedious yet rewarding mission that required diligence and care to avoid damaging the sensitive exterior finish. But the final reward was a sleek, polished look that let my RV reflect my identity. The moral of the story: with time and the right techniques, anyone can defeat the logo overlords and customize their home on wheels.
Identifying the Logo Type
The first step was carefully inspecting the logos to identify what type they were. RV graphics are typically either painted directly onto the fiberglass surface or applied as adhesive vinyl decals. Paint can be tricky to remove completely, usually requiring sanding or chemical strippers. Vinyl decals have more flexibility so they can be slowly peeled or scraped off with some diligent effort. Determining the logo material helped me select the best removal methods.
Source: letscampsmore
Removing Process for Painted Logos
Removing painted logos or graphics from surfaces like fiberglass, metal or plastic can be challenging. For the painted manufacturer logo on the back, I first tried chemical paint strippers. These solvent-based products are strong enough to cut through multiple layers of paint. However, they ended up being too harsh on my skin and I worried they would damage the fiberglass finish if left on too long. Instead, I had better success renting an electric sander. Chemical paint strippers and mechanical sanding are two common methods. So –
- Assess logo and surface type. Determine if the logo is painted directly on the surface or if there is a clear coat over it. Also, check if the surface is delicate or abrasion-resistant. This will dictate your removal approach.
- Try chemical paint strippers. For simple paint jobs, a chemical paint stripper diluted with water and applied with a brush may lift the paint. Ensure proper ventilation and skin protection. Let it sit for adequate time to penetrate the layers. Scrape off with a plastic putty knife. Repeat as needed.
- Move to Sanders. For difficult logos with multiple coats of clear-over paint, mechanical sanding may be required. Start with a coarse 60-80 grit sandpaper to remove the top layers efficiently. Use a random orbital sander for contoured surfaces. Apply moderate pressure and keep the sander moving to avoid digging in.
- Finish with finer grit. Once the logo is removed, smooth out abrasions and scratches with 120, 220, or higher grit sandpaper. For delicate surfaces, use an oscillating multi-tool with sanding attachments instead of high RPM rotary tools to prevent swirl marks and burns.
- Clean and restore finish. Wipe away all dust and debris when complete. On bare metal, apply a primer and re-paint. For plastics or fiberglass, utilize polishes and protectants to restore the original sheen and luster. Be careful not to over-polish fragile surfaces.
Removing Process for Vinyl Decals
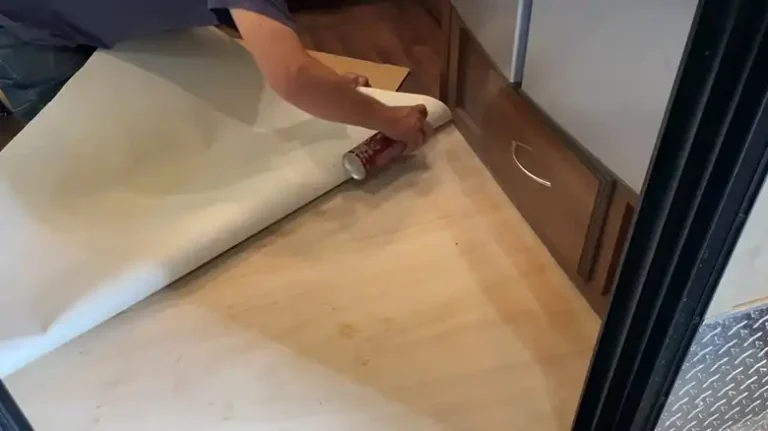
Vinyl decals and graphics can be tricky to remove, but taking a gradual, controlled approach with the right tools makes it manageable. I found plastic scrapers helpful for lifting the edges, and a heat gun to soften the adhesive when needed. Chemical solvents like Goo Gone dissolved any leftover sticky residue. Here’s the detail –
- Start at the edges. Insert a plastic putty knife or scraper under the vinyl corners and gently lift up. Work slowly to separate the sticker from the surface. Apply light pressure to avoid scratching.
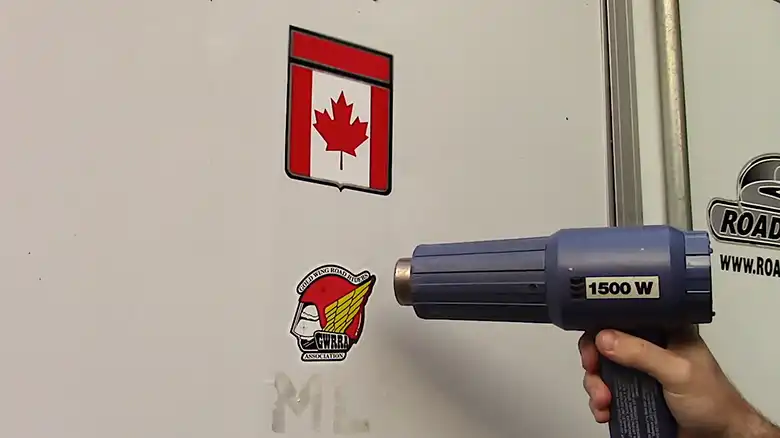
- Apply heat as needed. For decals adhered tightly, use a heat gun to warm them up. Move the heat gun continuously over the vinyl at a distance of a few inches. This softens the adhesive backing so the decal can be slowly peeled up.
- Pull off slowly. Once loosened, grab the lifted vinyl corner and pull it back diagonally, keeping it close to the surface. Pulling too quickly risks tearing the decal. Remove it in small sections for easier control.
- Use solvents for residue. Any remaining adhesive can be scrubbed away with isopropyl alcohol or Goo Gone type solvents. Apply the solvent and let it sit for a few minutes to dissolve the sticky residue before wiping it off.
- Be extra careful on delicate surfaces. Use lower heat settings and less aggressive solvents on surfaces like car paint that can scratch or stain easily. Test products in inconspicuous areas first. Use non-abrasive plastic or microfiber cloths for wiping.
- Apply protection when finished. Once the decals are removed and the adhesive is cleaned away, apply a fresh coat of wax or sealant to protect the bare surface from the elements. This helps restore the original appearance.
Preparing and Restoring the Surface
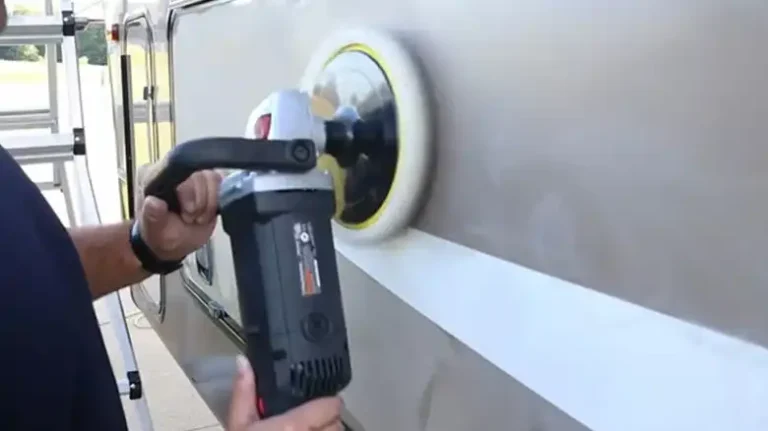
No matter which removal method I used, properly prepping and restoring the trailer’s surface afterward was crucial. I used a buffing compound and an electric buffer to smooth out any remaining scratches or residue. The buffer returned a nice glossy finish to the fiberglass exterior. I was also diligent in thoroughly cleaning each section with isopropyl alcohol before applying any new decals or paint.
My Results
After considerable time and effort, I successfully removed the obtrusive manufacturer graphics from both sides of my RV, leaving a sleek, uniform, and custom look. The job required patience, using the proper logo removal tools for each type, and taking care not to damage the exterior finish. I was pleased to have a trailer that now reflects my style instead of acting as a free advertisement.
Do these Removal Methods Work for All Logos like on Planes, Buildings, etc?
Eliminating pesky logos and branding requires the right technique for the surface they’re on, whether it’s the fiberglass exterior of an RV, the polished body of a plane, or a brick building facade. Painted signs may need chemical stripping or sanding, while vinyl graphics can be heated and peeled. Metal surfaces may require gentler scraping to avoid scratches. The key is starting with a test spot and using just enough effort to lift logos without damaging the underlying finish. With care and the proper removal tools for each material, you can free planes, buildings, cars, and more from the grip of tacky branding. A little strategic effort will reveal the blank canvas underneath, ready for you to customize it your way.
Wrapping It Up
In summary, removing unwanted logos and graphics from your RV takes some work but can give it a polished, custom look. Using the right tools and techniques for the job, you can successfully eliminate graphics without damaging the valuable exterior finish. Take the time to properly clean and restore the surface afterward. Then you can cruise in your RV logo- and hassle-free!
Relevant Questions
What are some commonly used vinyl adhesives that require removers?
Common adhesives for RV vinyl graphics include 3M films and transfer tapes. Products like Goo Gone, WD-40, or adhesive remover wheels work well to break these down.
Can I just paint over existing graphics instead of removing them?
You can paint over logos and graphics, but the outline and shape of them will likely still show through the new paint. It’s best to fully remove them first.
Will aggressively removing logos damage my RV’s exterior finish?
If you use proper techniques suited for each material, like plastic scrapers for vinyl decals and avoiding over-sanding paint, you can remove logos without damaging the finish. Be very cautious and take your time.
What type of logo is easiest to remove – painted, vinyl, or silkscreened?
Vinyl decals are the easiest type to remove by slowly peeling and using adhesive removers. Silkscreened ink is very durable and hard to eliminate. Paint falls somewhere in between.