Hey there! Have an old RV just sitting around not being used? Well with some elbow grease and basic skills, we can convert that unused frame into a handy car trailer! I did this myself and saved a ton versus buying new.
In this article, I’ll walk through how I transformed my old RV into a heavy-duty hauler perfect for cars, lawnmowers, and more. It took planning, material gathering, and careful construction – but the end result was a quality DIY trailer customized just how I wanted. So grab those tools and let’s get building!
Preparation for Your RV-to-Trailer Conversion
The preparation stage is crucial to set up your RV trailer conversion project for success. Before you start cutting, grinding, and welding, take the time upfront to gather needed materials and accessories, assess the frame’s current condition, and plan out the trailer’s layout. Rushing into construction without proper planning can leave you frustrated, with a trailer that doesn’t meet your needs or work properly.
Essential Materials for Building Your Car Trailer
You’ll need an assortment of raw materials, parts, and tools to complete your RV to car trailer conversion project. At a minimum, you should gather the following:
Steel for expanded metal flooring
The inside of your trailer will need a sturdy floor to support the vehicles or heavy loads being carried. Expandable metal sheets are lightweight but strong and allow tie-downs to secure loads. Other options are wood planking or steel plate flooring.
Wheels, tires, axles, lights, etc.
Unless your RV frame already has the needed wheels, axles, lights, and associated hardware, you’ll need to source these crucial parts. Make sure the axles are rated for the intended trailer load capacity.
Welder, grinder, drill, and other tools
A welder is essential to fuse and attach the various trailer parts and accessories onto the frame. Other metalworking tools like grinders, hammers, and drills will also be needed for cutting, fitting, and fastening.
Hitch and trailer tongue
A hitch coupler or fifth wheel will need to be welded onto the trailer frame so it can be towed by your vehicle. You’ll also need a sturdy tongue constructed to transfer the load forces from the trailer to the tow vehicle hitch.
Inspecting and Assessing the RV Frame
Before investing time and money into building your car trailer, carefully inspect the used RV frame you are starting with.
Make sure the frame is in good condition and structurally sound. Check thoroughly for rust, cracks, or damage to the axles, tongue, and chassis. Examine underneath for bends, cracks, or holes in the longitudinal frame members or cross members. Confirm the frame width and length are sufficient for your planned trailer size and capacity. Look for signs of accident damage like misaligned or bent frame sections. Evaluate the condition of any existing axles, tires, bearings, and suspension parts.
Minor surface rust and dents can be remedied, but if the frame has any severe structural damage, corrosion, or weakness it is not suitable to build on.
Designing Your Trailer Layout
Before cutting or welding anything, carefully measure the RV frame and map out the major components of your trailer build.
Measure RV frame length, width, and cross-member locations. Account for any axles already installed. Determine the desired dimensions and floor space needed for the trailer bed to haul your vehicles or cargo. Decide on drop-down tailgate or permanent walls enclosing the trailer bed. Layout where new axles/suspension (if needed) will mount and how far apart. Pick locations for lights, wiring, jacks, tie-downs, ramps, and any other accessories.
Visualize how you will use the finished trailer and design the layout accordingly. Your plans may change as the build progresses but having a solid starting concept makes the job much smoother.
Preparing the RV Frame for Trailer Construction
With materials gathered and the build planned, now you can start prepping the RV frame for the trailer conversion.
Remove any unwanted parts like holding tanks, propane compartments interior walls to open up usable space. Grind or sand the frame smoothly to prep for new parts and create solid weld joints. Wire brush off loose paint and rust. You’ll repaint/protect the frame later. Determine the coupler size and weight capacity needed for your trailer hitch setup. Cover any openings in the floor with wood, sheet metal, or expanded metal to create a solid surface.
The frame should now be stripped down and prepared for you to start constructing your car trailer!
Step-by-Step Construction Process for Your Car Trailer
With proper planning and preparation complete, you can now shift your focus to the fun part – constructing your custom utility trailer! The major steps include building the hitch/tongue, installing axles and wheels, adding the trailer bed, installing lighting as well as final accessorizing and detailing.
Take things slow and be meticulous during construction – measure twice, cut once as the old saying goes. Building a safe, high-quality trailer is all about attention to detail.
Build the Trailer Tongue/Hitch
The tongue performs the vital task of transferring forces between the trailer and the tow vehicle so needs to be extremely sturdy.
Weld on a suitable coupler to the end of the RV frame to accept your desired trailer hitch ball or pintle ring. Fabricate triangular gusset support plates from steel plates – these tie the coupler to the frame. Weld gusset plates in multiple locations under the coupler to reinforce the tongue. Attach horizontal and vertical support bars back from the coupler to further strengthen the tongue. Consider adding wood flooring on top of the tongue to create a toolbox storage area.
Take the time to overbuild the tongue and you’ll greatly improve the durability and safety of the whole trailer.
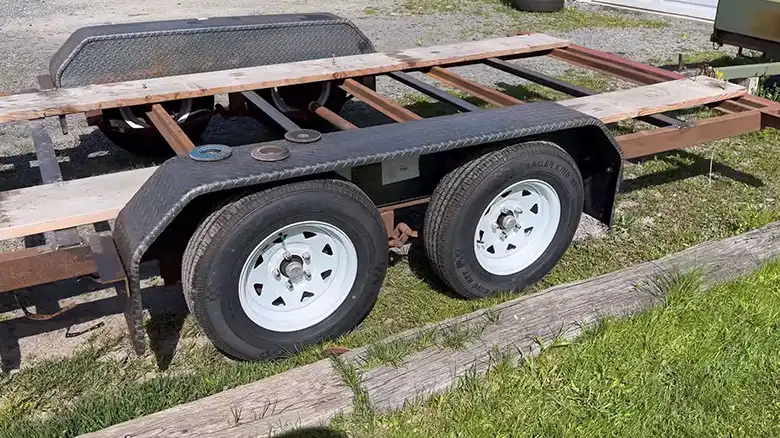
Install Axles, Wheels, and Tires
With the frame prepped and tongue attached, the next step is bolting on the axles, springs, wheels, and tires.
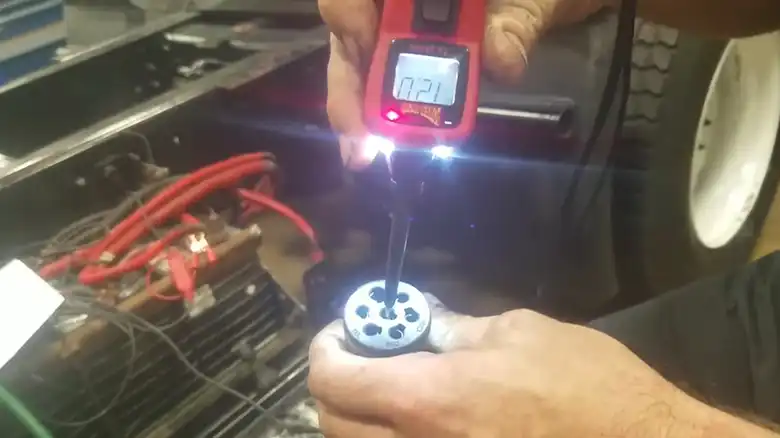
Weld on axle hangers aligned with your planned axle locations. Use C-clamps to hold axles in place during installation and welding. Bolt leaf spring packs to the underside of the axles using U-bolts. Attach hubs and drums to axle ends if needed. Slide on wheels and mount with lug nuts – ensure they match the hub bolt pattern. Inflate tires to the rated air pressure indicated on the sidewall.
Double-check check all fasteners are tight and grease wheel bearings before loading the axles with the trailer’s weight.
Add Trailer Bed
Now it’s time to add the expanded metal or other material that will form the floor of your trailer bed.
Measure the inside dimensions of the RV frame and cut sheets to fit. Weld overlapped expanded metal sheets in place across the entire frame. Consider adding wood plank decking over the metal floor for additional strength. Construct side rails around the perimeter to keep cargo centered and contain small items. Add steel ramps at the rear to load vehicles and equipment.
Take care to fully weld sheets to the cross members so the floor doesn’t bend or squeak when loaded.
Install Lights and Wiring
The lighting and electrical system is critical for safe road use.
Wire up LED brake, turn signal, and marker lights at the rear per federal regulations. Add side marker lights if the trailer is over 80 inches wide. Run wires neatly through the interior frame. Seal any light mounting holes to prevent water intrusion. Connect the trailer plug to the tow vehicle wire harness to power signals.
Double-check all lights are functioning before towing the finished trailer.
Add Finishing Touches
With the major mechanics and structure complete, put the final touches on your DIY car trailer.
Sand and repaint the frame with durable automotive paint to protect it from rust. Add wood side panels or metal sheeting around the bed to contain cargo. Install collapsible rear ramps for easy loading. Weld on D rings, tie downs, and rub rails where needed. Bolt-on a swivel jack stand to the front tongue to level and stabilize the trailer. Add a spare tire carrier to the front or side. Consider wiring in floodlights and a 12V battery to enable off-grid use.
Take pride in these finishing details that make your car trailer unique. Now load it up and hit the road!
Conclusion
Whew, we made it! Wasn’t too bad right? Now you’ve got your own custom utility trailer for hauling all kinds of stuff. I had a blast building mine from an RV frame and saved big bucks over a brand-new one. The most important things I learned were to overbuild the tongue, triple-check the lights, and take it slow. Patience pays off. Your new trailer is ready to load up and put to good use! Hitch it up and let the adventures begin! Thanks for reading and let me know if you have any other questions.