My Journey Converting a Pop-Up Camper to Hardside: What Steps Did I Take?
Pop-up campers have long been a beloved companion for outdoor enthusiasts like me. They offer the joys of camping while providing a roof over your head. However, there came a time when I considered upgrading to a hardside camper for added comfort and convenience. I embarked on the journey of converting my pop-up camper into a hardside.
In this article, I’ll share my personal experience, provide step-by-step instructions, and offer valuable tips. I’ll also discuss the pros, cons, and alternatives, and answer frequently asked questions about this transformation.
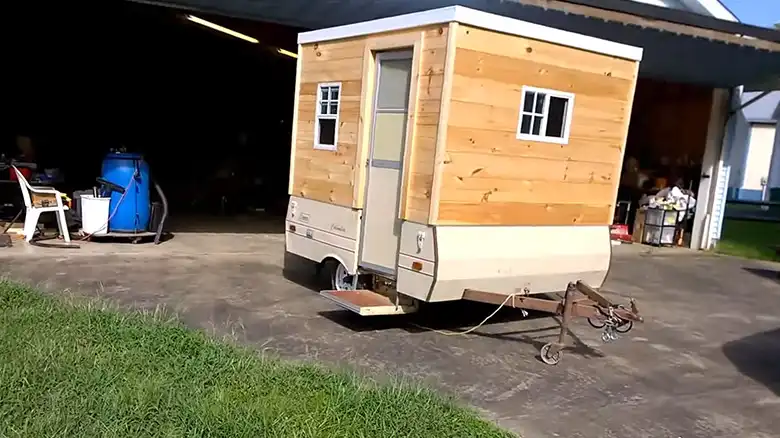
Steps to Convert My Pop-Up Camper to Hardside
Converting a pop-up camper to a hardside is a significant project, but with the right tools, materials, and handy DIY skills, it’s entirely achievable.
Step 1: Planning My Conversion
Before diving into the conversion, I took some time to plan my project. I considered the layout, materials, budget, and timeframe. I thought about the features I wanted in my hardside camper, such as windows, storage, and insulation.
Pro Tip: Create a detailed project plan with sketches and measurements to ensure everything fits together seamlessly.
Step 2: Gathering Necessary Materials
I needed various materials, such as plywood, insulation, fasteners, windows, and siding. I made a list of all the items I’d need and sourced them in advance. I also consulted with experts at my local hardware store to ensure I was getting the right materials for my specific project.
Pro Tip: Overestimate the materials you’ll need to account for any mistakes or changes in design.
Step 3: Removing the Canvas
I started by removing the canvas and any soft-sided components of my pop-up camper. This exposed the frame and allowed me to work with a clean slate. It was essential to carefully label and store any components I planned to reuse.
Pro Tip: Take plenty of photos during disassembly to help with reassembly.
Step 4: Framing the Hardside Structure
Using the frame of my pop-up camper as a guide, I created a rigid structure with plywood. This formed the skeleton of my hardside camper. I ensured that it was securely attached to the existing frame.
Pro Tip: Reinforce corners and joints to enhance stability.
Step 5: Insulating My Hardside Camper
To achieve superior insulation, I added foam board insulation between the framing and covered it with plywood or another suitable material. This step was vital for maintaining a comfortable interior temperature.
Pro Tip: Ensure there are no gaps in your insulation for maximum efficiency.
Step 6: Adding Windows and Doors
I cut openings for windows and doors, ensuring a snug fit. I installed weatherproof windows and doors, complete with sealing to keep my new hardside camper dry and cozy.
Pro Tip: Double-check your window and door seals to prevent leaks.
Step 7: Installing Siding and Roofing
I selected siding materials that suited my preferences and climate conditions. I securely attached the siding to the framework and added roofing material to protect against the elements.
Pro Tip: Choose siding that complements the design of your hardside camper.
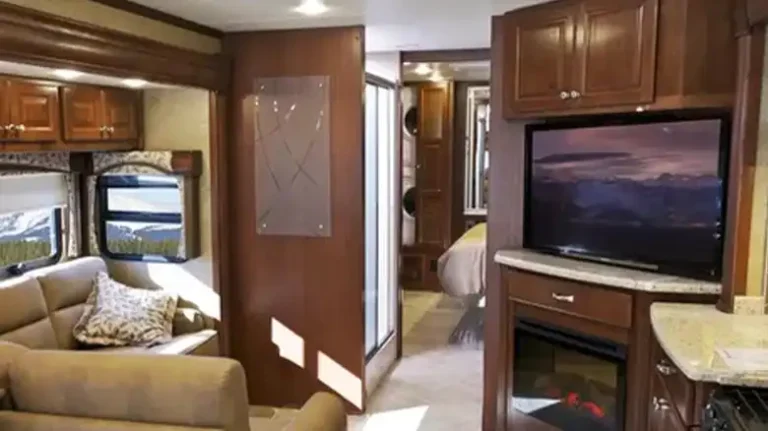
Step 8: Finishing the Interior
I finished the interior to my liking. I installed cabinets, storage, and any other features I planned during the initial phase. I ensured everything was securely fastened to the frame.
Pro Tip: Make use of every inch of space for storage to maximize comfort during your trips.
Step 9: Testing and Refining
Before hitting the road, I thoroughly tested my newly converted hardside camper. I checked for leaks, insulation effectiveness, and any structural issues. I made adjustments as needed.
Pro Tip: Spend a night in your hardside camper close to home to ensure everything functions as expected.
Lessons Learned During My Conversion
Throughout my conversion journey, I encountered a few challenges and learned some valuable lessons:
- Weight Considerations: The addition of hardside materials significantly increased the weight of my camper. I ensured my vehicle could safely tow the new weight.
- Sealing and Weatherproofing: Leaks can be a common issue if not properly addressed. I paid close attention to sealing and weatherproofing to keep my camper dry.
- Ventilation: Adequate ventilation is crucial to prevent condensation and maintain air quality. I planned for vents and windows accordingly.
- Aesthetics: I made sure my hardside conversion didn’t compromise the visual appeal of my camper.
Pros of My Hardside Camper Conversion
- Improved Weather Resistance: My hardside camper can handle a wider range of weather conditions, keeping me dry and comfortable.
- Enhanced Security: I enjoy increased security and privacy for peace of mind during my adventures.
- Extended Camping Season: I can now enjoy camping in more seasons with better insulation and weatherproofing.
- Greater Comfort: My hardside camper provides better insulation, noise reduction, and a more comfortable sleeping experience.
Cons of My Hardside Camper Conversion
- Cost: Converting my pop-up camper to a hardside was expensive, especially since I wasn’t initially proficient in DIY projects.
- Weight: The added materials significantly increased the weight of my camper, requiring a suitable tow vehicle.
- Time-Consuming: The conversion was a time-consuming project, which may not be feasible for those with busy schedules.
- Aesthetic Changes: Some may find that the appearance of the hardside camper differs from their ideal camping aesthetic.
Alternatives to Converting a Pop-Up Camper to Hardside
If you’re hesitant about converting your pop-up camper, consider these alternatives:
- Purchase a Hardside Camper: If your budget allows, invest in a pre-built hardside camper with all the features you desire.
- Rent a Hardside Camper: Renting is an excellent option for those who only occasionally need the added comfort of a hardside camper.
- Custom Hardside Camper: Order a custom-built hardside camper from a manufacturer, tailoring it to your specific needs and preferences.
Why I Converted My Pop-Up Camper to a Hardside
The Need for a Sturdier Shelter
Pop-up campers, with their canvas walls, are fantastic for fair-weather camping, but they may not fare well against harsh weather conditions. When I encountered heavy rain or wind during my trips, it often left me feeling vulnerable and exposed. Converting to a hardside offered a solution, providing a sturdier shelter that could withstand various weather conditions.
Enhanced Security and Privacy
Privacy and security are essential when camping. While pop-up campers can offer a reasonable level of privacy, they are still susceptible to unwelcome guests, whether it’s curious wildlife or fellow campers. Hardside campers provide a more secure and private environment.
Additional Comfort
The comfort of a hardside camper is unmatched. I now enjoy better insulation from temperature extremes, improved noise reduction, and a more comfortable sleeping experience. After a few seasons of camping, I yearned for these upgrades.
Extended Camping Season
With the added insulation and weatherproofing that hardside campers offer, my camping season can be extended. I’m better prepared for both early spring and late fall adventures.
Frequently Asked Questions
How much does it cost to convert a pop-up camper to a hardside?
The cost varies widely depending on factors such as materials used, camper size, and your DIY skills. It can range from a few thousand dollars to over $10,000.
Can I convert any pop-up camper to a hardside?
In theory, you can convert most pop-up campers, but some are better suited for it than others. Smaller campers with simpler designs are often easier to convert.
How long does the conversion process take?
The duration varies based on the complexity of your project, your skills, and the availability of tools and materials. It can take several weeks to several months.
Do I need any special skills to complete the conversion?
While basic DIY skills are beneficial, you can learn many of the necessary skills as you go. Patience and careful planning are more critical than advanced skills.
Can I use my converted hardside camper in extreme weather conditions?
Your hardside camper should be better equipped to handle adverse weather, but it’s essential to avoid extreme conditions and use common sense when camping.

