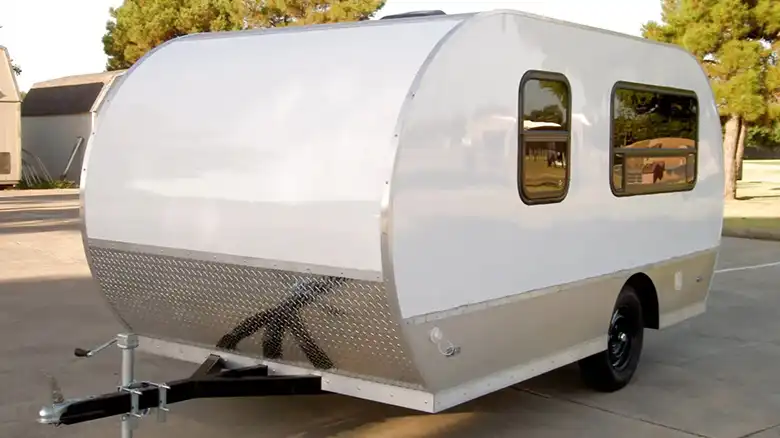
Starcraft campers are a popular brand of recreational vehicles prized for their durability and reliability. These campers rely on propane furnaces to provide heat and hot water when not connected to external power sources. Propane is stored in tanks and distributed via lines into the RV, powering stoves, fridges, and furnaces.
The furnace combusts propane to generate heat. However, incomplete combustion can leak carbon monoxide, a colorless, odorless gas that can be fatal in enclosed spaces. It’s critical to inspect and maintain furnaces annually. Crack windows for ventilation, install CO detectors, and never idle a camper with the furnace on for long periods.
As winter approaches, Starcraft owners like myself are eager to turn on the heat and enjoy the comforts of “glamping.” With basic precautions, these furnaces provide safe, convenient warmth. I look forward to many more seasons using my trusty camper to reveal nature while protected from the elements. The open road calls!
Step 1: Finding and Setting Up the Thermostat
Before turning on the furnace in a Starcraft camper, you first need to locate the thermostat that controls it. This small but important device acts as the command center for the heating system.
A. Typically Found on a Wall Towards the Front of the Camper
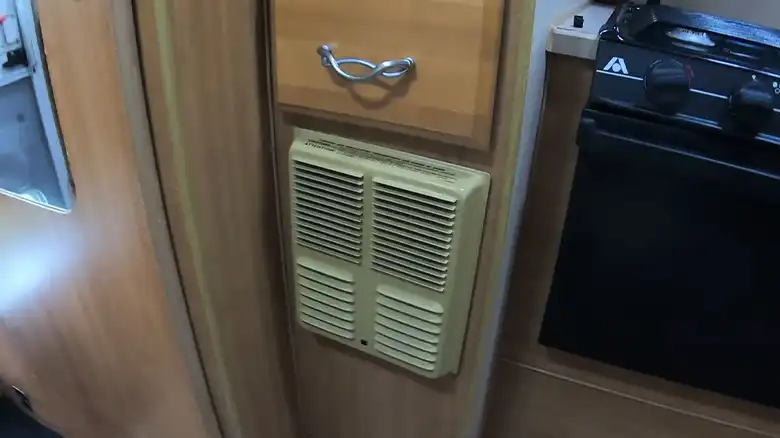
In most Starcraft models, the thermostat is mounted on the wall in the front half of the RV, usually near the main living area. This allows easy access to control the temperature where occupants spend much of their time.
B. Maybe a Basic On/Off Dial or Temperature Controls
Thermostats can vary from a simple on/off switch to more advanced units with temperature dials or digital displays. Basic dial thermostats allow setting a target temperature, automatically cycling the furnace to maintain this heat level.
C. Some Models Have Digital Touchscreen Thermostats
Higher-end Starcraft campers may come equipped with fancy digital touchscreen thermostats. These offer the same temperature control as dial types but with a sleek, modern interface and features like programmable schedules.
The thermostat type and location may differ across Starcraft models but generally can be found quickly near the front of the living space. With the temperature controller located, you can then power the furnace and begin heating the camper interior.
Step 2: Starting the Heat in Your Starcraft Camper
Once the thermostat is located, it’s time to fire up the furnace and start heating the camper interior. Starcraft RVs utilize either propane or electric heating systems.
A. Propane Furnace Operation
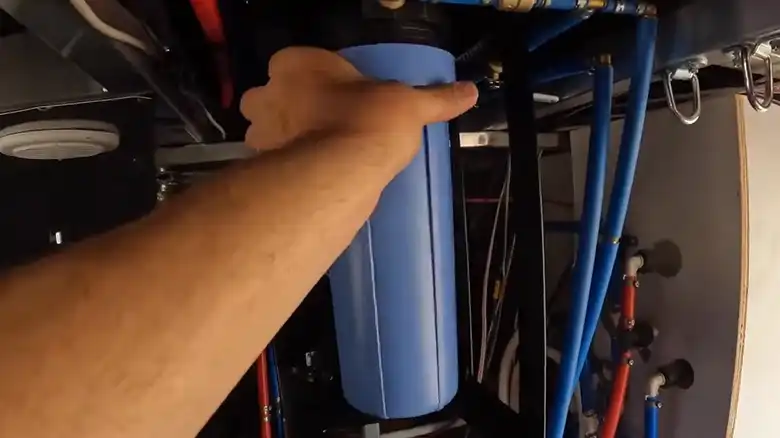
- Propane furnaces are commonly used for heating and hot water in Starcraft campers. The first step is to verify the propane tank is adequately filled and all connection lines are secure.
- Though many furnaces have auto-ignition, some RV models require manually lighting the pilot light to operate. Locate the small button or switch to ignite the pilot.
- Finally, rotate the thermostat dial or adjust the temperature setting upwards to the desired interior temperature. The furnace will automatically turn on and cycle to reach and maintain this heat level.
- Monitor the furnace and propane tank to ensure proper functioning. Take care when dealing with propane systems and refer to product manuals for proper use. Allow sufficient time for camper air and surfaces to heat to comfortable levels.
B. Electric heaters
- Some Starcraft camper models utilize electric heating instead of or in addition to propane furnaces. These electric heaters offer simple and direct temperature control. First, adjust the thermostat dial to the desired interior temperature setting. The electric heating elements will activate and cycle on/off automatically to achieve and maintain this preset level.
- If the electric heat does not respond after adjusting the thermostat: double-check that the RV is connected to a power supply, and inspect the circuit breaker box. Flip any tripped breakers fully to the “off” position then back on again to restore power flow to the electric heater. Circuit breakers commonly trip due to temporary power spikes or overload from operating too many appliances simultaneously. With power restored, the electric heating can be activated via the interior thermostat.
C. Considerations
- When activating the furnace, allow sufficient time for the camper’s interior air and surfaces to reach the set temperature. Depending on the conditions, heating the entire interior to a comfortable level may take 30 minutes or longer. Be patient and let the thermostat cycle the furnace automatically.
- Balance the power demands of the furnace with other major appliances like hot water heaters, large microwaves/ovens, or roof ACs. Simultaneous high electrical loads can trip breakers. For propane furnaces, check the tank fuel gauge occasionally to ensure adequate propane. Tanks depleted faster in cold weather and may need to be swapped more often.
- Proper ventilation is also key when the furnace runs. Keep a roof vent or window slightly open to maintain airflow and oxygen levels within the camper interior. Follow the manufacturer’s safety guidance when operating RV heating systems. Allowing time for full heat distribution makes for a much more comfortable camping experience.
D. Adjusting Vents
- Starcraft campers feature ceiling vents that can be used to better distribute heat when the furnace is running. Open or close built-in vents as needed to channel airflow towards or away from certain areas.
- For example, open vents above the main living space or at night above the bed being used. Close vents in unused areas like storage compartments to conserve heat efficiency. Rotate adjustable vents to face the desired direction of airflow.
- Carefully directing the vent position allows heat to be focused where occupants are located, rather than wasting energy heating empty spaces. Dialing in vent direction and closure takes some trial and error to find the optimum setup. Properly positioned vents make the furnace more efficient and effective for a cozier interior environment. Monitoring different parts of the camper for even temperature distribution is recommended.
Both propane and electric furnaces rely on the thermostat to maintain the set temperature. Monitoring connected power sources like propane tanks or electrical drawers is recommended. Strategically placing vents can improve heat distribution.
Alternative Steps to Safely Start Your Furnace
– Ensure propane tank filled and connected
– Flip the switch to the “on” position if present on the furnace
– Set thermostat to temp above interior temp (try 90°F)
– Listen for the fan and auto igniter clicking
– Heat should begin flowing within 30 seconds
– If strong propane odor, turn the system off immediately
Essential Safety Checks for Your Starcraft Camper’s Furnace
Operating an RV furnace safely requires attention and care, especially with propane systems. Follow this list of checks each time you use the furnace to protect yourself and your travel companions:
Confirm carbon monoxide detectors are working
– Ensure the CO monitor has good batteries and is placed properly
– Test it manually if possible per device instructions
– Replace if over 5 years old as sensor reliability declines with age
Never cover or block furnace vents
– Vents provide airflow and vent exhaust – keep clear
– Ensure baggage, furniture, curtains, etc do not obstruct vents
– Proper ventilation is crucial for safe operation
Closely follow all furnace operating guidance
– Review the manual to understand proper use procedures
– Check warning labels on the furnace body
– Ignoring instructions risks fire, explosion, injury, or death
Staying alert and taking basic safety measures go a long way to preventing issues. Allowing everyone to relax and remain healthy means more memories made by exploring the beautiful surroundings!
Wrapping Up
To easily turn on the heat, find the thermostat, check power, light pilot if needed, set temp, give time to warm, position vents, monitor fuel gauge, check breakers. Critical safety includes functional carbon monoxide detectors, unblocked vents, following instructions, and no propane leaks. Staying alert to dangers and systematically starting the furnace enables enjoying toasty nights in the camper.