Summer is right around the corner, which means RV camping trips and weekend getaways to beautiful destinations. However, all the appliances and devices in your RV require ample electrical power to operate optimally. This makes installing a dedicated high-power NEMA 14-30 outlet critical.
A NEMA 14-30 outlet goes a long way in delivering clean and consistent power to your motorhome. It completes all your charging needs seamlessly while you are parked at your residence. This guide covers everything related to putting in a fully functional NEMA 14-30 receptacle for powering your recreational vehicle.

Understanding the NEMA 14-30 Outlet Standard for RVs
The NEMA 14-30 is a type of 240-volt electric outlet that features a grounded and polarized 30-amp plug. It comes with a 120/240-volt power delivery ability through three wires – two ungrounded hot leads and one grounded neutral. The NEMA 14 refers to the plug standard published by the National Electrical Manufacturers Association (NEMA). The number 30 denotes the maximum amps this receptacle can deliver through each hot pin.
Since the NEMA 14-30 can supply 240 volts at high amperage, it is commonly used for powering large home appliances such as electric ovens/stoves, well pumps, AC condenser units, and vehicle chargers or converters.
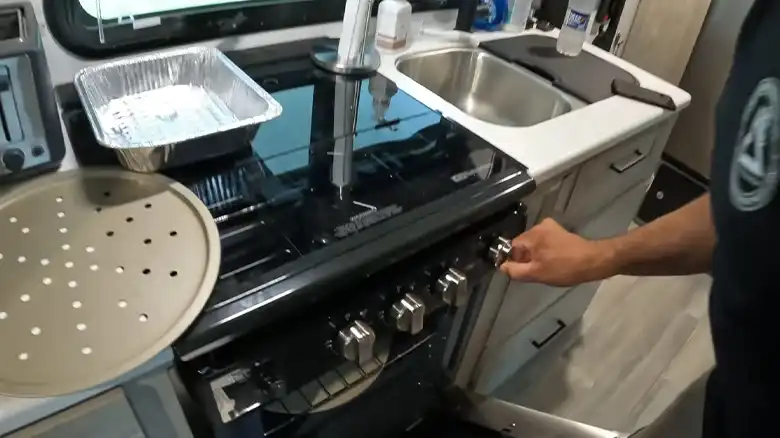
For RVs, installing a dedicated 14-30 receptacle allows the owner to plug in the motorhome’s cord and run all onboard equipment and devices. It adequately meets the electrical necessities – AC, fridge, battery charging, water heating, and others.
Key Features of Wiring a NEMA 14-30 Outlet
The critical specification of a NEMA 14-30 outlet is the dedicated neutral and ground wires for delivering clean electricity. The receptacle features,
Hot Wires: Two hot wires, typically red and black, carry the electrical current from the circuit breaker to the outlet.
Neutral: The neutral wire, usually white, serves as the return path for the electrical current.
Ground: The ground wire, typically green or bare copper, provides a safety path for any stray electrical currents.
It also comes with durability for outdoor and indoor installation and has weather/water-resistant covers for protection.
Additionally, the outlet houses stainless steel mounting plates with a powder coating of weather-resistant epoxy paint. This structure and design make 14-30 outlets perfect for RV installations.
Planning Your NEMA 14-30 Outlet Installation
Putting in a NEMA 14-30 RV power outlet requires careful planning beforehand regarding the equipment, site considerations, and electrical requirements of the RV itself.
The materials needed include a 4-wire cable consisting of 6/3 copper wire with ground to ensure the cable ampacity meets the 30-amp rating. Make sure that you are using at least 10awg wire. An appropriate metallic conduit rated for outdoor installation is required to house the wiring. A 30A, double-pole, 240V breaker will connect to the supply panel to deliver power to the outlet. Finally, a weatherproof NEMA 14-30 receptacle rated for outdoor installation will be wired to accept the RV connection.
When determining the installation location, the site should be as close to the main power source and panel as possible to minimize excessive cable and conduit lengths. It should be easily accessible to comfortably reach the receptacle to plug and unplug the RV cord. It should be placed in a covered location protected from direct exposure to rain. The best places are typically at the parking site where the RV will sit or in an adjacent electrical room if available.
The electrical requirements of the RV itself will determine the size of the breaker and the rating of the wiring and outlet. Adding up the nameplate amperages of all the appliances and devices on the RV will provide the minimum supply capability needed. Longer cords in the range of 25 to 50 ft will likely be needed to neatly route between the outlet and RV. Surge protecting power strips is a wise investment to safeguard electronics in the RV from power fluctuations.
With the equipment considerations ironed out and the installation site selected, the outlet can now be wired.
Step-by-Step Guide to Wiring the NEMA 14-30 Outlet
The process of connecting the receptacle wires involves safely turning off the main power supply at the breaker panel before making any connections. The route for running the wires through conduits should be predetermined to reach between the breaker panel and outlet location.
Step 1 – Turn off power
Shut off the main supply through circuit breakers before wiring.
Step 2 – Run cable lines through the conduit
Determine the wiring route from breaker to outlet. Fish the cables through metallic conduits for safety.
Step 3 – Connect wires to the outlet
Refer to the wiring diagram. Connect the ground, neutral, and two hot wires to the terminal screws.
Step 4 – Connect outlet to 50A breaker
Link the cable entering the receptacle to a 50A double-pole breaker in the service panel.
Step 5 – Energize and test outlet
Turn the power back on and ensure the outlet works correctly using a multimeter.
Detailed NEMA 14-30 Outlet Wiring Diagram
Here is how the internals of a NEMA 14-30 outlet are wired:
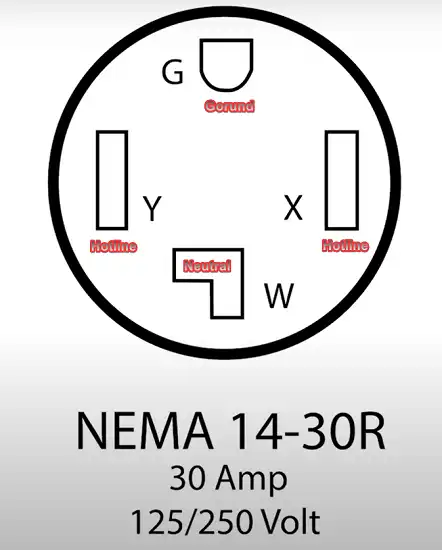
Hot wires carry 120V each from the 50A breaker and terminate onto the vertical pins.
The neutral connects to the horizontal pin and completes the 240V supply at the outlet.
The ground wire bonds the receptacle to the main panel ground through the conduit.
The breaker feeds electricity through hot wires and also protects against overloads.
Use this reference diagram during the receptacle wiring process.
Using the NEMA 14-30 Outlet for RV Power
With a fully working NEMA 14-30 outlet installed, an outdoor-rated 30-amp extension cord will be required to deliver the power to the RV safely. Using an adapter with the proper NEMA 14-30P plug for the outlet end and a plug style that matches the RV electrical inlet on the other end will allow seamless power transfer. The cord gauge rating must also match the outlet amperage to safely deliver that load.
Care should be taken when connecting to the RV to avoid damaging the equipment or cord. The entire cord length should be neatly extended before plugging into the outlet, taking care not to violently pull cords taut. When plugging into the outlet, the ground pin should align correctly with the receptacle holes and the plug should sit flush with proper engagement. Any exposed terminal contacts should be wrapped with weatherproof tape as an additional safety measure.
Before energizing the RV components, use a multimeter to check for any wiring faults between the outlet and the RV plug. With everything appearing correctly connected, begin carefully switching on appliances and devices, monitoring the supply panel for any unexpected breaker tripping due to overload.
Periodically inspecting the receptacle wiring will ensure long-term durability. Check for any physical cracks or damage to the outlet, make sure covers are tightly secured, check ground continuity, and contact an electrician at any sign of burn marks or abnormal smells indicating a larger electrical issue.
Exploring Alternative Power Options for RVs
Here are other ways to power your recreational vehicle if installing a dedicated high-power outlet seems expensive/tedious:
30/20A outlets
Basic 120V outlets can still power smaller RVs with moderate electrical loads. Use appropriate rating adapter cords.
50A outlets
Two-pole outlets allow a high 50-amp supply capability sufficient for larger motorhomes.
Power pedestals
Special sockets provide power, cable TV, Ethernet, water, and even sewage disposal. Easily installed outdoors.
Generators
Gasoline-powered portable inverter generators produce clean AC power for off-grid RV usage.
Evaluate your motorhome electricity necessities and appliance consumption before deciding the optimal power solution.
Final Thoughts
Putting in a 240V, 30-amp NEMA 14-30 receptacle to power RVs is a worthwhile investment. Follow the equipment considerations, precise wiring, safety practices, and maintenance tips outlined in this guide for a long-lasting installation. With the ability to draw clean and consistent electricity, you can now comfortably take your motorhome on those much-awaited camping getaways.
I hope this article helped you understand every crucial detail related to planning and installing a NEMA 14-30 outlet for your recreational vehicle. Feel free to drop any queries in the comments section below.
Happy and safe camping trips!