Changing a tire on a regular car is one thing, but when it comes to a double-axle travel trailer, things can get a bit more complicated. In this article, I’ll take you through the process of changing a tire on a double-axle travel trailer and highlight the key differences from changing a tire on a regular vehicle.
Key Differences in Changing Double Axle Trailer Tires
Before we dive into the details, let’s address the primary question: Is changing a tire on a double axle travel trailer any different from changing a tire on a regular vehicle? The answer is yes, and there are a few key differences to be aware of:
Size and Weight: Double axle travel trailers are much larger and heavier than regular cars. This means the tires are bigger and heavier as well. You’ll need to use specialized tools and equipment to handle the weight.
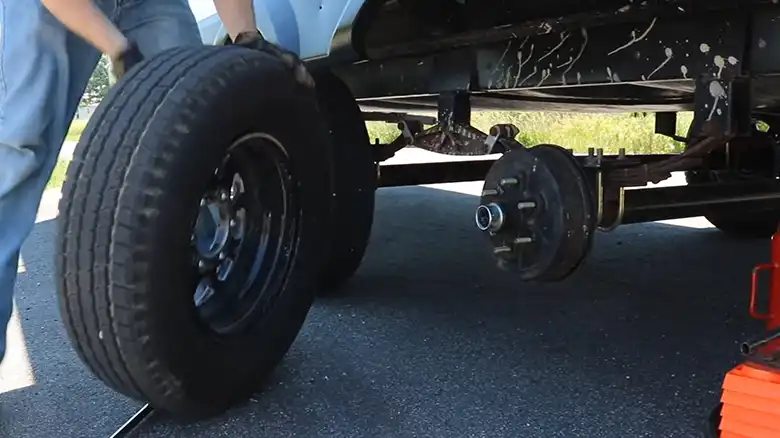
Double Axles: As the name suggests, double axle trailers have two axles, each with one or more tires. This means you’ll be dealing with multiple tires when changing one, which adds complexity to the process.
Height and Accessibility: Travel trailers sit higher off the ground than regular cars. This requires a different approach when it comes to jacking up the trailer and accessing the tires.
Simple Steps to Replace a Double Axle Trailer Tire
Now, let’s get into the nitty-gritty of changing a tire on a double axle travel trailer. I’ll walk you through the step-by-step process:
Step 1: Safety First
Before you begin, ensure that your travel trailer is parked on a level surface and that all passengers have exited the vehicle. Engage the trailer’s emergency brake to prevent it from rolling.
Step 2: Gather Your Tools
Collect all the tools and equipment listed above and place them within easy reach.
Step 3: Locate the Flat Tire
Identify the tire that needs to be changed. It’s crucial to know which tire is flat so you can jack up the right axle.
Step 4: Chock the Wheels
Place wheel chocks on the tires opposite to the flat one to prevent the trailer from moving during the process.
Step 5: Loosen the Lug Nuts
Using the lug wrench, slightly loosen the lug nuts on the flat tire. Don’t remove them entirely at this stage.
Step 6: Jack Up the Trailer
Position the hydraulic jack under the frame of the trailer, near the flat tire. Pump the jack to raise the trailer off the ground. Ensure it’s stable and secure before continuing.
Step 7: Remove the Lug Nuts
Now, you can fully remove the loosened lug nuts and take off the flat tire. Place it aside.
Step 8: Install the Spare Tire
Mount the spare tire onto the wheel hub and hand-tighten the lug nuts as much as possible.
Step 9: Lower the Trailer
Using the hydraulic jack, gently lower the trailer until the spare tire makes contact with the ground.
Step 10: Tighten the Lug Nuts
Now, use the lug wrench to securely tighten the lug nuts in a crisscross pattern to ensure even pressure.
Step 11: Double-Check Everything
Once the lug nuts are properly tightened, double-check your work. Ensure that all tools and the flat tire are safely stowed, and remove the wheel chocks.
Essential Tools for Safe Tire Changing
To change a tire on a double axle travel trailer, you’ll need a specific set of tools and equipment. Here’s a list of what you’ll require:
Spare Tire: Make sure you have a spare tire in good condition that matches the size of the tires on your travel trailer.
Jack: A heavy-duty hydraulic jack designed to lift the weight of your trailer is essential. It should have the capacity to handle the load.
Lug Wrench: A high-quality lug wrench with the appropriate socket size for your trailer’s lug nuts is necessary.
Chocks: Wheel chocks are used to prevent the trailer from rolling while you work. Safety is paramount in this process.
Wooden Blocks: These can be used to provide extra stability when jacking up the trailer and to ensure it is level.
Gloves and Safety Gear: Safety should always be a priority. Gloves, safety goggles, and reflective vests are essential when working on the side of the road.
Flashlight: You may need it if you find yourself changing a tire in low-light conditions.
Pro Tips for Smooth and Safe Tire Replacement
Regular Maintenance: Always maintain your travel trailer tires in good condition. Check their pressure before each trip and inspect them for signs of wear or damage.
Practice in a Controlled Environment: If you’re new to changing tires on a double axle travel trailer, practice the process in a controlled environment to become familiar with it.
Roadside Assistance: Consider having a roadside assistance plan in case you encounter any issues you can’t handle yourself.
FAQs About Trailer Tires: Inspection, Jacks, and Replacements
How often should I inspect my travel trailer tires?
Regularly inspect your trailer tires before every trip and consider a more thorough inspection every 3,000 miles or at least annually.
Can I use a car jack to lift the trailer?
No, car jacks are not designed to handle the weight of a travel trailer. Use a heavy-duty hydraulic jack suitable for your trailer’s weight.
Do I need to replace all tires if one goes flat?
It’s generally best to replace all tires on an axle to ensure even wear. However, if the other tires are still in good condition, you can replace just the flat one.
Sum Up
Changing a tire on a double-axle travel trailer may seem daunting at first, but with the right tools, knowledge, and practice, it becomes a manageable task. Remember that safety is paramount, and always have a contingency plan, like a roadside assistance service, in case things go awry. Being prepared and confident in your ability to handle such situations will make your travel adventures all the more enjoyable. Safe travels!