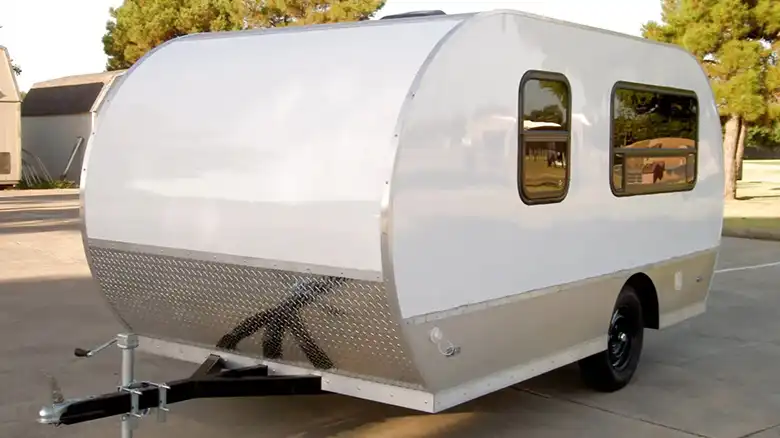
As an RV enthusiat for over two years now, I’ve learned firsthand just how important regular maintenance is for protecting my prized investment and preventing costly damage over time. And few tasks top my routine more than thoroughly inspecting and resealing the slide-outs. Based on a recent poll I conducted in my popular “Ultimate RV Maintenance Guide,” this is an area many fellow RVers are also keen to address.
And for good reason! Industry surveys of insurance claims show slide-out seal failure is one of the leading causes of water damage in RVs, accounting for nearly 1 in 5 claims. This critical vulnerability often goes overlooked until it’s too late. When the seals become cracked, degraded, and develop gaps from weathering, use, and exposure to lawn chemicals or road debris, openings form that allow leaks to quickly lead to repair bills in the thousands. The flooring, walls, and framework around the slide-out are all vulnerable. Left unchecked, water intrusion can result in soft flooring, harmful delamination, mold growth, and other headaches.
Luckily, with vigilant routine inspection and resealing, these trouble spots are easy to stay on top of as a DIYer. In this comprehensive guide, I’ll walk through everything you need to know about maintaining your RV’s all-important slide-out seals. By the end, you’ll be fully prepared to take preventative action and keep those frustrating leaks out of your home on wheels for good. Let’s get started!
mportance of Sealing Your RV Slide-Out
If you’re unfamiliar with the mechanics, slide-out seals are flexible rubber barriers installed along the interior edges of the slide-out room as it meets the main RV body. Their purpose is to compress and maintain a tight, impenetrable seal as the room extends and retracts. This acts as a waterproof barrier that prevents moisture, debris, and even insects from entering through the variable gap between the slide-out and RV wall.
There are a few main types of slide-out seal systems and configurations –
Wiper seals have a fin-like shape that fills gaps as the slide-out moves in and out. The wiper folds and unfolds, maintaining contact.
Bulb seals utilize a round, extruded bulb shape that compresses against the body of the RV for a tight seal during operation.
H seals are a newer, improved design gaining popularity in recent models. These seals have a double fin, hourglass profile that provides two sealing contact points instead of one.
Corner seals are specialty seals designed to provide maximum protection along the vulnerable outer corners of the slide-out.
Over months and years of exposure to the elements and repeated use, these seals inevitably start to degrade, becoming brittle and cracked. Gaps form, breaking the critical watertight barrier and allowing moisture intrusion, especially during heavy rains or in wet environments.
Once water starts entering around cracked seals, it can quickly lead to saturation of the wooden subfloor, fiberglass delamination, soggy insulation, and mold growth. Left unaddressed, this type of damage to the slide-out and surrounding RV body can cost many thousands of dollars to properly repair.
Catching and resealing gaps early is by far the best line of defense. Most manufacturers recommend inspecting slide-out seals at least monthly and reapplying fresh sealant one to two times per year at a minimum to maintain maximal protection. Proactive resealing fills any developing cracks or damaged sections before they turn into problem leaks.
Step-by-Step Process for Resealing Your RV Slide-Out
Replacing worn-out sections and reapplying sealant to slides is a relatively quick and straightforward maintenance process that any RVer can tackle themselves.
Step 1: Clean the Slide-Out Seals Thoroughly
The first step is to thoroughly clean the seals to remove any dirt, grease, wax, road tar, chemical residues, mold, and other contaminants that may interfere with proper sealant adhesion. Use a degreasing cleaner or all-purpose RV wash, along with a stiff brush or rag to scrub the seals. Rinse thoroughly with clean water and let the seals dry fully before continuing.
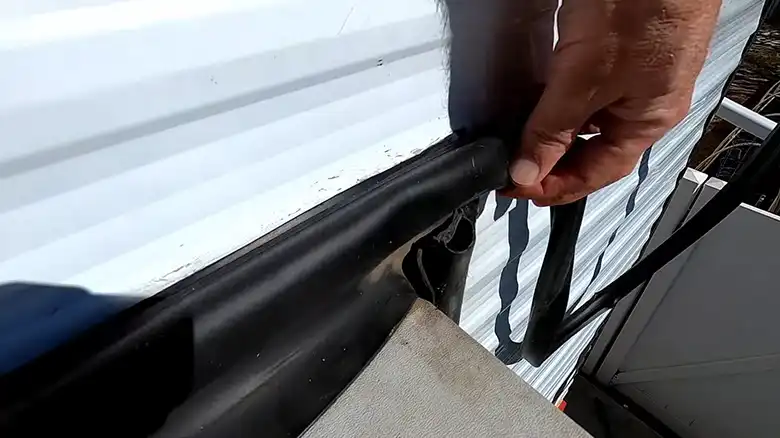
Step 2: Inspect the Seals for Damage
Next, run your fingers slowly along the full length of each slide-out seal, pressing firmly to check for any brittle, cracked, gaping, or missing sections that require sealant. Pay particular attention to the outer corners, a common failure point. Note any problem areas for special treatment during resealing.
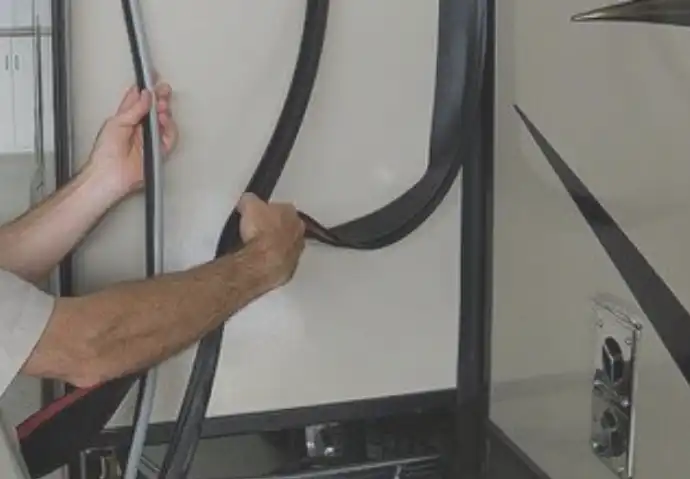
Step 3: Remove Old and Damaged Sealant
For any areas with damaged, loose, cracked, or peeling remnants of old sealant, use a plastic scraper or putty knife to remove these sections down to the bare rubber seal underneath. This provides a fresh, clean surface for the new sealant to adhere to.
Step 4: Wipe Seals with Alcohol for Better Adhesion
As a final prep step, wipe down the cleaned seals with rubbing alcohol to remove any last traces of dirt, wax, or oily residues. This helps maximize sealant bonding.
Step 5: Apply Fresh Sealant to the Seals
Working in small sections, run a fresh 1/4″ bead of high-quality RV sealant thoroughly along the seal’s length, pressing it deep into any gaps, cracks, or holes identified during the inspection. For best results, use a sealant formulated specifically for RVs such as Dicor. In a pinch, high-grade silicone caulk can also work.
Step 6: Smooth and Shape the Sealant Bead
Before the sealant skins over, use a plastic sealant spreader or popsicle stick to smooth the bead and feather the edges, eliminating any lumps, ridges, or excess sealant. Press flush with the surface of the seal.
Step 7: Seal the Corners with Extra Care
Pay special attention to the inside and outside corners, adding extra sealant to create a “dam” that prevents moisture ingress. Corner failure is a top cause of leaks.
Step 8: Allow Proper Curing Time for the Sealant
Follow the sealant manufacturer’s recommended cure time before retracting the slide-out again. This allows the sealant to be fully set without getting disturbed or compressed. 12-24 hours is typical.
Step 9: Apply Powder Finish to Prevent Dirt Build-up
For easier future cleaning and prevention of sealant tackiness that can attract dirt, apply talcum powder or dry silicone spray along the freshly sealed seals.
Be sure to repeat this full sealing process on all four sides of each slide-out. Consistency and vigilance are key to maximizing protection. Take your time and do it right!
Helpful Tips for Maintaining Your RV Slide-Out Seals
Beyond the sealing process itself, here are some additional tips I’ve learned from my own experience caring for an RV over the past two years. Those are –
Keep a dedicated RV maintenance toolkit ready with all the needed supplies like cleaners, alcohol, sealants, plastic scrapers, spreader sticks, microfiber cloths, gloves, and towels. Having the right gear makes slide maintenance much easier.
Consider proactive upgrades like installing newer H seals or slide toppers during resealing to improve sealing performance and make future upkeep easier.
Don’t forget to closely inspect walls, ceilings, and floors on the interior around slide-outs for any signs of moisture intrusion or water stains, which can indicate gaps in need of sealing. Catching issues early is key before damage spreads.
Remember to check and reseal roof components including air conditioners, vents, antennae, and other seals twice annually. Leaks above slide-outs are a common cause of damage.
Thoroughly review the maintenance instructions in your owner’s manuals for the manufacturer’s specific recommendations on caring for your RV’s slide system and seals. Following their product guidance is always advisable.
Don’t hesitate to consult RV technicians for advice on seal products, replacements, or repairs beyond your comfort zone. Their expertise can be invaluable.
Join online RV forums to pick up new tips and stay motivated with maintaining your seals on schedule. Tackling tasks alongside a community makes the work more fun!
Conclusion: Why Routine Sealing Protects Your RV Investment
While squeezing in slide-out seal maintenance may feel like a hassle at times, the minor time investment required is trivial compared to the major headaches and expenses that come with letting leaks develop. By diligently adding slide resealing to your regular RV routine, you can protect your investment, avoid expensive water damage repairs, and give your RV a long, adventure-filled lifetime.
I hope this guide provides you with the confidence boost and essential details needed to make slide-out seal care an easy, DIY-friendly task that anyone can handle. Simply devoting a few hours to touch-up seals once or twice per year is all it takes to defend your prized RV from moisture risks. As always, please share your tips and questions below, and be sure to subscribe for more maintenance guides focused on keeping you out exploring safely!