
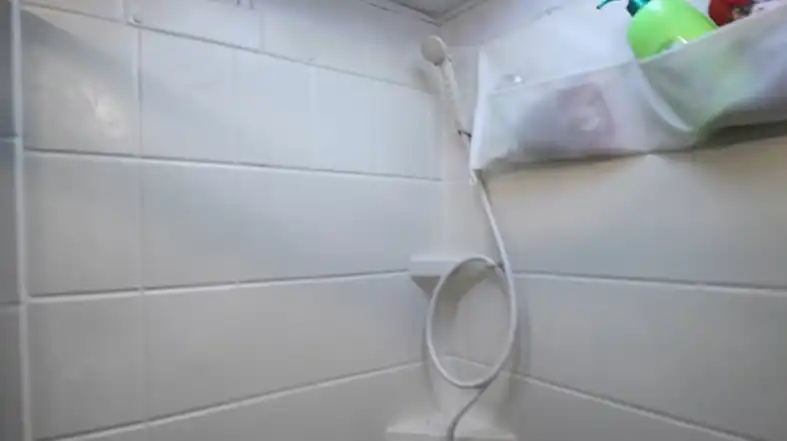
Choosing the right material for RV shower walls can be tricky. You want something durable, waterproof, and easy to clean. But RVs also require lightweight and affordable options that can withstand movement and vibration. The shower walls also need to allow for occasional access to plumbing and wall cavities for maintenance and repairs.
With so many factors to balance, what are the best options for RV shower walls? Here is an in-depth look at the most popular materials, including the pros and cons of each.
Prefabricated Shower Surrounds: Pros and Cons
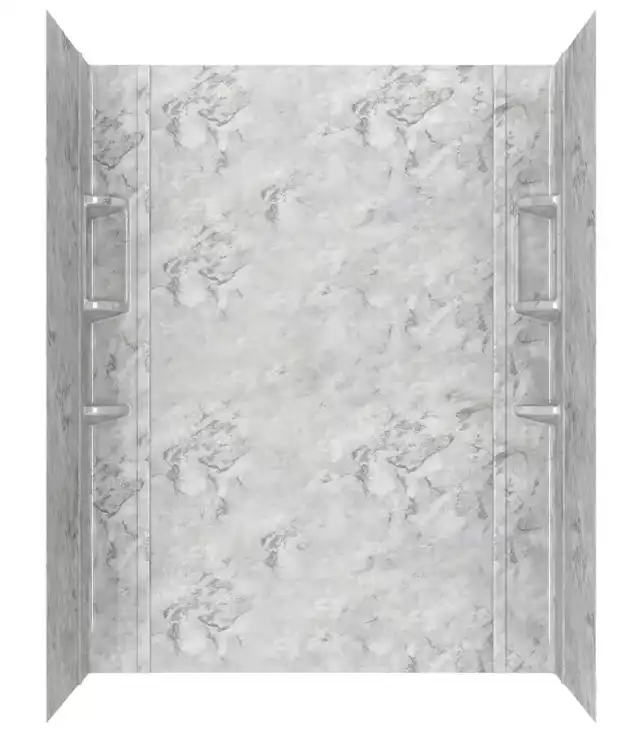
Prefabricated shower surrounds are complete wall units that are manufactured offsite and installed as a single component. They come in many styles, colors, and materials such as fiberglass, acrylic, polystyrene, and cultured marble.
The Advantages of Prefabricated Surrounds
Prefabricated shower surrounds offer several advantages that make them a top choice for many RVers. First, they provide an all-in-one, easy installation option. The entire surround is manufactured offsite to exact sizing and then shipped onsite ready to install. RV owners or contractors simply secure the lightweight surround directly to the wall studs with screws. There is no complex tile work or plumbing involved.
In addition to easy installation, the durable composite materials commonly used on prefabricated surrounds are designed to last for many years. Fiberglass, acrylic, and cultured marble withstand humidity, leaks, and constant use without showing wear and tear. They resist stains, mold, and mildew that can develop in the moist RV shower environment.
Prefabricated surrounds also provide a watertight seal around the entire shower enclosure. This protects walls from moisture damage and leaks that could cause dangerous mold and deteriorate drywall or wood over time. The minimal seams on a prefabricated unit are sealed at the factory, so there are no grout lines or tile edges to regrout.
Finally, the smooth non-porous finishes are easy to keep clean. A quick wipe-down prevents soap scum build-up and hard water stains. The glossy material allows water and grime to simply bead up and slide off the walls. Ongoing maintenance is minimal compared to tile or other surfaces.
Considerations When Using Prefab Surrounds
There are a few drawbacks to weigh when deciding if a prefabricated surround is the right choice for your RV shower remodel. The main consideration is the higher upfront cost compared to installing separate shower walls and surround materials. Pre-made fiberglass or acrylic surrounds cost over $200 on average.
Accessing the walls or plumbing behind a surround also becomes more difficult. The entire surround has to be detached from the studs and removed to get behind it, which can mean unsealing, replacing, and resealing it later. Tile, paint, or panels could simply be replaced in one section.
Limited sizing is another downside of prefab surrounds. Although custom ordering is sometimes available, surrounds mainly come in standard sizes. The RV shower space may need modifying with filler panels or framing adjustments to accommodate a surround.
Lastly, the seams and joints on a surround may eventually leak over time. Silicone or other caulking needs to be inspected and redone periodically to maintain waterproofing as the RV shifts slightly with use.
Peel-and-Stick Tiles: Easy Installation and Design Flexibility

Peel-and-stick tiles provide an easy upgrade to existing RV shower walls. The self-adhesive backing allows anyone to install them quickly without grout or specialized tools.
The Convenience of Peel-and-Stick Installation
One of the biggest advantages of peel-and-stick tiles is the super fast and easy DIY installation. Anyone can upgrade their RV shower on a weekend with just a few affordable tools. Each lightweight tile has an adhesive backing that is simply peeled off and firmly pressed to the cleaned shower wall surface.
No need to haul out heavy bags of mortar or grout or learn specialized techniques like aligning and spacing rows of tile. Just stick each tile right where you want it, trim any edges, and the job is done. The convenience factor makes it an ideal option for RV owners who want to renovate showers themselves without a big hassle or mess.
Endless Design Options with Peel-and-Stick
In addition to easy installation, another advantage of peel-and-stick tiles is the nearly endless number of design options. Tile materials like vinyl, plastic, fiberglass, and metal come in every color, shape, size, and pattern imaginable.
RV owners can choose complementary colors to match their existing decor or make a bold statement with vibrant hues. Mix and match sizes like large rectangles offset by mosaics or skinnier trim pieces. Opt for a natural stone or wood look. Even metallics tiles offer a glamorous modern vibe. With hundreds of choices, tile stickers can achieve any aesthetic.
The variety also allows for creating custom designs like alternating colors in rows or designing patterns. Peel-and-stick tiles provide complete creative freedom.
Potential Issues with Peel-and-Stick Tiles
However, there are a few disadvantages to consider with peel-and-stick tiles in RV showers. While durable, they do not provide the same lifelong performance as grouted ceramic or natural stone tiles. The adhesive can fail over time, causing tiles to fall off, especially in humid RV shower conditions.
Another downside is that they may allow water intrusion, particularly around the tile edges. Careful sealing is required, and mildew can grow if moisture gets behind the tiles. The seams are also prone to gapping as the RV shifts and moves over time. Resealing and replacing fallen tiles is necessary.
Finally, some RV owners dislike the more temporary, unfinished look of groutless tile installation. The visible seams and edges give it a peel-and-stick appearance instead of a polished custom tile job. For a more upscale aesthetic, grouted tiles may be preferable.
Why Fiberglass Panels are a Great Option for RV Showers?
Fiberglass reinforced plastic (FRP) sheets provide a glossy, easy-to-clean surface for RV shower walls. These durable panels are waterproof and resist moisture damage.
Why Fiberglass is an Ideal RV Shower Material
The lightweight yet durable properties of fiberglass make it a top choice for RV shower wall upgrades. Fiberglass panels are reinforced with strands of glass to create a material that is extremely strong but still very lightweight – an essential quality for motorhome use.
At the same time, solid fiberglass is completely waterproof. The non-porous surface allows water to bead up and run off easily without being absorbed. Fiberglass stands up to humidity, leaks, and constant exposure to water without warping or degrading over time like wood or drywall would. These moisture-resistant qualities are crucial for the damp RV shower environment.
In addition to being waterproof, fiberglass is very easy to keep clean and sanitary. The glossy finish prevents soap scum, hard water deposits, and grime from building up. Everything can be easily wiped off the smooth walls. Fiberglass won’t host mold or mildew like other surfaces, improving health and safety.
Installation and Ongoing Care of Fiberglass Panels
Installing fiberglass panels is also an easy DIY project for RV owners. The lightweight sheets can be cut to size and applied directly to wall studs using silicone caulk and aluminum trim. No special tools or tile-setting expertise is needed.
Minimal maintenance is required after installation. The durable finish resists damage or deterioration. To prolong the glossy look, a polish can be applied periodically. Silicone caulk around the edges may need replacing every few years.
Overall, the balance of strength, moisture resistance, and easy care make fiberglass an exceptional material for RV shower walls. Just be sure to allow for proper ventilation to avoid excess condensation.
Potential Drawbacks of Fiberglass
Some RV owners dislike the high-gloss finish of fiberglass, finding it to be sterile, cold, or industrial-looking in a home environment. The minimal texture does not provide decorative visual interest. Painting fiberglass is an option but risks reducing the waterproof properties unless special paints are used.
Fiberglass walls also provide less insulation against sound and cold compared to more solid surfaces like tile. The hollow behind the panels can increase the echoing of noise. Condensation on the exterior side requires ventilation to avoid mildew issues.
Lastly, caulking requires diligent maintenance. Any gaps at seams, edges, fixtures, or corners can compromise waterproofing and lead to leaks or water damage if left unsealed. Regular inspection and re-caulking is advised.
Waterproof Paint: Affordable Shower Wall Waterproofing
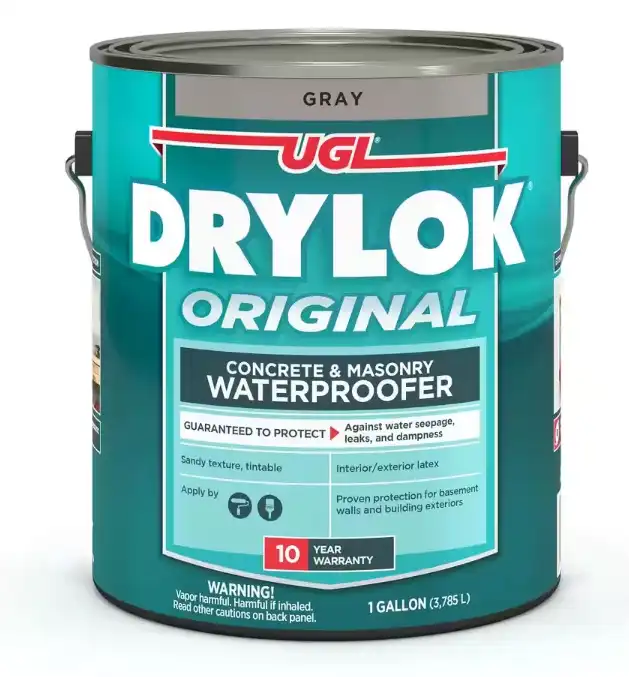
Specialized RV shower wall paint offers an inexpensive way to waterproof existing surfaces. Two-part epoxy paints provide a seamless moisture barrier that prevents leaks.
Providing Inexpensive Waterproofing for Existing Surfaces
One of the biggest benefits of waterproofing paint is the cost savings. High-quality epoxy paint provides a durable water barrier for only about $30 per gallon. Tiling an entire shower can cost 10 times as much in materials alone. The budget-friendly price makes paint an accessible option for many RV owners.
In addition, paint can be applied easily over existing shower walls – a major plus for older RVs. Paint provides a moisture-sealing facelift without requiring a complete tear-out. As long as tile, vinyl or other glossy surfaces are properly sanded and primed first, the epoxy adheres seamlessly. No need to remove or replace surrounds or plumbing.
Longevity and Limitations of Painted Surfaces
When applied correctly, epoxy paints form an exceptionally durable, watertight glossy barrier. The rugged, molded-plastic-like finish resists moisture, humidity, and cleaning chemicals for years. However, surface preparation is crucial for good adhesion and longevity, so this is best left to experienced professionals.
While sealing the walls, paint still allows access behind if repairs are needed. Paint can simply be sanded and patched over holes. However, any scratches or chips in the epoxy can allow water intrusion and potential for mold growth, reducing the healthy advantages of other solid surfaces.
Paint also requires careful ongoing maintenance around edges and fixtures. Reapplication every year or two helps maintain maximum waterproofing as the paint wears over time. Overall, paint provides an inexpensive temporary solution but may not match other materials for longevity.
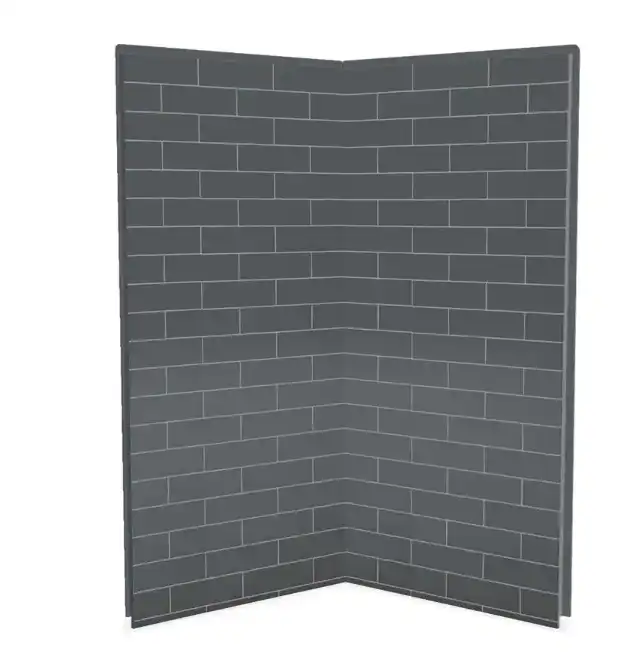
Tiles for RV Showers: Timeless and Durable

Glazed ceramic or porcelain tiles continue to be a popular RV shower wall option. They offer an attractive, durable surface that is easy to maintain. Grout provides a watertight seal.
Why Tile is a Timeless Shower Material
Tile has been used in bathrooms for centuries, and for good reason. The hard-glazed surface is naturally waterproof, preventing water absorption that leads to leaks, warping, and mold growth. Tile contains no organic materials, so it does not support mold growth either.
At the same time, the durability of ceramic and porcelain tile is exceptional. Properly installed tile can last 50 years or more without showing signs of wear, damage, or needing replacement. The colors stay vibrant as well. This longevity makes the tile a worthwhile investment despite higher initial costs.
Tile also excels at being easy to clean and sanitize. The non-porous surface prevents soap, oils, and grime from soaking in or sticking. A quick wipe-down keeps the tile looking freshly scrubbed. The range of color, pattern, and design options provide decorative appeal as well.
Special Considerations for Tile in RVs
However, there are a few challenges to consider when using ceramic or porcelain tile in an RV application. First and foremost is the weight. Natural stone tiles can weigh 15 pounds per square foot or more. The heavy material quickly adds hundreds of pounds of weight, which is highly undesirable in a vehicle.
Professional installation is strongly recommended, which also adds to costs. Precise cutting, mortar application, proper grout spacing, and sealants are needed to prevent cracks and leaks. DIY jobs have a much higher risk of failure.
Grout also requires sealing regularly to prevent cracking that allows water intrusion. Re-grouting or replacing broken tiles usually requires removing surrounding tiles as well. Accessing behind the walls means dismantling large sections.
Overall tile remains a top performer for waterproofing and longevity but requires skillful installation and extra weight considerations for RVs. Lighter grout less options help offset some downsides.
The Benefits of Plastic Wall Panels for RV Showers
Plastic laminate panels present an ultra-lightweight option for RV shower walls. These durable panels snap into place and create a waterproof barrier.
Why Plastic Panels Excel in RV Showers
One of the biggest perks of plastic laminate shower wall panels is their lightweight properties. Panels made from PVC, acrylic, polystyrene, or PET plastic weigh mere ounces per square foot. This keeps additional weight negligible – an essential RV consideration.
Despite being lightweight, plastic laminates are incredibly durable. The panels resist water, humidity, and chemical cleaners without corroding, decaying, or becoming damaged. Many options carry warranties of 10 years or longer.
Installation is also a benefit. Interlocking joints with rubber gaskets easily snap together to form a watertight seal. No grouting or special tools are needed. Applying silicone sealant around the edges completes the waterproof encapsulation quickly.
Finally, the range of texture and color options allows for customizing the walls. Warm wood looks, cool metals, and natural stone patterns can be achieved with plastic laminates.
Downsides of Plastic Wall Panels
On the downside, plastic panels lack the insulation qualities and sound-dampening abilities of more solid shower walls. The hollow behind the panels can result in echoing and require extra heat to keep comfortable.
They also require diligent sealing at seams and edges. The gaskets can fail over time, allowing leaks without proper adhesive maintenance every couple of years. Accessing plumbing may mean removing large sections of panels.
While durable, plastic walls lack the lifelong permanence of materials like tile. The lightweight construction gives a less finished, upscale look as well. Still, as an affordable RV shower option, laminate panels offer many benefits.
Deciding Factors for Choosing the Best Fit for Your RV Shower Walls
Choosing the right shower wall material involves weighing several key factors:
Budget
One of the top considerations is cost. Prices can range from $30/gallon for paint to $700+ for a full surround install. Compare material costs and factor in professional installation fees if needed. Get quotes to find options in your budget.
DIY Skills
Consider your own skill level as well. Peel-and-stick tiles are easy for novices, while tile requires advanced skills. Opt for an installation process you are comfortable tackling or outsource to a pro.
RV Size and Weight
Keep the size and weight limitations of your RV in mind too. Heavy tile may not be suitable. Focus on lightweight panels, paints, or acrylic surrounds to avoid adding hundreds of pounds.
Desired Style
Factor in the visual aesthetics you want to achieve. Fiberglass and plastic panels come in wood and stone looks. Tile offers patterns and textures. Choose a material that aligns with your RV decor.
Maintenance Preferences
Finally, consider your ability and willingness to upkeep the walls. Fiberglass needs little maintenance while tile requires more frequent re-grouting and sealing. Opt for easy-clean materials if the upkeep is unappealing.
Weighing all these decision factors helps narrow down the shower wall options ideally suited for your RV model, budget, skillset, and lifestyle. Compromise on some aspects if needed to find the right balance for your needs.
Conclusion
Choosing RV shower wall materials requires balancing factors like waterproofing, durability, weight, cost, and aesthetics. Fiberglass, acrylic surrounds or traditional tile offer the best protection and longevity. Peel-and-stick tiles or plastic laminates serve well as lightweight, affordable options. Be sure to properly prep and seal any edges and seams during installation. With routine sealing and cleaning, your RV shower walls will stay watertight and durable for years of camping fun.
Let me know in the comments if you have any other questions about RV shower wall options! Thanks for reading.

