As an RV owner, a bubbling toilet when you flush is never a good sign. This unusual phenomenon is often an indicator of issues within your black water system that should be addressed promptly to avoid more serious problems down the road. After dealing with a bubble RV toilet myself, I decided to investigate the common culprits.
Here’s what I discovered about the possible reasons an RV toilet gulps and bubbles, plus the steps you can take to stop it.
Understanding the RV Toilet System: How It Works
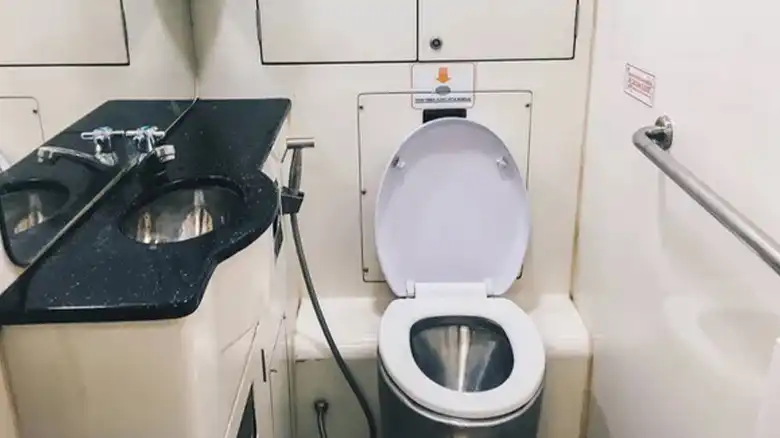
To comprehend the issue at hand, let’s delve into the components of an RV toilet. The bowl, flushing mechanism, and holding tank collectively play a pivotal role in the system’s functionality. The flushing process involves a carefully orchestrated sequence, where the water supply, flapper valve operation, and gravity-based flushing work in tandem to ensure efficient waste disposal.
Top Reasons for RV Toilet Bubbles
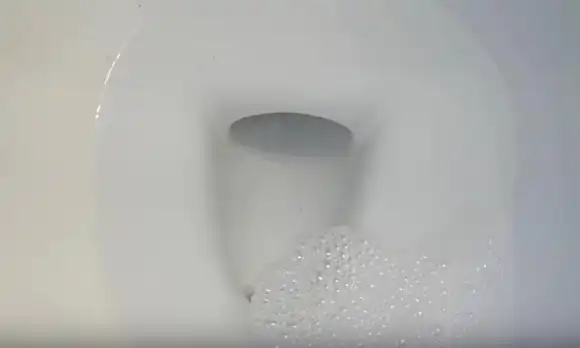
Like any other toilet, an RV bathroom relies on a series of pipes and valves to route waste from the bowl down into a holding tank. If any component in this waste elimination system becomes blocked or clogged, it can spur bubbles when you flush.
Vent Pipe Blockages and Their Impact
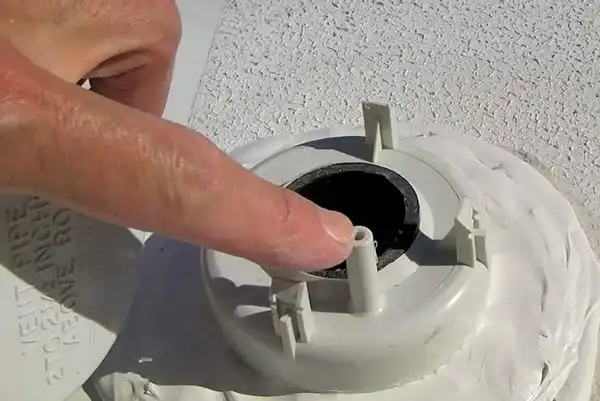
The vent pipe allows gases to safely exit the black water tank as it fills up with sewage. This ventilation prevents pressure from building up. When vent pipes are obstructed with leaves, mud nests, or other debris, gases look for the nearest exit point when you flush – which bubbles up into the toilet bowl. Always inspect pipes before assuming the worst tank troubles.
Dealing with Drainage Pipe Obstructions
Connecting the black water tank to the external dump valve, drainage pipes can also become congested over time. Thicker toilet paper, dirt, and grime lead to gradual blockages. Snaking the pipes and blasting them with a hose attachment often clears out the passageways. Replace cracked or damaged drainage pipes.
What to Do When the Outlet Valve is Jammed
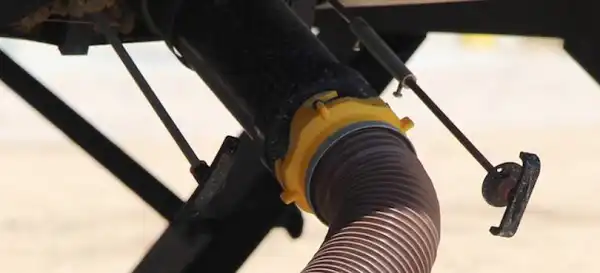
As the exit route for tank waste, keep the outlet valve properly functioning. Dropping ice cubes down the toilet followed by hot water helps break up debris surrounding the internal opening. Consult a technician if valve blades appear cracked or warped.
Issues within the storage tank itself also contribute to unwanted bathroom burps. Monitor tank levels, buildup, and overall condition to prevent problems.
Signs of an Overfilled RV Toilet Tank
Letting black water reach its absolute full limit pressurizes the container enough that air and waste look to escape from any feasible opening when flushed – including back up into the toilet. Never let levels max out. An RV-safe dye or tank monitoring system helps track waste accretion.
How Solid Waste Buildup Affects Your RV Toilet
Over months and years of use, solid accumulations sticking to tank walls and corners are inevitable. Pay attention to tank sensors even after dumping. Agitate the RV to dislodge debris. Alternatively, dissolve stubborn masses using commercial cleaners or ice cube treatment.
Identifying Structural Cracks or Leaks in Your Tank
With frequent travel vibrations and exposure to extreme temperatures, small cracks and leaks can ultimately develop in tank housing. Damp spots underneath RVs indicate external leakage needing immediate repair. Replace dysfunctional, cracked tanks to restore normal waste flows.
Like any other complex machinery, RV toilets rely on intricate valve systems to route liquids and solids without contamination or backflow issues. Malfunctioning valves under the toilet can also cause bubbling with flushing.
Vacuum Breaker Malfunction
Designed to prevent reverse siphoning of waste, vacuum breakers occasionally fail over years of use. Test breaker functionality and listen for hissing upon flushing, indicating a breach. Replace defective vacuum breakers to stop water backflows.
Fill Valve Failure
Managing the influx of fresh water with each flush, worn-out fill valves permit too much air influx – seen as bubbles. Similarly, inspect flapper valves at the tank inlet for secure seals and switches to “open” and “closed” positions when flushed. Update outdated interior toilet hardware.
How Do I Stop RV Toilet From Bubbling?
Now that you know what caused the gurgling scenario in the first place, let’s now start with the troubleshooting procedure.
Unclog Vent Pipe
In the event of a clogged vent pipe, a strategic approach is required. Utilize a specialized vent cleaning wand or a solution of water and degreaser. Navigate the intricate vent path with precision, ensuring unobstructed airflow. This meticulous process will effectively eliminate any impediments, resolving the issue of unwanted bubbles during toilet flushing.
Adjust Drain Slope
Mastery of the art of leveling is imperative when addressing drainage concerns. Methodically level the RV both side-to-side and front-to-back. Position the vehicle strategically to establish a gentle slope towards the outlet, facilitating an unhindered flow of waste. This deliberate adjustment will mitigate drainage issues and eliminate the occurrence of disruptive bubbles.
Clear Outlet Valve
Assuming the role of a proficient plumber, disconnect the outlet valve with care. Conduct a thorough inspection to identify any obstructions or signs of wear. Should wear and tear be evident, proceed to replace the valve diligently. This precise intervention is instrumental in restoring the unimpeded flow of waste and eliminating the occurrence of undesired bubbling.
Inspect/Repair the Black Water Tank
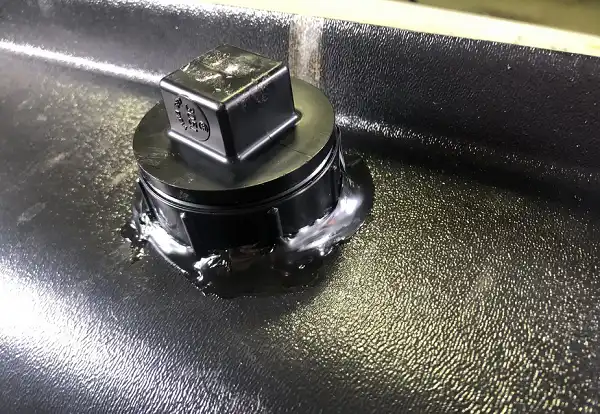
Undertake the responsibility of an RV surgeon when confronting issues with the black water tank. Commence by draining the tank, followed by a meticulous inspection for cracks or damage. Employ tank sealants judiciously or, in severe cases, consider the replacement of the tank. This conscientious approach ensures the structural integrity of the black water tank, mitigating the occurrence of disruptive bubbles during toilet use.
How to Prevent Your RV Toilet from Burping in the Future?
A fix isn’t enough when you know that the issue is going to resurface, no pun intended, sooner or later. Therefore, here are some maintenance tips to keep your RV toilet from bubbling in the future.
Use RV Toilet Treatment Regularly
Afford your RV toilet with the requisite care and attention by incorporating regular applications of RV toilet treatment. This specialized solution serves to disintegrate waste, fostering a harmonious environment within the tank. This routine, albeit simple, is paramount for the sustained functionality of the RV sewage system.
Only Put RV-Safe Products Down the Toilet
Embrace a judicious and conscientious approach by refraining from introducing items that could compromise the integrity of the RV toilet system. Opt exclusively for RV-approved toilet paper and products, a practice fundamental to nurturing optimal functionality.
Keep Vent Clear of Debris/Insects
Assume the role of a vigilant custodian as you routinely inspect and clear the vent of any debris or insects that may impede airflow. The unimpeded exchange of air is pivotal to maintaining a healthy plumbing system within the confines of the RV.
Dump Black Water Regularly
Establish a disciplined regimen of black water dumping at recommended intervals. Adherence to this routine shields the RV from potential overflows, preserving the delicate balance of the sewage system. This disciplined practice is essential for uninterrupted travel.
Additional Tips for RV Water Tank Maintenance
Beyond addressing toilet complications, safeguarding other facets of the RV’s water system is imperative.
- Clean and Disinfect Freshwater Tank:
Undertake a thorough cleaning regimen for the fresh water tank, ensuring an environment conducive to the purity of your RV’s water supply. Regular maintenance is indispensable for a consistently wholesome water source.
- Inspect Water Hoses
Adopt the role of a meticulous inspector as you scrutinize water hoses for any signs of leaks or wear. This proactive measure is essential in averting potential issues before they escalate, ensuring the continued reliability of the water supply.
- Consider Water Filters
Elevate the standards of water quality within your RV system by integrating water filters. This measure serves as a defense against impurities that may compromise the purity of your water, facilitating an uncompromised water experience.
- Check and Replace Water Pump Filters
Attend to the core of the water system by periodically checking and replacing water pump filters. This proactive measure ensures an uninterrupted and steady flow, mitigating disruptions to the water circulation within the RV.
- Drain the Hot Water Tank
Bid farewell to sediment buildup by routinely draining the hot water tank. This practice ensures the optimal efficiency of the heating system, guaranteeing a consistently luxurious and uninterrupted hot water supply during your travels.
FAQs and Answers
- Can I Use a Plunger to Fix a Bubbling RV Toiler?
Using a plunger on an RV toilet can be a potential solution for certain issues, but it may not directly address the specific problem of bubbles during flushing. Plungers are typically employed to clear clogs by creating pressure to dislodge blockages in the drain pipes.
- Can I use household toilet paper in my RV toilet?
It’s recommended to use RV-approved or biodegradable toilet paper in your RV. Household toilet paper may be thicker and less prone to break down, potentially leading to clogs in the RV plumbing system.
- How often should I dump the black water tank?
The frequency of dumping the black water tank depends on your usage and the size of the tank. As a general guideline, it’s advisable to dump the tank when it’s about two-thirds full or at regular intervals, typically every few days or weekly, depending on usage.
- What is the purpose of RV toilet treatment, and how often should I use it?
RV toilet treatment helps break down waste and control odors in the black water tank. The frequency of use depends on the product’s instructions, but it’s typically recommended to use it after each tank dumping and regularly throughout the camping season.

