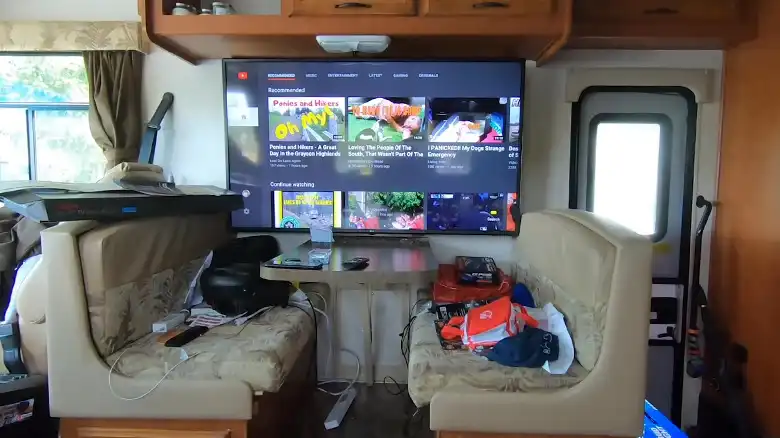
Your RV is your ticket to adventure, a home on wheels that takes you to breathtaking places. But what’s an adventure without some on-the-road entertainment? Installing a flat-screen TV in your RV can be a game-changer, providing comfort and relaxation during your travels. However, it’s not as simple as plugging in and hitting the power button. In this detailed guide, I’ll provide you with the nuts and bolts of RV TV installation, ensuring you’re equipped with all the knowledge you need for a seamless setup.

Quick Overview of Installing a Flat-Screen TV in Your RV
I’ll get into the details later. But first, I want to provide a quick solution for those who are in a hurry. Here’s a quick overview of what you’ll need and the basic steps for installing a flat-screen TV in your RV –
Materials:
- A flat-screen TV
- An RV-specific TV mount
- A bubble level
- A cordless drill
- Screwdriver
- Screws
- Wall anchors (if mounting on drywall)
Steps:
- Choosing the Right Location
- Marking the Mounting Point
- Prepping the Wall
- Mounting the TV Bracket
- Mounting the TV
Now, let’s take a more in-depth look at each step and other considerations that will help you master the art of installing a flat-screen TV in your RV.
Step 1: Selecting the Ideal Location for Your TV
Selecting the right location for your TV is critical. Here’s what to keep in mind –
Level Ground: Ensure that the chosen spot is level. A crooked TV can be irritating to watch, especially while the RV is in motion.
Stud-Free Zone: Avoid mounting where there are wooden or metal studs behind the wall. If your TV mount doesn’t align with your desired location, you may need to choose a different spot.
Step 2: Marking the Mounting Spot Accurately
Use a bubble level to accurately mark the position of your TV mount. This guarantees that your TV will be straight and visually pleasing.
Step 3: Preparing the Wall for Installation
Before attaching the TV mount, drill pilot holes for the screws. This will make the installation process smoother and reduce the risk of damaging your RV’s interior.
Step 4: Securing Your TV Mount with Precision
If you’re mounting on drywall, consider using wall anchors. They provide a more robust and secure connection, especially when the RV is in motion.
Step 5: Easy Steps for Mounting the TV
Attach the TV mount to the wall using screws. Make sure you don’t overtighten the screws, as this could damage the wall or distort the mount.
Step 6: Installing the TV onto the Mount
Finally, attach your flat-screen TV to the TV mount. Ensure it’s securely fastened, level, and stable. This step may require two people to handle the TV’s size and weight.
Important Considerations for TV Installation in RVs
The Right Fit
Opt for an RV-specific TV mount. These are designed to handle the vibrations and movement associated with RV travel, ensuring a secure and stable installation.
Size Matters
Choose a TV size that suits your RV’s space. You don’t want an oversized TV that dominates your living area or a tiny one that leaves you squinting at the screen.
Weight Watchers
Ensure your chosen TV mount can support the weight of your TV. Consult the manufacturer’s specifications to avoid overloading the mount.
The Electric Symphony
RV electrical systems differ from those in traditional homes. If you’re not comfortable with electrical work, it’s wise to hire a professional to handle the wiring.
The TV Tango
While driving your RV, secure the TV to the mount or use additional safety straps. This prevents the TV from shifting or falling, reducing the risk of damage or accidents.
Popular Locations for Mounting Your RV TV
Under-Cabinet TV Mount
If space is a premium in your RV, consider an under-cabinet TV mount. This ingenious design attaches to the bottom of a cabinet, allowing you to fold the TV out of the way when not in use.
Wall-Mounted TV Mount
For those with ample wall space, the wall-mounted TV mount is a fantastic choice. It attaches to the wall and offers swivel and tilt features, granting you the perfect viewing angle.
Ceiling-Mounted TV Mount
If wall space is limited, a ceiling-mounted TV mount is an excellent alternative. This type attaches to the ceiling and provides swivel and tilt capabilities, making it easier to find that ideal viewing position.
Challenges of Entertainment While Traveling in an RV
The nomadic life is exhilarating, but when the day’s adventures wind down, it’s comforting to unwind with your favorite TV shows or a movie. However, installing a flat-screen TV in an RV comes with the following key challenges –
- RVs are constantly on the move. You need a TV installation that can handle the vibrations and jolts of the road without plummeting to the floor.
- RVs are cozy, and space is at a premium. You need a TV setup that maximizes your living area without becoming an eyesore.
- Wiring an RV isn’t the same as a traditional home. You must consider the RV’s electrical system, battery power, and the safety of your setup.
- Picking the right spot to mount your TV is critical. It needs to be level, convenient for viewing, and not obstructed by studs or other obstacles behind the wall.
Conclusion
Installing a flat-screen TV in your RV isn’t just about entertainment; it’s about enhancing your on-the-road experience. With the right materials, careful planning, and step-by-step instructions, you can transform your mobile home into a rolling entertainment center. As you embark on your adventures, relish the comfort of your favorite shows and movies, all from the cozy confines of your RV. Safe travels and happy watching!
Have more questions or tips to share? Feel free to drop them in the comments below. Your fellow RV enthusiasts are eager to hear from you. Thanks for reading, and may your RV journeys be filled with endless entertainment and unforgettable moments!


