
RV vent fans and their motors are important for keeping indoor air fresh and preventing moisture buildup. If your vent fan seems slow, noisy or fails to turn on, the motor likely needs replacing. Replacing the motor yourself can save time and money compared to professional repair.
Follow this step-by-step guide for the replacement process.
What Is an RV Vent Fan Motor?
An RV vent fan motor is a small electric motor designed specifically to turn the fan blades and drive air circulation through ceiling vents or rooftop fan assemblies. These motors have components like brushes, windings, bearings, and switches that can wear out or fail over time after prolonged use. Issues with burnt-out wiring, locked bearings, broken motor mounts, or malfunctioning circuits mean the motor itself has become damaged or defective in some way. Attempting to repair these internal components is difficult and usually futile.

As a result, RV owners must fully remove and replace the non-working motor in order to restore vent fan operation. Carefully evaluating potential signs of motor failure and obtaining a proper replacement unit is imperative before tackling this repair project.
How to Identify When the Vent Fan Motor Needs Replacing
Several clear warning signs indicate when an RV’s ventilation fan motor requires replacement. First, if the fan itself fails to power on completely or only spins sporadically, this points to no electrical current reaching the motor or internal components not activating properly to drive the rotation. Vent fans that manage to turn on but spin at much slower speeds than their normal rates likely have motors with heavy internal friction issues along the core shaft and windings. Persistent loud squealing, grinding, or rattling coming from the motor itself signals extensive wear and imminent breakdown.
RV vent fan motors will also show symptoms by radically overheating despite working only briefly, as excessive friction creates internal heat damage. Intermittent operation where the fan powers off randomly points to shorts or disconnected circuits. Noting when any of these critical operational issues arise means proactively replacing the defective motor before total failure occurs.
Step-by-Step Guide to Replacing the RV Vent Fan Motor
Follow these key steps in detail to safely and effectively replace your RV vent fan motor once you determine failure:
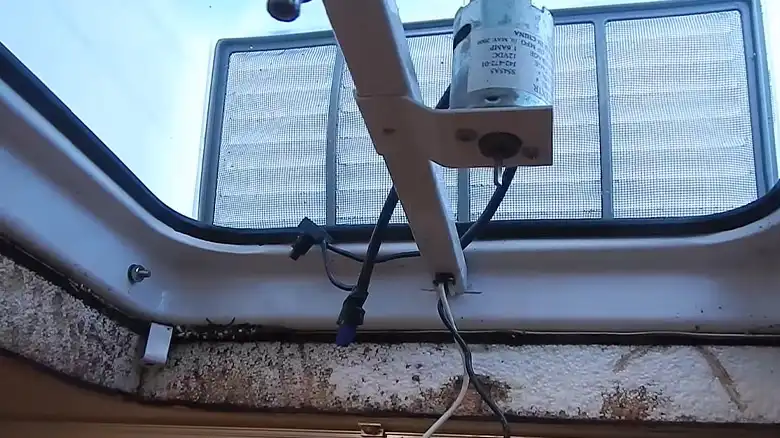
Step 1: Prepare for the Motor Replacement
Fully power down the motor by locating and flipping the correct circuit breaker switch that supplies electricity to your RV ventilation fan. Then remove any screws, caps, or panels surrounding the fan assembly and detached it completely from the interior ceiling or external rooftop housing so you can access the motor’s mounts. Make certain not to pull or strain any wiring connectors leading into the motor, and use masking tape and a permanent marker to label these wires and matching terminals for accurate reconnecting later.
Gather your hand tools for the motor removal and installation process, take care to wear thick work gloves, and goggles for eye protection from debris, and have proper precision screwdrivers as well as wrenches hand-sized for the fastener nuts and bolts. Lay down drop cloths below ceiling vents to catch dirt and particles stirred up in the old housing.
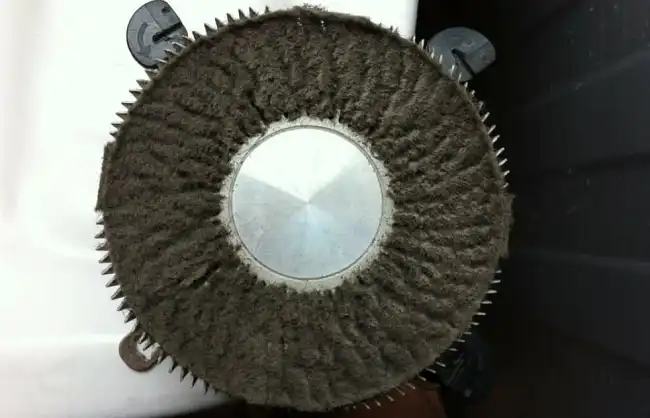
Step 2: Remove the Old Vent Fan Motor
After fully disconnecting electrical feeds and gaining access, begin stripping away any protective metal covers, caps, and external components surrounding the motor using screwdrivers and wrenches to remove barriers until the physical motor is exposed. Employ gloves and eye protection when prying apart the old vent fan unit.
Detach mounting screws, washers, rubber gaskets and finally the motor itself from the frame, using gentle controlled movements with screwdrivers and pry bars to separate the unit without damaging components for reinstallation. Check that debris like dust and insulation material is cleaned from the open vent housing before fitting the replacement part.
Step 3: Install the New Motor
Closely compare specification labels between old and new motors, verifying the voltage, wiring, rotations per minute (RPMs), and physical dimensions match or exceed original performance standards to operate correctly. Consult manufacturer guides if in doubt. Set replacement motor with care into mounting position, sliding core shaft through the center bracket lip and aligning any ports and wiring boxes. Reassemble the various mount screws, bolts, washers, caps and gaskets to secure the motor tightly into its frame housing.
Use a torque wrench and follow any rotational tightening sequence instructions to distribute pressure evenly across joined surfaces. Guide the labeled wires extending from the motor into their corresponding ports on the electrical circuit board or junction box terminals, taking care to press connections firmly and avoid loose wire leads.
Step 4: Finish the Motor Replacement Process
With the new motor fully installed, reattach the entire vent fan assembly to the roof or ceiling ensuring no gaps exist and all peripheral sealant and anchors are properly set around the edges. Double-check your work area for stray tools or debris before restoring circuit breaker power. Test initial operation by switching on the vent fan at its various speed settings, allowing a full minute before ramping up to full speed so initial movement is smooth and controlled.
Verify sufficient airflow by observing motion without obstruction through the external guards and louvers. Your RV ventilation fan with a rebuilt internal motor is now ready for reliable service and operation.
Tips for Maintaining Your RV Vent Fan
To maximize the lifespan of your RV’s new vent fan motor and maintain proper functionality, be sure to follow these important usage and maintenance guidelines:
Clean the Fan Blades Regularly – Over time, dust, grime, and particulates clump onto the fan blades which causes imbalance, and friction, and places extra strain on the motor. About once a month, wipe down the fan blades with a soft brush and gentle cleaner to remove stuck-on debris.
Ensure Vents Stay Clear of Obstructions – Any objects, insulation, nests, or covers that obstruct intake or outtake vents will block airflow, causing the motor to strain against the pressure differences. Periodically check that all vent openings and passes remain clear.
Address Any Dampness Issues Quickly – Excess moisture that condenses and pools around the fan housing and motor can lead to corrosion and electrical shorts. Immediately dry any wet areas and consult professionals in case water leaks are causing the dampness issues.
Limit Continuous Runtime – While ventilation is important, letting RV vent fan motors run nonstop for over an hour at a time can easily overheat components to the point of burnout and failure. Set timers and periodically turn fans off to give motors a needed cooldown break.
Final Thoughts
Replacing a worn-out or broken RV vent fan motor is a manageable maintenance project for most owners once important steps are followed using care and attention to detail. Ensuring full electrical disconnections, properly containing loose debris, comparing part specifications, torquing down mounts, and making certain wire leads are matched and secured leads to success. Periodically cleaning your vent fan blades and housing and checking for unusual noises allows early detection of motor problems before integral failure. Employing meticulous motor replacement techniques as outlined keeps fresh airflow circulating through your recreational vehicle.

