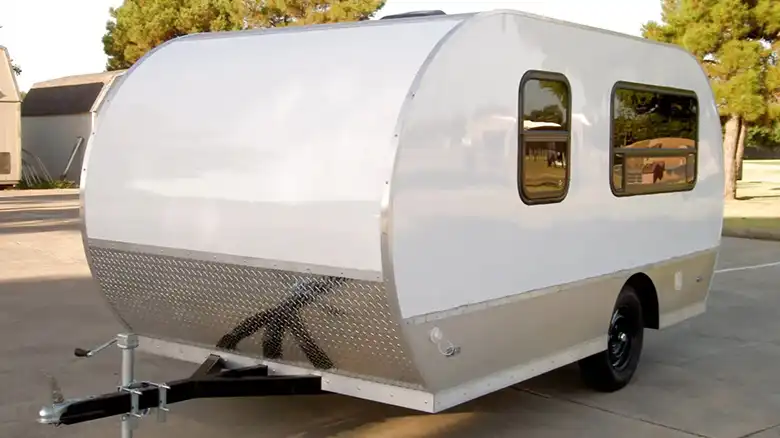
Pop-up campers, also known as folding campers or tent trailers, provide a unique and affordable way to enjoy camping while still having some of the comforts of home. A key component of these recreational vehicles is the canvas that covers the collapsible roof and side walls. Like any part of an RV, the canvas needs periodic inspection and maintenance to stay in good shape. In particular, it’s important to know how to identify and properly repair any damage to the canvas seams.
In this article, I’ll provide you a thorough overview of pop-up camper canvas materials, seam types, damage causes, inspection tips, repair techniques, tools, and preventive maintenance best practices. With the right information, pop-up owners can keep their camper canvas looking great and lasting for years of continued road trips and outdoor adventures.
Understanding Pop-Up Camper Canvas and Its Importance
Common Materials Used in Pop-Up Camper Canvas
Pop-up camper canvas is typically made from tightly woven, medium to heavy weight cotton, polyester, or blends of natural and synthetic fibers. Vinyl or acrylic coatings are often applied to make the fabric watertight. The most common materials include:
Cotton duck- Closely woven canvas of cotton fibers. Coated for water resistance. Mid to heavyweight. Durable but can mildew if stored wet.
Acrylic coated polyester- Lightweight synthetic canvas with acrylic coating. Waterproof and mold/mildew resistant.
Vinyl laminated polyester- Polyester reinforced with a vinyl layer. Very waterproof but less breathable.
Cotton/poly blends- Mix of natural and synthetic fibers. Combines strength of cotton with polyester’s durability.
The seams where separate canvas pieces are joined together are usually double stitched for strength. Other seam types like binding tape or heat sealing may also be used. Matching UV resistant thread helps seams hold up to outdoor exposure.
How to Spot Different Types of Canvas Seams?
There are three main types of seams used on pop-up camper canvas:
Stitched Seams: The most common seam type uses stitching to join canvas panels. Two edges are layered together and sewn with interlocking rows of heavy duty thread. Durable polyester or acrylic thread is used to resist UV damage. A double row of straight stitching provides a strong seam.
Taped Seams: With this method, a vinyl, polyester or reinforced fabric tape is adhered over the seam. Applied correctly, taped seams can be very water resistant. Tape can be used alone or combined with stitching.
Heat-Sealed Seams: Vinyl coated fabrics can be sealed together using heat. A special heat tool melts the vinyl backing so the panels bond tightly. No stitching is required. Heat-sealing creates a watertight, weatherproof seam.
Identifying Canvas Seam Damage Early On
Main Causes of Pop-Up Canvas Seam Damage
Over years of use, a few key factors can start to degrade the canvas and cause seam failures on pop-up camper covers:
UV Exposure: Extended sun exposure can damage fabric fibers and weaken thread used for stitching. Untreated canvas is especially vulnerable to UV damage which appears as fading, yellowing, cracking, or becoming brittle.
Wear and Tear: Regular use inevitably starts wearing on canvas materials and seams. Entry and exit, folding and unfolding, and abrasion from branches or other objects during camping can strain the canvas.
Moisture and Mold: Wet canvas that is folded up or improperly stored allows mold and mildew growth. This can cause staining, canvas degradation, and seam failure.
Signs of Damaged Canvas Seams
Watch for these common indicators that a pop-up’s canvas seams need repair:
Fraying: Thread damage causes stitching to become loose. Seam edges will start to separate and canvas threads will fray.
Leaks: Once stitching fails, seams lose integrity and can leak during rain or snow. Water drops inside when seams split open.
Visible Holes: Over time, small gaps in stitching expand into larger holes or tears as the fabric separates. Sunlight becomes visible through compromised seams.
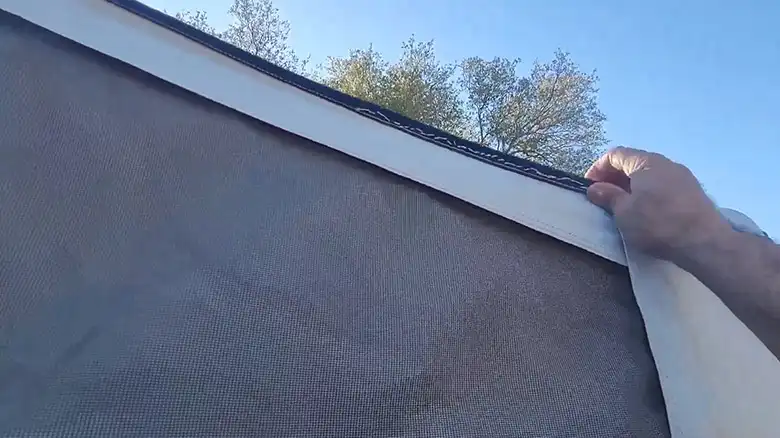
Inspecting Seams
Regularly inspect the entire canvas cover, especially seams and areas exposed to wear. Use a magnifying glass to examine every inch of stitching. Identify any gaps, holes, or stitching that looks loose, frayed or UV damaged.
Also scan for tears, cracking, and canvas dry rot. Carefully note each problem area and the type of repair needed – simple re-stitching, patching, or full canvas section replacement. Thorough inspections allow you to repair seam damage promptly before it worsens.
Determining Repair Needs
Assess the extent of each seam problem to determine the best repair method. Small gaps or fraying just needing re-enforcement can be re-stitched by sewing over the original seam.
Bigger holes or tears will require patching with new canvas material. Very degraded canvas may need sections fully replaced. Identifying bigger underlying issues like water pooling on the roof that accelerates deterioration can also help prevent repeat seam failures in those problem areas.
Tools and Materials Needed for Repair
Fixing pop-up canvas seams requires having certain supplies on hand. Gather repair tools and materials before starting work on the camper.
Inspection Kit
- Magnifying Glass: A magnification lens allows closely examining stitching and canvas fibers for damage. Look for gaps, fraying, holes or deterioration.
- Seam Ripper: Use a seam ripper tool to remove old loose stitching or open up damaged seam areas that need patching.
- Waterproofing Spray: Coat seams with a canvas waterproofing spray after repairs to reduce leaks. Silicone or acrylic sprays help repel moisture.
Repair Kit
- Heavy-Duty Thread: Upholstery thread or waxed polyester sewing thread provides a very durable stitch that withstands pulling and friction. Match existing thread color.
- Needle and Threader: Use heavy duty needles that won’t bend or break when sewing through multiple canvas layers. A needle threader helps guide the thread through needle eyes.
- Patch Material: Keep vinyl, canvas or tent patch fabric on hand. Match the color and weight of the pop-up canvas type. Use patches for reinforcing tape, lining holes, or replacing canvas sections.
Step-by-Step Guide to Repairing Pop-Up Camper Canvas Seams
With the right materials prepped, you’re ready to start fixing any problem seams on your pop-up camper canvas. Follow these methods to properly repair the most common types of seam damage.
Step-01. Preparing the Work Area
- Cleaning the Canvas: Dirty canvas can cause needles to deflect while stitching. Use a mild detergent and soft brush to gently clean the canvas around seam repair areas. Rinse off all soap residues. Allow the canvas to air dry fully before beginning repairs.
- Securing the Pop-Up Camper: If possible, do repairs with the pop-up camper roof and walls set up. This allows access to all sides of the canvas for stitching. Safely secure the camper with jacks on level ground so it can’t collapse accidentally. Remove any dangling threads in the seam holes so they don’t catch in the needle when stitching.
Step-02. Identifying the Type of Seam Damage
Inspect each problem area closely to determine the seam construction – stitched, taped, or heat sealed. This identifies the proper repair technique to use.
1. Stitched Seam Repair
2. Taped Seam Repair
3. Heat-Sealed Seam Repair
Look for original stitch holes or thread remnants and note the seam path. Check for any indicator of tape or heat sealing along the seam. Diagnosing the seam type helps choose the right materials and methods to fix it.
Step-03. Repairing Stitched Seams
Stitched seams are repairable by re-sewing or reinforcing with patches. Use heavy duty thread in a color matched to the original.
1. Seam Reinforcement
Reinforce loose, separated seams by sewing a new straight stitch row right over the original seam path. Use knotted thread and do not skimp on stitches. They need to be close together for a tight seam. Add stitches to fill any gaps. Permanent adhesive can also help bind seam allowances.
2. Needlework Techniques
Straight stitch – For basic seam repair. Go over original stitches.
Zig zag stitch – Creates a flexible seam with some give. Good for patching.
Box stitch – Makes a very strong reinforced seam. Ideal for high-stress corners.
Try different needlework patterns when restitching or patching for the strongest hold. Straight stitches work for basic seam fixes. Zig zag or box patterns are best for patching canvas tears. Watch online videos to help learn proper hand stitching methods.
Step-04. Repairing Taped Seams
Split or peeling taped seams must have the old tape fully removed before new tape is applied for the best bond.
a. Removing Damaged Tape: Carefully lift the edge of the damaged tape with a seam ripper. Slowly peel it away from the canvas, applying a heat gun if needed to soften the adhesive. Remove any remaining adhesive residue with acetone or alcohol. Let the canvas dry completely.
b. Applying New Seam Tape: Cut a new piece of vinyl repair tape to the size needed, allowing at least 1-2 inches of overlap on both sides of the seam. Remove the backing and use a roller tool to firmly adhere the new tape. Consider adding stitching as well for a very secure repair.
Step-05. Repairing Heat-Sealed Seams
a. Identifying Heat-Sealed Areas: Check for any glossy or melted looking sections of vinyl coating to locate heat sealed seams. The canvas may appear welded together.
b. Using Heat-Sealing Patches: First prepare the canvas surface. Then place a heat seal patch cut larger than the seam hole. Apply a hot heat sealing tool over the repair patch, carefully melting it into the surrounding vinyl coating for a water tight seal.
Step-06. Patching Holes and Tears
For larger openings or canvas tears, flexible adhesive patches provide an easy repair solution.
Cut a canvas or vinyl patch well oversized compared to the hole size. Rounding the corners reduces points prone to peeling. Adhere to the inside canvas first, then sew around the perimeter for a very secure, watertight patch. Consider adding a second interior patch layer for a permanent fix.
Step-07. Replacing Dry Rotted Canvas
Extensively damaged canvas may need complete removal and replacement in some areas.
Once dry rotted canvas is fully removed, trace the opening onto fresh canvas. Cut to size allowing ample overlap. Adhere into place over the opening using a vinyl glue or adhesive caulk. Stitch the new canvas section securely into the surrounding material using box stitching for highest strength. Seal edges with waterproofing spray.
Step-08. Waterproofing Repairs
After all seam repairs are complete, go over stitching, patches, and replace canvas areas with a sealant. Liquid seam sealants or silicone sprays penetrate and coat fibers to prevent leaks. Allow sealants to cure fully before folding or storing the canvas.
Preventive Maintenance Tips
Regular inspections and proper care helps minimize seam repairs and extend the life of a pop-up’s canvas.
A. Regular Canvas Inspections: Make thorough canvas checks part of routine pop-up camper maintenance. Look for fraying, holes, leaks, and deterioration monthly during camping season. Repair any small issues promptly before they worsen.
B. UV Protection Measures: When parked, keep the camper roof angled or use a tarp/awning for shade if possible. Treat canvas with UV inhibiting sprays. Store folded canvas out of direct sunlight.
C. Proper Storage Techniques: Allow wet canvas to dry fully extended before folding. Unroll stored canvas periodically. Use mildew inhibiting sprays and keep storage areas clean and dry.
More Questions & Answers
Q1. What are some indications the canvas needs repairs?
A: Some signs your pop-up camper canvas needs repairs include fraying seams, visible holes or openings at seams, sunlight visible through seams, water leaks through seams, canvas areas that feel stiff or brittle, mold/mildew stains, and any visibly broken stitching.
Q2. How do I match canvas when making repairs?
A: Take a small canvas swatch to a fabric or RV supply store to get the closest match possible in canvas weight, weave pattern, thickness, and color. Have them recommend appropriate patch adhesives and stitching threads that work with that canvas type.
Q3. What size canvas patch should I use?
A: Cut any canvas patch at least 2 inches wider on all sides than the hole you are patching. The extra overlap helps prevent further tearing. Use rounded corners on patches to minimize stress points too.
Q4. How soon after a repair can I get the canvas wet?
A: Read product instructions, but often sealants and adhesives require 24-48 hours curing time to become fully waterproof. Limit water exposure until repairs have fully bonded and dried.
Q5. How can I improve my hand stitching skills?
A: Practice basic stitches on scrap canvas before tackling repairs on your camper. Watch online video tutorials. Invest in a good thimble to push needles easily through heavy canvas. Take care to keep stitch spacing and tensions even.
Q6. Should I use a sewing machine or stitch repairs by hand?
A: For DIY repairs, hand-stitching often works best for the awkward angles needed to mend camper canvas seams. Using an upholstery needle and heavy thread allows stitching repaired seams by hand securely.
Q7. How can I prevent canvas seam repairs?
A: Regularly inspect seams and treat with waterproofing sprays. Park in shade when possible. Allow wet canvas to fully dry before storing. Check for water pooling on the roof. Promptly fix minor damage before it worsens. Use breathable canvas storage covers.
Q8. What is the best way to clean dirty camper canvas?
A: Use a soft brush and mild detergent to gently scrub stains, mold, and dirt. Rinse thoroughly with clean water. Allow the canvas to completely air dry before treating with any waterproofing products or making repairs.
Q9. How do I know if I need to replace a canvas section completely?
A: If the canvas is badly cracked, brittle, has widespread holes, or more than about 25% of a panel is damaged, full replacement is likely needed. Replacing small sections is much easier than replacing entire camper canvas.
Bottom Line
The canvas enclosure is what allows pop-up campers to provide interior living space protected from the elements. Keeping the canvas cover in good repair is essential for enjoying these versatile RVs. With routine care and proper seam maintenance, a pop-up’s canvas can remain durable and weatherproof for many years of continued road trips and camping fun.