RVs allow you the freedom of the open road while still providing a comfortable living space. However, the decor that comes standard in most RVs may not suit your personal style. One of the first things many RV owners want to update is the window valances. These gathered or pleated fabric treatments frame the windows and often feature elaborate, dated patterns. Replacing the valances is a relatively easy weekend project that can give your RV’s interior a fresh new look.
Removing and replacing the RV’s existing window valances may seem intimidating at first. But with the right tools, a bit of patience, and by following some simple removal steps, you can give your RV a mini makeover. Basically, it’s about detaching hardware, gently sliding valance off mounting brackets, vacuuming surrounding areas, patching, and painting if needed, and then measuring and installing new window treatments. The end result will be windows dressed in styles and fabrics you love.
Here, I’m providing everything you need to know to successfully remove those outdated valances. You’ll learn the necessary tools, the step-by-step removal process, and things to consider beforehand. I’ll also provide some alternative window treatment ideas to inspire your redecoration.
Let’s get started!

How Do You Remove Window Valance in RV?
Ready to remove those outdated RV valances? Here’s everything you need to do the job right.

Source: kreatinghomes
Tools You’ll Need
- Screwdriver or power drill
- Ladder or step stool
- Vacuum cleaner and dusting brush
- Replacement window treatments (or fabric and sewing supplies to create your own)
Step-by-Step Guide to Removing RV Valances
Step 1: Vacuum and dust the valances and surrounding areas to clear away dirt and debris before starting the removal process. This will make the job easier and cleaner.
Step 2: Use the screwdriver or drill to remove any screws, brackets, or hardware attaching the valances to the wall or ceiling. Be sure to save any of these small parts for reinstallation later.
Step 3: Carefully slide the entire valance out and off the mounting hardware. Take it down gently to avoid tearing the fabric.
Step 4: Use the vacuum crevice tool and dusting brush to clean the areas around the window that were hidden by the valance.
Step 5: Patch and repaint the wall or ceiling surrounding the window, if needed, to address any damage or discoloration.
Step 6: Measure the window openings and create or install new curtain rods, shades, blinds, or other window treatments.
Step 7: Attach any new hardware and reinstall the window treatments.
Step 8: Step back and admire your valance-free windows decorated in fresh new styles!
That’s all!
Why You Might Want to Remove RV Valances?
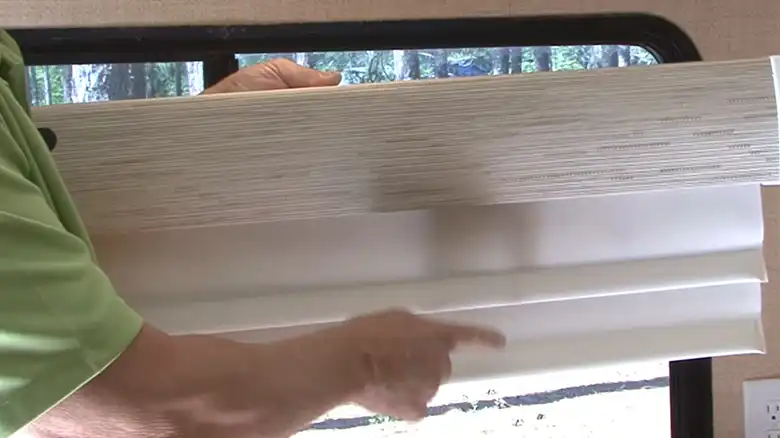
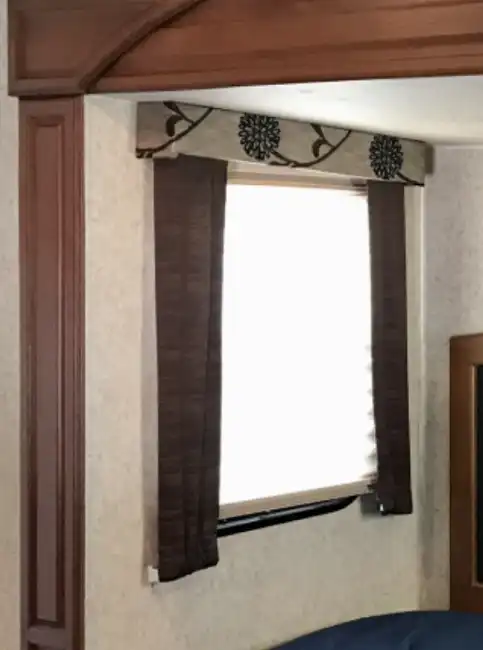
While you don’t have to remove the existing valances, there are good reasons to take them down. The valances that come with most RVs are outdated, with unappealing colors and patterns that detract from your decor. Older valances may be faded, dusty, or even damaged. Replacing them improves appearance. If you want to install new window treatments, the valances will get in the way and need to be removed. Removing them gives you access to clean the entire window area thoroughly. Taking down the old valances is the first step toward creating a customized look. So while removing the original valances isn’t required, doing so allows you to upgrade the windows and make the space your own.
Important Tips for Safe Valance Removal
Taking down valances is easy if you follow these handy tips –
a) Check the valance attachments to determine the best tools for safe, easy removal before starting.
b) Have replacement window treatments or plans ready so you can decorate right after removing old valances.
c) Use care not to damage walls or ceilings when taking valances down. Fill holes and repaint if needed.
d) Take valances down gently without tearing to keep the fabric intact if reusing or repurposing them.
e) Note the original mounting locations so you can install new hardware properly.
f) Clean dust and debris thoroughly around the window area once the valances are down.
g) Properly measure each window opening for perfect-fitting replacements.
h) Follow any specific installation directions for your new blinds, shades, curtains, etc.
i) Ask for help if the valances are large, heavy, or hard to reach. Don’t risk falling off ladders!
Thinking through the process in advance and taking care during removal will ensure you can safely take down those outdated RV valances and get your windows looking their best.
Fresh Window Treatment Ideas for Your RV
Once you remove the old valances, you have lots of options to give your RV’s windows a fresh new look –
Curtains
Hang rod pocket curtains, tab top curtains, grommet-top curtains, or other styles. Choose solid colors or patterns like buffalo check or floral that coordinate with your RV decor. Opt for blackout curtains in sleeping areas.
Blinds
Vinyl or aluminum mini-blinds provide privacy and light control. Get them in colors that match your color scheme.
Shades
Roller shades or Roman shades offer stylish coverage. Stick with neutral hues or bold colors and prints.
Valances
Ironically, you can install new, updated valances after removing old ones. Try gathered styles or relaxed, tailored looks.
Wood Blinds
Real wood blinds give a warm, natural feel. The slats come in different colors and finishes.
Mix and match different window treatments throughout your RV for a customized look!
End Note
Replacing worn and outdated window valances is a great way to give your RV a fresh, new look. By following the proper steps for safe removal and considering what new window treatments to install, you can easily upgrade this often-overlooked interior design element. Soon you’ll be hitting the road while enjoying views from windows styled just how you like it. Don’t be afraid to remove those valances and explore creative new options for dressing your RV’s windows!
I hope you found this overview helpful. What transformation are you planning for your RV? Let us know in the comments below if you have any other questions as you get started removing valances and decorating your windows. Safe travels and happy decorating!
Relevant Questions
What’s the best way to measure for new RV window treatments?
Use a steel measuring tape to measure each window opening width and height precisely. Write down the measurements to ensure custom window treatments fit perfectly.
How do I determine the right window treatment length for my RV?
The optimal RV window treatment length depends on the style. For curtains, extend 20-30 inches past the window frame on both sides and above/below. For blinds and shades, add 2-3 inches past the window’s width and height.
What adhesive is best for reattaching RV valances?
Strong adhesives like E6000 or Loctite work well for securely reattaching valances. Apply a bead, let dry for 24 hours, then carefully rehang the valance. Avoid liquid nails which can stain fabric.
Can I repair damaged RV valances?
You can patch small holes or tears in valances using iron-on patches or fabric glue. For more extensive damage, consider replacing the valance.
What length should RV curtains be?
For optimal coverage and the best look, RV curtains should extend 20-30 inches past the window frame on each side and 20-30 inches above and below the window.


