
Keeping your RV comfortable during hot summer road trips depends on having an efficiently running air conditioner. But like any machine, an AC needs regular maintenance to operate at its best. One of the most important maintenance tasks is cleaning the air filter. A clogged, dirty filter restricts airflow and makes the AC work harder trying to cool your RV. Taking time to clean the filter prevents problems down the road and helps ensure reliable cooling on sweltering days.
This post covers the steps for properly cleaning an RV air conditioner filter yourself. Simply, it’s removing the filter, brushing debris, soaking in mild detergent, rinsing thoroughly, allowing it to fully air dry, and then reinstalling for optimal airflow and cooling performance. Also, you’ll learn the recommended cleaning frequency when to replace a filter, pro tips for maintenance, and what other components need cleaning.
Equipped with this knowledge, you can optimize your AC’s performance and cooling ability this travel season. So, let’s begin!
6 Simple Steps to Clean Your RV Air Conditioner Filter
To get into the cleaning procedure straightforwardly, you need to arrange the following simple tools and supplies first –
Phillips screwdriver – you’ll need this to remove any screws or panels covering the filter access area. Make sure it fits the screw heads properly.
Replacement filter – check your AC manual or owner’s guide for the exact size needed for your make and model. Filters come in different sizes so getting the right dimensions is important.
Soft brush or vacuum cleaner – use a soft bristle brush or the brush attachment on your vacuum to gently dislodge dirt and debris. Avoid anything abrasive that could damage the filter material.
Mild detergent and water – mix a gentle soap-like dish detergent in warm water to help dissolve stuck-on particles when cleaning a reusable filter. Avoid harsh chemical cleaners.
Bucket or sink – you’ll need a container to immerse the filter in cleaning solution if doing a deep clean. Allow space for agitating the filter to remove grime.
Source: Pinterest
Once you’re ready, get started immediately –
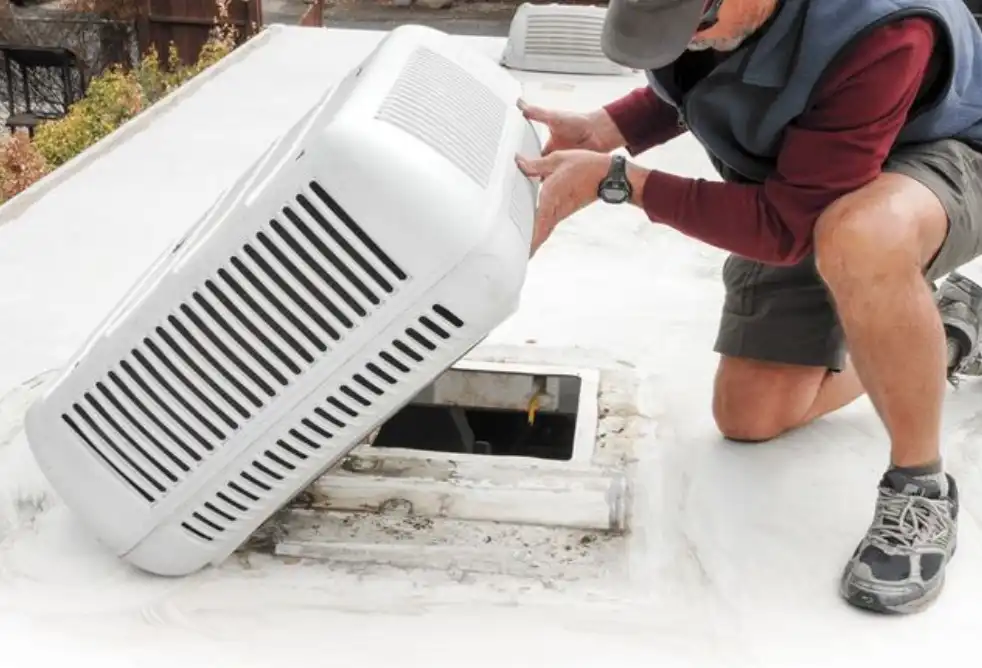
Step 1: Locate the filter access panel, usually on the interior ceiling near the AC unit or under the exterior shroud outside the RV. Check the owner’s manual if you’re unsure. Remove any screws or panels covering the filter using your Phillips head screwdriver.
Step 2: Once accessible, carefully slide out the dirty filter. Inspect it to see how dirty it is and whether cleaning or replacement is needed.
Step 3: Use a soft brush or vacuum cleaner to gently remove any surface debris or dirt built up on the filter. For deeper cleaning, mix a mild detergent with warm water in your bucket or sink. Step 4: Submerge the filter and agitate it to dissolve stuck-on dirt and oils. Let it soak if needed to break up stubborn buildup.
Step 5: Rinse thoroughly under running water until it runs clear and no more dirt or suds come out. Allow the filter to air dry completely before reinstalling to prevent mold growth. Fans or sunlight can speed drying.
Step 6: Once fully dry, slide the clean or new replacement filter back into the compartment, making sure it fits snugly in place. Replace any panels or screws. Run the AC to ensure normal operation and airflow from the vents.
That’s it!
Is Regular Cleaning of the Filter Necessary?
Yes, regular cleaning of the AC filter is strongly recommended by manufacturers for optimal performance. As the filter collects dirt, dust, pet hair, and other particles over time, it can become clogged. This restricts airflow through the vents, forcing the AC unit to work harder to try to cool the RV interior.
A dirty filter causes extra strain on the AC motor, compressor, and internal components. The system has to labor excessively to pump enough air. This can lead to system failures, frozen evaporator coils, costly repairs, and even complete breakdowns – not something you want to deal with on a hot summer road trip!
Regular maintenance cleans the filter and maintains proper airflow for efficient cooling. It also safeguards the AC from premature wear and tear. Trying to use an RV air conditioner with a neglected, dirty filter typically results in inadequate cooling, then pricey issues down the road.
How Often Should the Filter Be Cleaned?
Most RV manufacturers recommend cleaning the air conditioner filter at least every 2 weeks when in frequent use to maintain cooling performance. During peak camping season, that often means biweekly cleanings. Here are some guidelines on timing –
a) If you camp often or run your AC daily, check and clean the filter at least every 2 weeks.
b) If you have pets that travel in the RV or drive on dusty roads frequently, clean the filter weekly for the best results.
c) For occasional RV use on clean paved roads, monthly filter checks are acceptable. Clean when the buildup is observed.
d) Visually inspect the filter once a month when using the AC minimally. Clean at first signs of debris accumulation.
e) If you notice reduced airflow, struggle to cool the interior, or the AC runs constantly, it’s a sign the filter needs cleaning right away.
Reusable filters may need a good deep cleaning but can be used for 6-12 months typically. Disposable filters should be replaced at least once a year or sooner if very dirty. Know your AC unit’s recommendation and inspect filters monthly as a rule of thumb to catch any buildup early.
Other Components of the RV Air Conditioner That Require Cleaning
In addition to the filter, other important components in the AC unit require periodic deep cleaning –
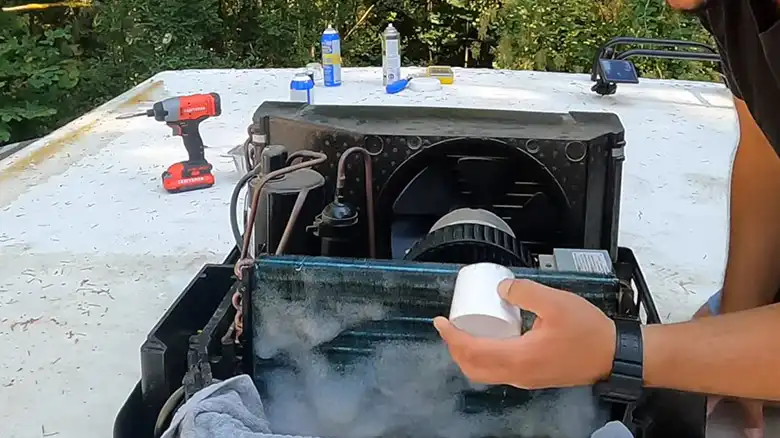
Exterior Condenser Coils
- Dust, bugs, and debris easily clog the condenser coils outside the RV. This prevents proper airflow and heat dissipation.
- Carefully clean the coils with an RV air conditioner coil cleaner/foamer and rinse. A fin comb straightens any bent fins.
Fan Blades & Motor
- Dirt, bugs, and lint build up on the fan blades, reducing airflow efficiency.
- Wipe the blades gently with a soft cloth to remove debris. Clean around the motor housing too.
Base Pan
- Condensation drainage promotes dirt and microbial growth in the base pan under the coils.
- Remove debris and thoroughly clean & disinfect the pan to inhibit mold.
Cabin Air Intake
- Outside air drawn into the AC can contain pollen, pollution, and dust.
- Clean the intake filter/screen if equipped. Some units have washable electrostatic filters.
Properly cleaning these internal components allows for optimal airflow, heat transfer, and cooling capacity. A comprehensive AC tune-up ensures it runs efficiently.
Expert Tips for Proper Air Conditioner Filter Maintenance
Follow these pro tips for keeping your RV air conditioner filter in top shape –
a) Check the filter at least monthly, more often with frequent AC use. Clean when any debris is visible.
b) Note the date on the filter when installing a new one. Check it monthly and replace it per the manufacturer’s recommendation.
c) When removing the filter, pay close attention to the orientation so it goes back in correctly. Mark directions if needed.
d) Rinse reusable filters thoroughly until the water runs clear. Dirt causes restriction.
e) Allow ample drying time before reinstalling a clean filter to prevent mold growth inside the AC system.
f) Use the manufacturer-recommended filter size for optimal performance. The wrong size impacts function.
g) Monitor and clean the filter more frequently when camping in dusty locales or with shedding pets.
h) If rinsing doesn’t fully clean, replace the reusable filter. Don’t just reinstall a still-dirty filter.
Regular filter care is the easiest way to keep your RV air conditioner operating at peak cooling capacity. A little preventative maintenance goes a long way!
When to Replace the Air Conditioner Filter
If your RV air conditioner filter appears excessively dirty or clogged after cleaning, it may need replacement. Reusable filters that are torn, bent, or otherwise damaged should also be replaced.
You can purchase new replacement filters specifically designed for your RV’s AC make and model either online, from an RV dealer, or sometimes in auto parts stores. Always check the manufacturer’s guidelines to ensure you get the correct size filter.
Installing a fresh new filter can help restore cooling performance and airflow if the current filter is too dirty or at the end of its usable lifespan. Properly maintaining the filter is one of the easiest ways to keep your RV air conditioner running at peak conditions.
End Note
Cleaning your RV’s air conditioner filter regularly is essential preventative maintenance that every RV owner should know how to do. A simple filter cleaning just takes a few tools, supplies, and easy steps. Setting a reminder to check the filter monthly ensures you catch any buildup before it can impede performance or cause bigger issues. Proper filter care promotes airflow, cools your RV efficiently, and can prevent costly AC repairs down the road. Just a little routine maintenance goes a long way in keeping your RV’s air conditioner running optimally season after season.
People Also Ask
How can I tell if my AC filter needs to be cleaned?
Check for reduced airflow, decreased cooling ability, or excessive dirt and debris buildup on the filter. These are signs it’s time to clean it.
What happens if I don’t clean the filter enough?
A partially clogged filter still restricts proper airflow, causing strain on the AC. Always fully clean filters for maximum performance.
Where exactly is the filter located in my AC unit?
Filter placement can differ between RV models. Check your owner’s manual or inspect the ceiling vents and exterior shroud to locate it.
Can I use soap and water to clean the reusable filter?
Yes, mild detergent helps dissolve stuck-on dirt and debris. Be sure to thoroughly rinse and completely air dry the filter before reinstalling.
How do I know when it’s time to replace my filter?
If it’s excessively dirty even after cleaning or becomes bent, damaged, or torn, replacement is needed for proper operation.

