
Sitting down to relax after a long day of hiking, I flipped on the TV in my RV only to be met with a blank screen. No channels, just the dreaded “no signal” message. My RV cable hookup wasn’t working. This is an all-too-common frustration among RV campers relying on cable connections for entertainment and internet access. Properly troubleshooting and resolving cable issues ensures you can get back to enjoying your trip. This guide will walk through simple initial checks, more advanced diagnostics, seeking professional assistance, and tips to avoid this problem in the first place.
When you notice your RV cable isn’t working, there are two key components to assess – the external wiring/dish setup and the internal TV connection. Methodically verifying both sides will help identify where the breakdown is occurring. Don’t immediately assume it’s a complex wiring issue. Oftentimes, it’s a loose connection or a settings change needed to restore your signal.
Initial Troubleshooting Steps: Quick Fixes to Try When Your RV Cable Isn’t Working
When confronted with a non-functional cable connection in your RV, the initial troubleshooting steps are crucial for identifying and resolving the issue promptly.
Follow these comprehensive steps to ensure a thorough examination –
Verify Coaxial Cable Connections
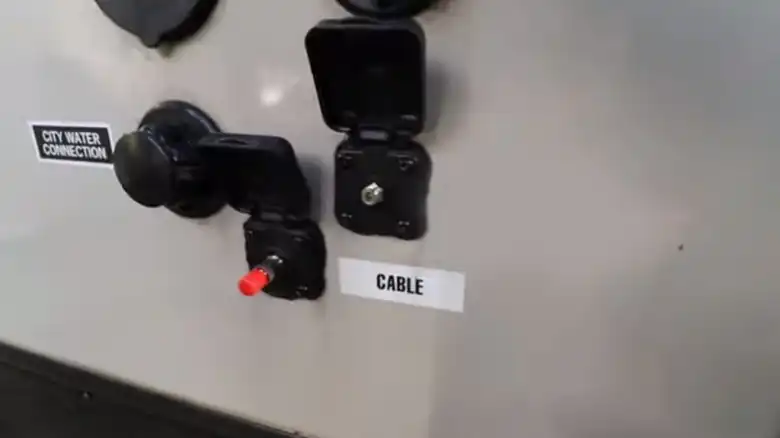
Step 1: Confirm that the coaxial cable is securely connected at both ends – at the outlet and the TV/receiver. Any looseness in the fittings can be addressed by snugly tightening the connections.
Step 2: Consider replacing the coaxial cable if it appears damaged or worn, as this simple step can often rectify connectivity issues.
Check TV Settings and Perform Channel Scan
Step 1: Review your TV settings to ensure the correct input source is selected for the cable connection.
Step 2: Perform a channel scan to guarantee that all available channels are properly preset and ready for viewing.
Inspect External Coaxial Wiring and Satellite Dish Attachments
Step 1: Visually inspect the external coaxial wiring leading to your RV and check satellite dish attachments for any signs of damage or looseness.
Step 2: Secure any loose cables and ensure that all connections to the satellite dish are intact.
Examine the Internal RV Unit
Step 1: Inside your RV, inspect for visibly loose internal wiring or any outlet plates that might have become disconnected.
Step 2: Reconnect any loose wiring and ensure that all internal connections are secure.
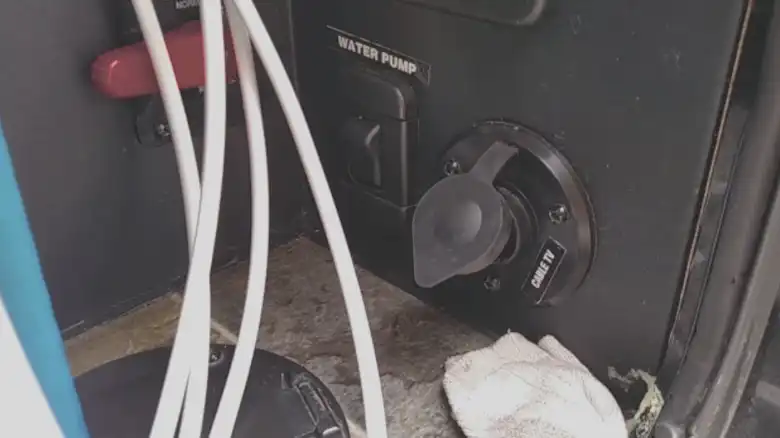
Focus on the RV Cable Booster
Step 1: Locate the booster box, typically mounted externally near the electrical hookup of your RV.
Step 2: Confirm that the booster switch is appropriately set to either “antenna” or “cable” based on your selected source.
Step 3: Verify the booster’s activation by plugging it into a power outlet or the designated 12V power source.
Advanced Diagnostics
Step 1: If the initial troubleshooting steps do not restore connectivity, it might be time for more advanced diagnostics.
Step 2: Consider seeking professional assistance or consulting your RV manual for further troubleshooting guidelines.
With those basic troubleshooting steps complete, you’ll either be happily watching TV again or ready for more advanced diagnostics.
Advanced Troubleshooting: Going Beyond the Basics
If you’ve checked all cables and ensured the booster has power but still no signal, let’s dig deeper. First, look at your TV settings. On your TV menu, make sure it’s set to receive a cable signal. Choose the input name that matches how your cable is connected. Also, do a channel scan to find any new channels.
Try connecting something else, like a DVR, to your TV. This helps figure out if the TV or the signal is the problem. Once TV issues are ruled out, check the physical wiring in your RV. RV cable wiring is simpler than home wiring, connecting the dish to the booster and then to the outlets.
Look closely at all the wiring. Check for damage, and wear, and make sure connectors are tight. Look at connections at the dish, booster, and junctions for any loose or corroded parts. You can also switch the antenna and cable wiring on the booster to see if it’s a specific wire issue.
Inspecting all the wires and connections step by step often reveals the real problem, whether it’s a damaged part or just a loose plug. By going through these advanced steps, you increase the chances of fixing the cable signal and enjoying your shows in the RV.
When to Get Help from Professionals for Your RV Cable Troubles
When you’re dealing with more complicated issues that aren’t easy to fix, it’s time to get help from the experts.
Contacting Your Cable Provider
Your cable provider has the tools to run tests and figure out if there are problems with the signal. They can identify issues with your receiver dish or the cables that connect everything. Sometimes, bad weather or other environmental factors can mess with satellite signals, causing disruptions in your connection.
Dealing with Weather Challenges
Weather and environmental conditions can sometimes interfere with satellite signals, leading to disruptions in connectivity. It’s a good idea to understand if weather-related issues are affecting your cable connection, and your cable provider can help you navigate through these challenges.
Consulting a Local RV Service Technician
If you’re still stuck and can’t figure out what’s going wrong, it might be time to bring in a local RV service technician. These professionals can do thorough tests on your wiring, pinpoint any flaws in how things are set up, and provide solutions to get everything working smoothly again.
Quick Resolution with Expert Help
Seeking assistance from experts can be a game-changer. They have the knowledge and tools to quickly identify and fix problems that might be beyond your understanding. Instead of struggling on your own, getting professional help ensures a quicker resolution to the issues you’re facing.
Remember, there’s no harm in seeking expert assistance when needed. They bring the expertise to tackle complex problems and get your RV cable setup back on track, allowing you to enjoy your entertainment without unnecessary hassles.
Conclusion
Fixing problems with your RV cable can be annoying, but most of them are solvable with simple steps. Check all the wires and connections carefully for damage, and make sure everything is plugged in properly. Confirm that you’ve chosen the right input, done a channel scan, and the booster has power. If needed, adjust the dish’s position. Don’t hesitate to ask for help from cable providers or RV technicians if you’re stuck. By following these easy steps, you can find and fix the problem, making sure your RV entertainment works smoothly and giving you the break you need.
Common FAQs
What are some common causes of RV cable problems?
Loose connections, damaged cables, power issues with the booster, incorrectly aligned dishes, and bad weather are some of the most common factors affecting RV cable performance.
Is it safe for me to troubleshoot wiring myself?
Yes, carefully inspecting cables, jiggling connections, and examining the booster box to check for problems is perfectly safe with proper precautions. Avoid touching exposed wiring.
When should I seek professional assistance?
If you’ve thoroughly checked connections and wiring but still see no signal, contacting your cable provider or RV technician can provide specialized troubleshooting to identify any issues. Let the experts handle equipment failures or electrical shorts.

